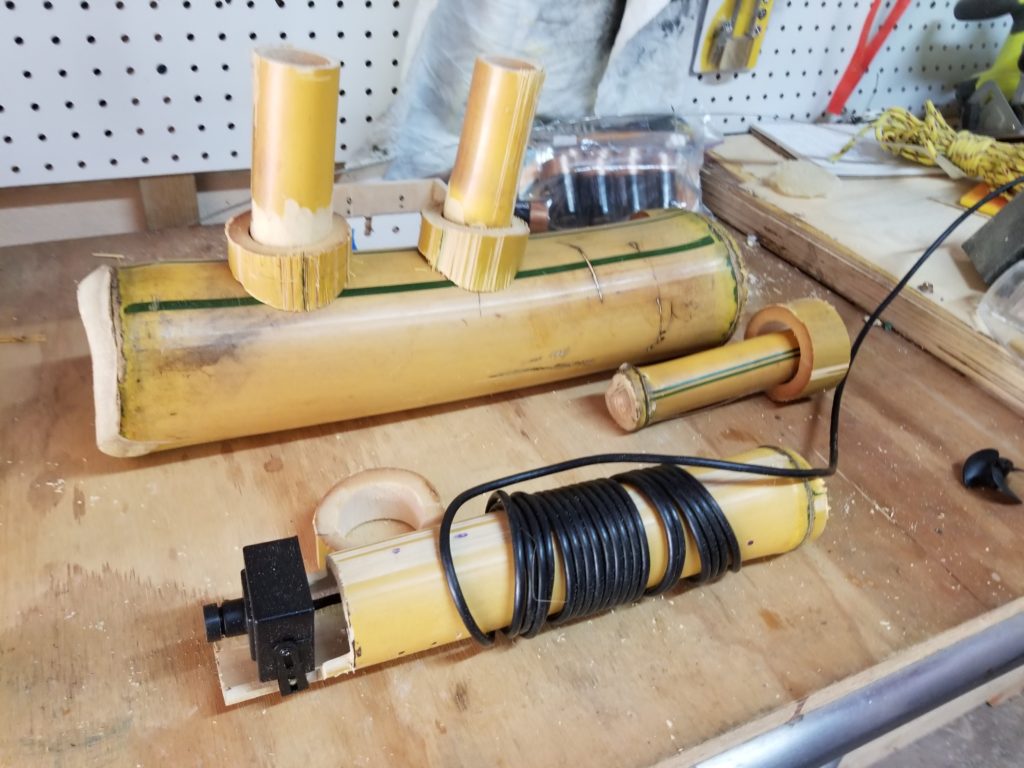
This project was an attempt to make a cheap DIY submarine, there are very few cheap kits for teachers and researchers that give access to the underwater worlds around us. This was designed as a simple wired ROV with a camera lights and a few small DC motors that would be able to dive and maneuver while delivering live camera feed. to the surface.
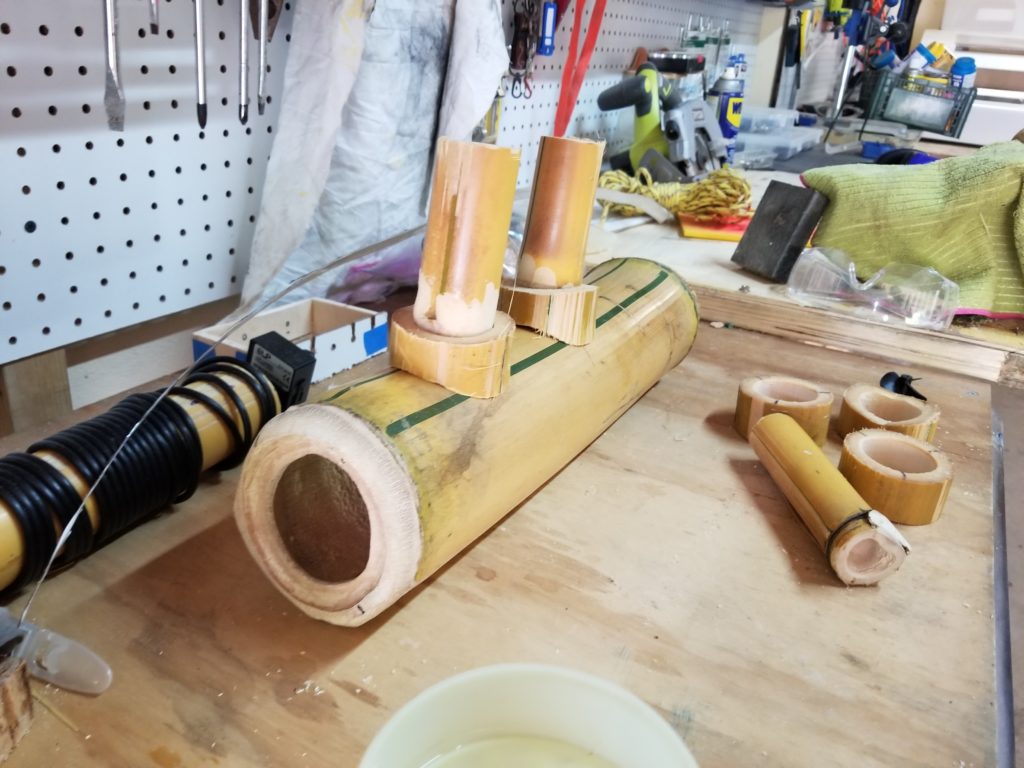
The body is made out of bamboo because it was abundant and invasive in Gamboa. If I complete this project again I would use a water bottle or another seal-able cylindrical object. The internals seemed to function well but problems arose with the improvised body. It was still fun to play around with all of the electronic bits and learn about circuits, current, and motors. The whole project only cost about 70 dollars and as a kit it could teach basic electronics , and problem solving. It also lets people see the water through different perspectives.
Overall this was a very good first test and prototype, I think with a small amount of tweaking I could have a functional cheap ROV!
Completing this project in a beautiful and different location surrounded by beautiful and different people helped. What an amazing ‘Conference’
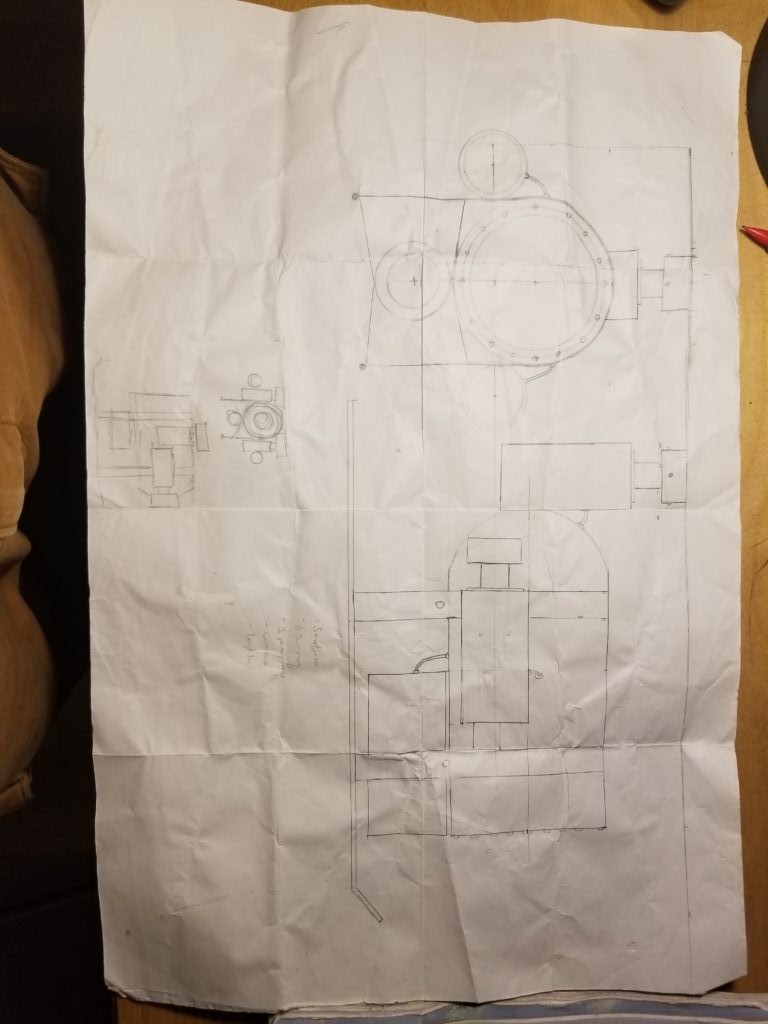
Original plans made to use fire extinguisher as body.
In this project, I created three-dimensional sculptural artworks derived from the shadows cast by found objects.
BACKGROUND
I began creating 3D prints through unusual processes in 2018, when I used oils to essentially paint a 3D shape. For me, this was a fun way to dip my toes into 3D modeling and printing using the skills I already had (painting) rather than those I didn’t (3D modeling). I was very happy with the output of this process, which I think lent the 3D model a unique texture–it wore its paint-ishness proudly, with bumpy ridges and ravines born from brushstrokes. There was an organic quality that I didn’t often see in 3D models fabricated digitally. I immediately began thinking of other unconventional ways to arrive at 3D shapes, and cyanotype solar prints quickly rose to the top of processes I was excited to try.
SHADOWS AND DIMENSIONS
My initial goal with this project was simply to test my theory that I could create interesting sculpture through the manipulation of shadow. However, a presentation by Josh Michaels on my first night at Dinacon got me thinking more about shadows and what they represent in the relationships between dimensions. Josh showed Carl Sagan’s famous explanation of the 4th dimension from Cosmos.
Sagan illustrates how a shadow is an imperfect two-dimensional projection of a three-dimensional object. I wondered–if all we had was a two-dimensional shadow, what could we theorize about the three-dimensional object? If we were the inhabitants of Plato’s cave, watching the shadows of the world play on the wall, what objects could we fashion from the clay at our feet to reflect what we imagined was out there? What stories could we ascribe to these imperfectly theorized forms? When early humans saw the the night sky, we couldn’t see the three-dimensional reality of space and stars–we saw a two-dimensional tapestry from which we theorized three-dimensional creatures and heroes and villains and conflicts and passions. We looked up and saw our reflection. What does a rambutan shadow become without the knowledge of a rambutan, with instead the innate human impulse to project meaning and personality and story upon that which we cannot fully comprehend? That’s what I became excited to explore with this project. But first, how to make the darn things?
THE PROCESS
For those who want to try this at home, I have written a detailed How To about the process on my website. But the basic workflow I followed was this:
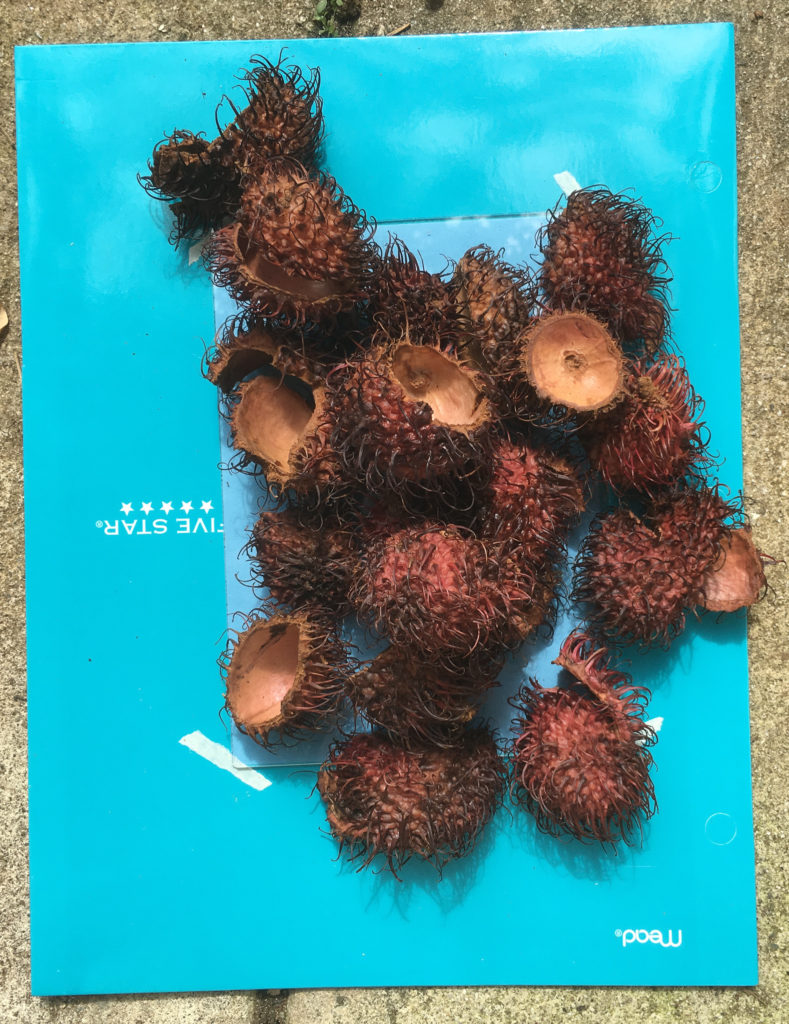
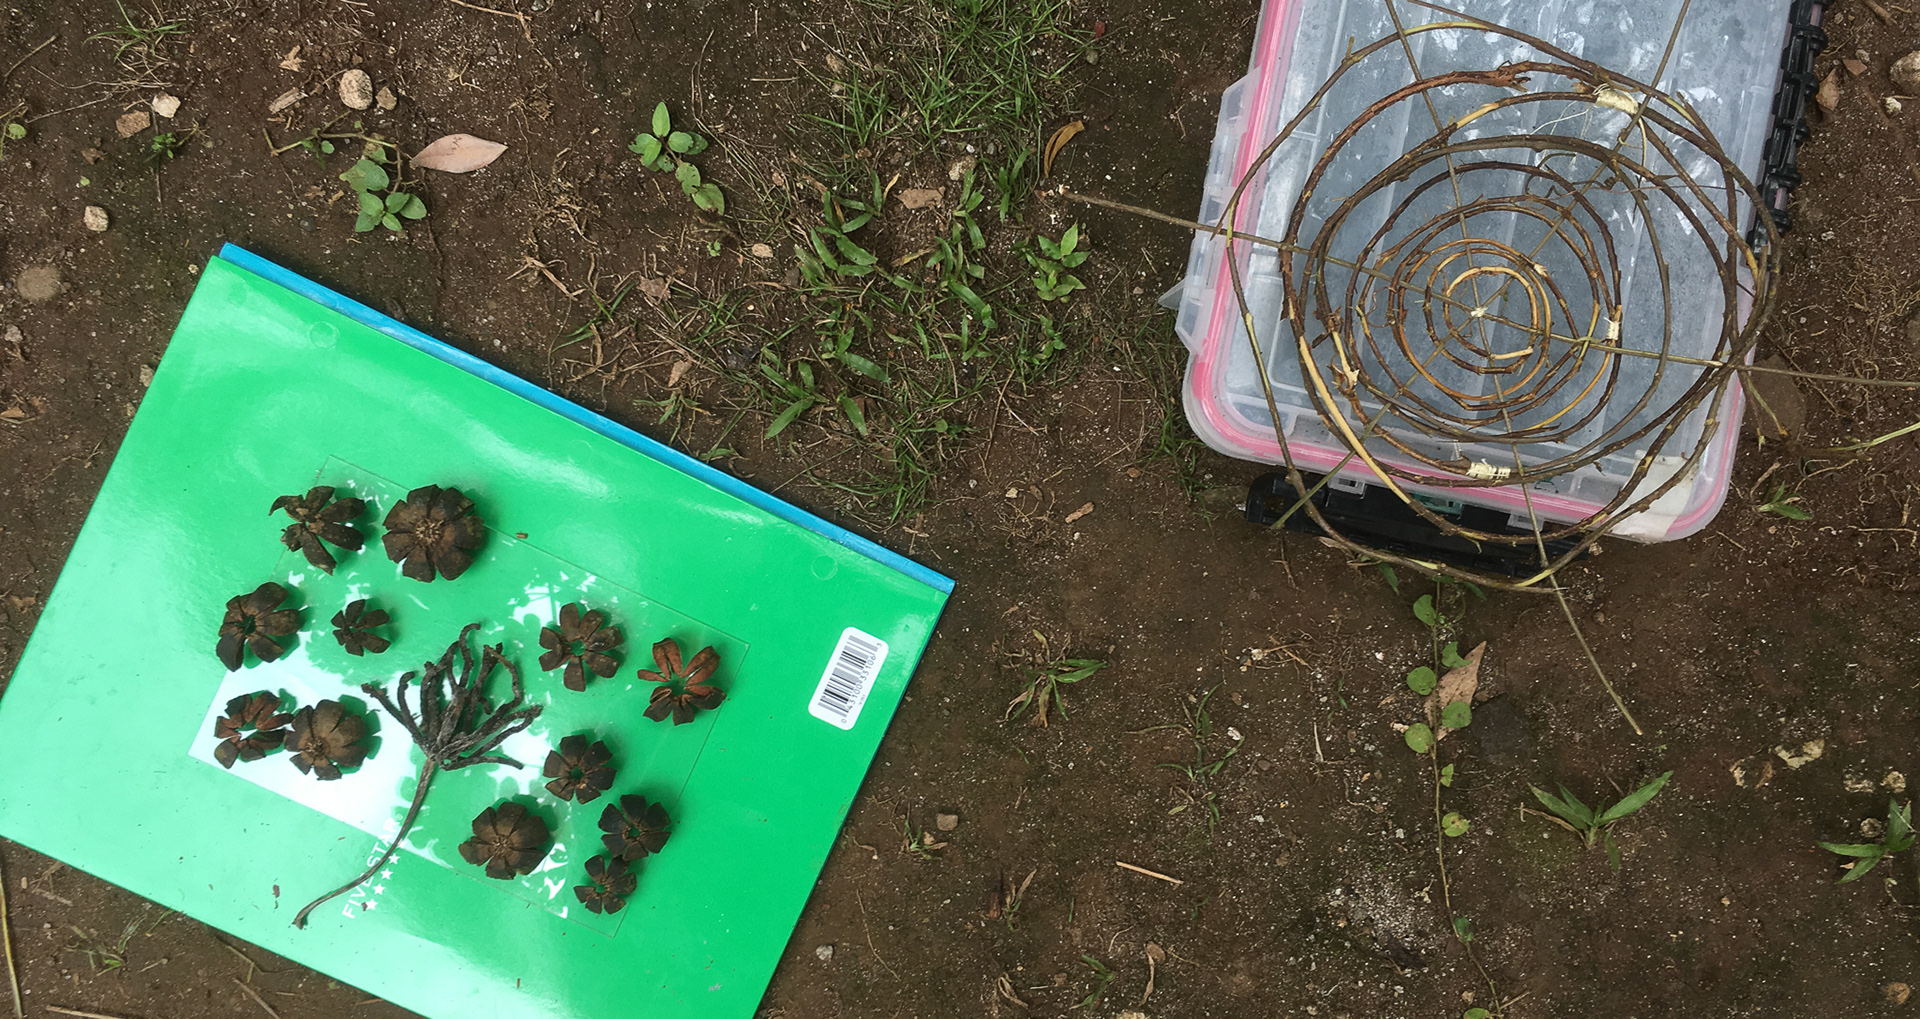
STEP 1: MAKE A SOLAR PRINT OF SOME INTERESTING OBJECTS
Exposing a solar print with rambutan husk shadows.
Washing the solar print after exposure.
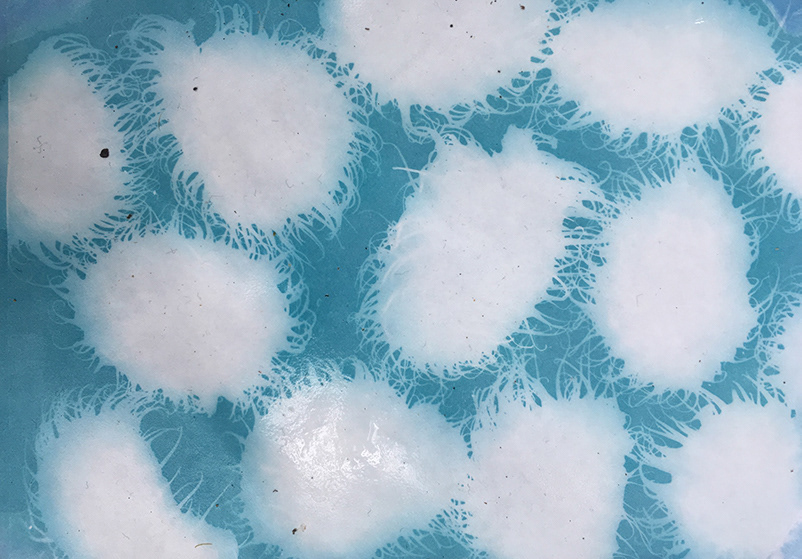
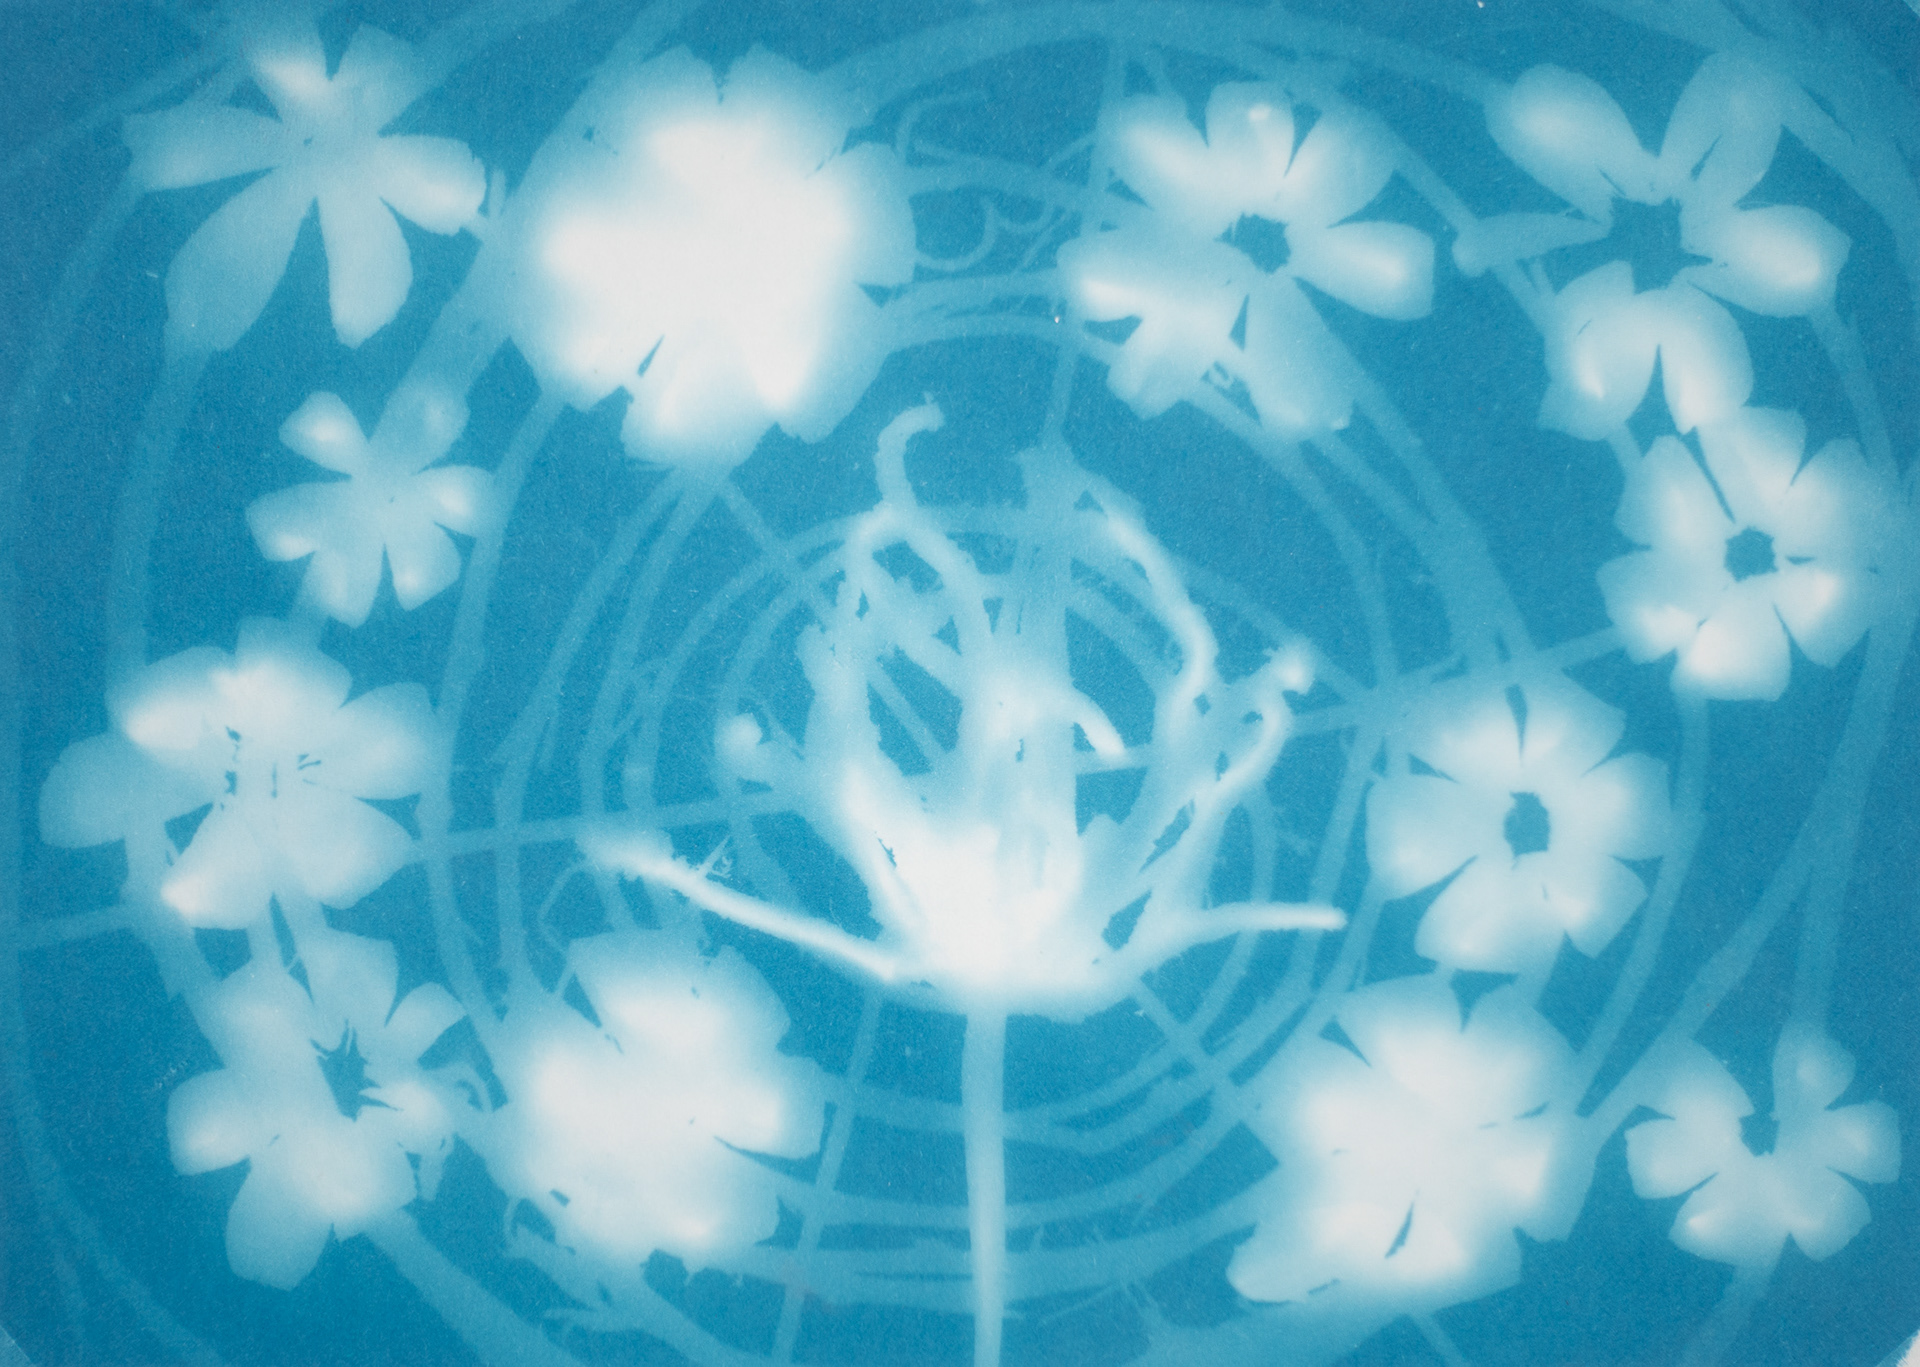
The areas that are more shaded by our objects stay white, and the areas that the sun hits become a darker blue. Note that the solar print that results from three-dimensional objects like these rambutans have some midtones that follow their curves, because though they cast hard shadows, some light leaks in from the sides. The closer an object gets to the solar paper, the more light it blocks. This effect will make a big difference in how these prints translate to 3D models.
A rambutan print soon after exposure and washing.
STEP 2: USE THE SOLAR PRINT AS A DEPTH MAP TO CREATE A 3D MODEL
For those unfamiliar with depth maps, essentially the software* interprets the luminance data of a pixel (how bright it is) as depth information. Depth maps can be used for a variety of applications, but in this case the lightest parts of the image become the more raised parts of the 3D model, and the darker parts become the more recessed parts. For our solar prints, what this means is that the areas where our objects touched the paper (or at least came very close to it) will be white and therefore raised, the areas that weren’t shaded at all by our objects will become dark and therefore recessed, and the areas that are shaded but which some light can leak into around the objects will by our mid-tones, and will lead to some smooth graded surfaces in the 3D model.
*I used Photoshop for this process, but if you have a suggestion for a free program that can do the same, please contact me. I’d like for this process to be accessible to as many people as possible.
Below, you can play around with some 3D models alongside the solar prints from which they were derived. Compare them to see how subtle variations in the luminance information from the 2D image has been translated into depth information to create a 3D model.
In the below solar print, I laid a spiralled vine over the top of the other objects being printed. Because it was raised off the paper by the other objects, light leaked in and created a fainter shadow, resulting in a cool background swirl in the 3D model. Manipulating objects’ distance from the paper proved to be an effective method to create foreground/background separation in the final 3D model.
The objects to be solar printed, before I laid the spiralled vine on the other objects and exposed the paper.
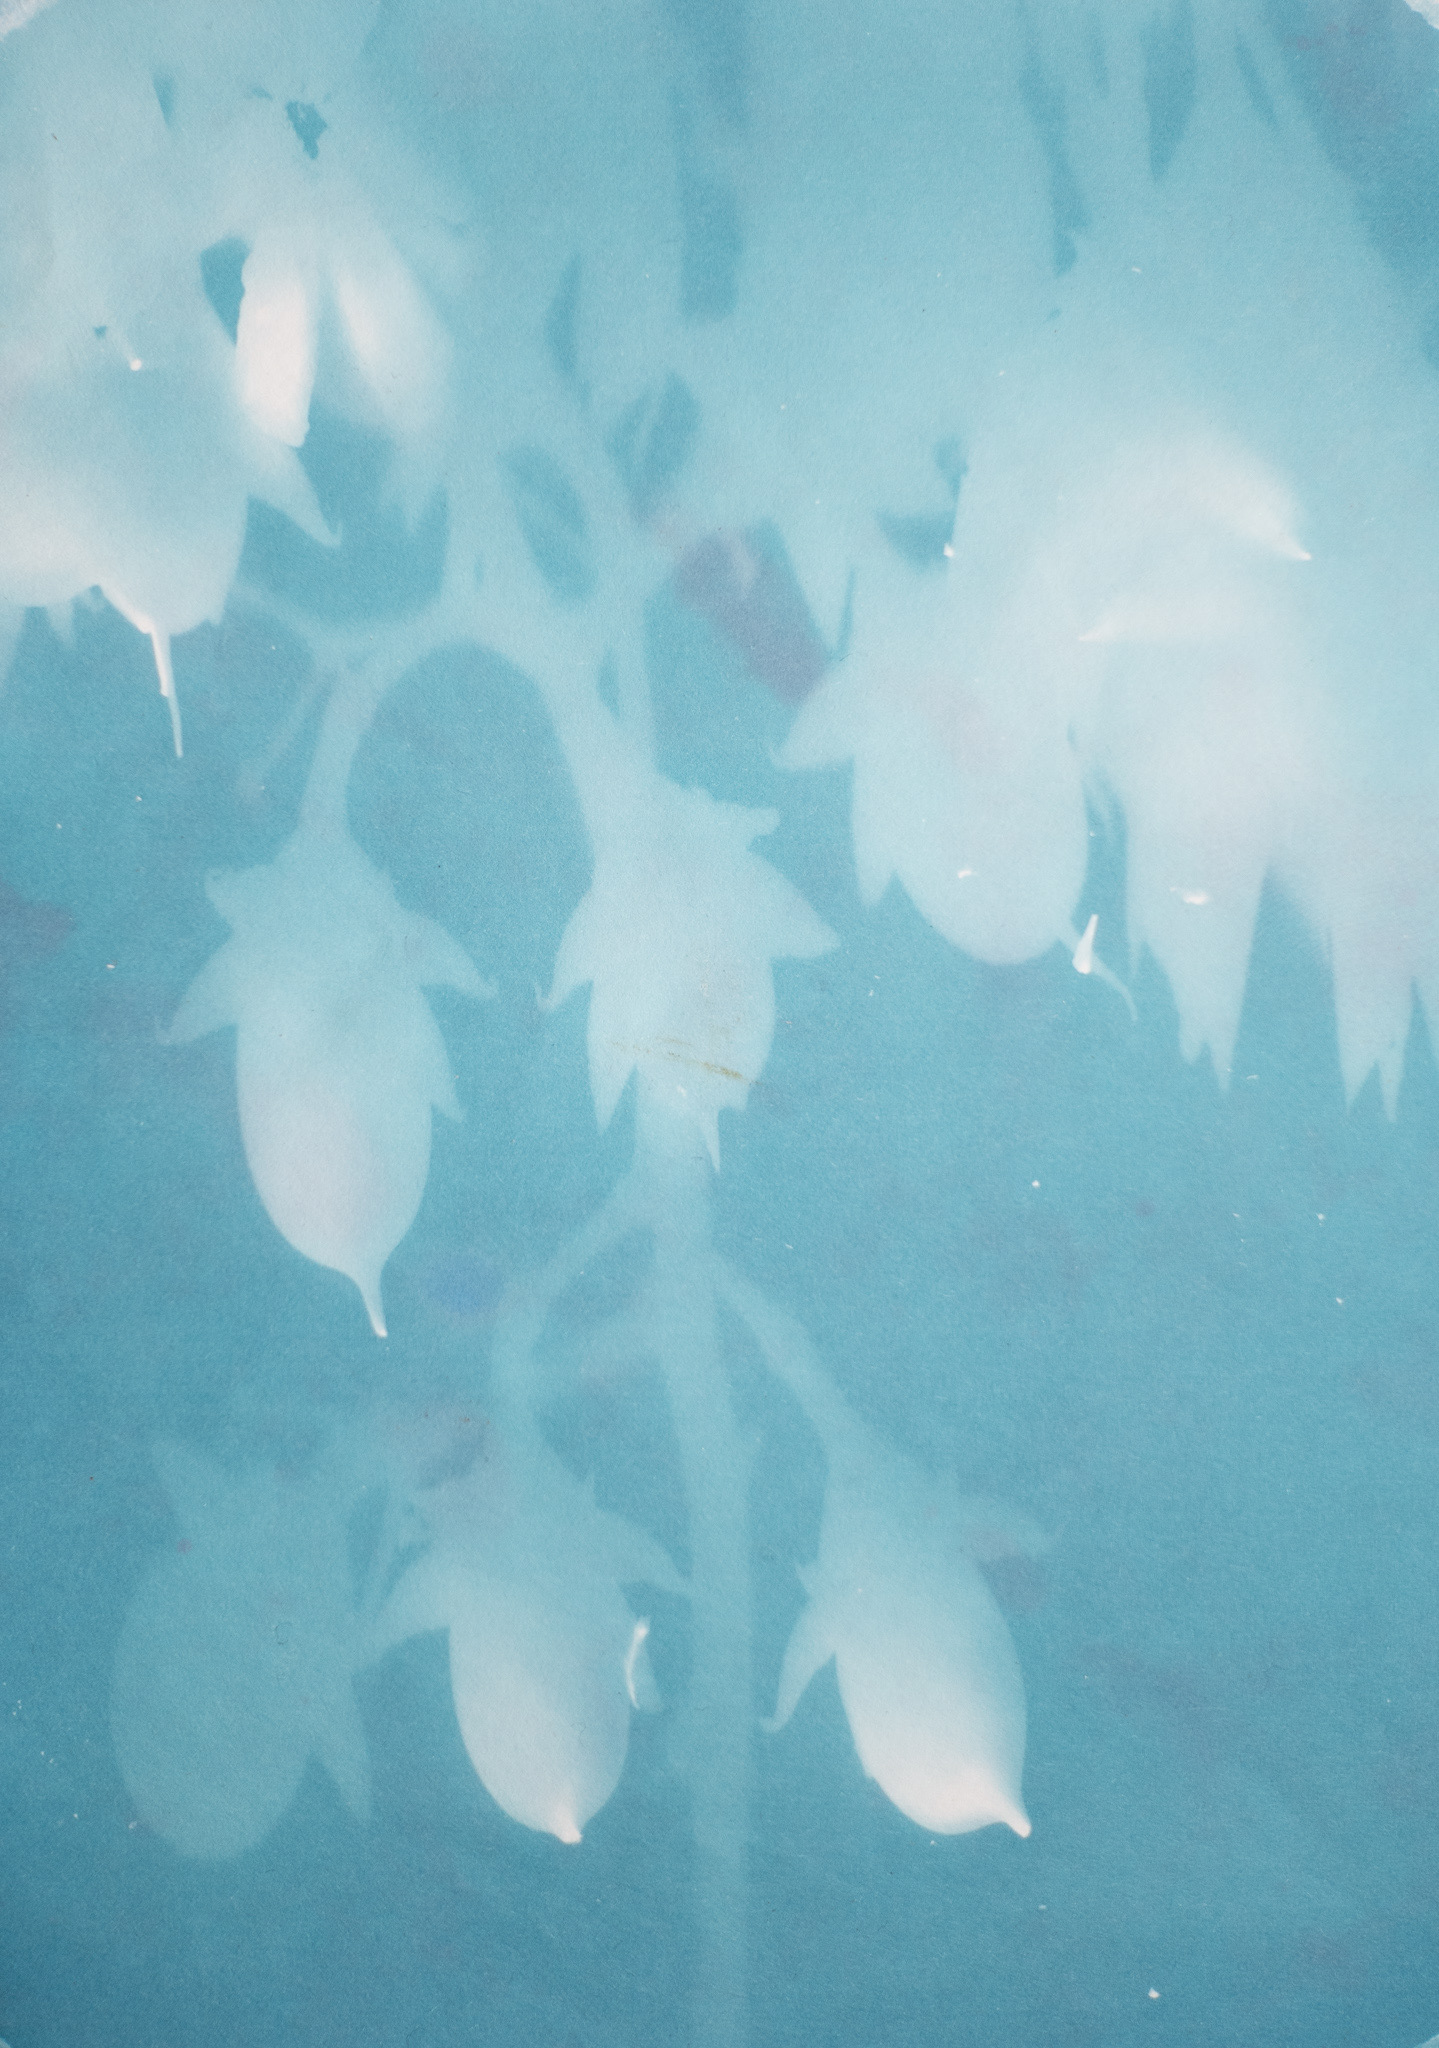
Another variable that I manipulated to create different levels in the 3D model was exposure time. The fainter leaves coming into the below solar print weren’t any father from the solar paper than the other leaves, but I placed them after the solar print had been exposed for a couple of minutes. This made their resulting imprint fainter/darker, and therefore more backgrounded than the leaves that had been there for the duration of the exposure. You can also see where some of the leaves moved during the exposure, as they have a faint double image that creates a cool “step” effect in the 3D model. You might also notice that the 3D model has more of a texture than the others on this page. That comes from the paper itself, which is a different brand than I used for the others. The paper texture creates slight variations in luminance which translate as bump patterns in the model. You run into a similar effect with camera grain–even at high ISOs, the slight variation in luminance from pixel to pixel can look very pronounced when translated to 3D. I discuss how to manage this in the How To page for this process.
One more neat thing about this one is that I made the print on top of a folder that had a barcode on it, and that reflected back enough light through the paper that it came out in the solar print and the 3D model (in the bottom right). After I noticed this I started exposing my prints on a solid black surface.
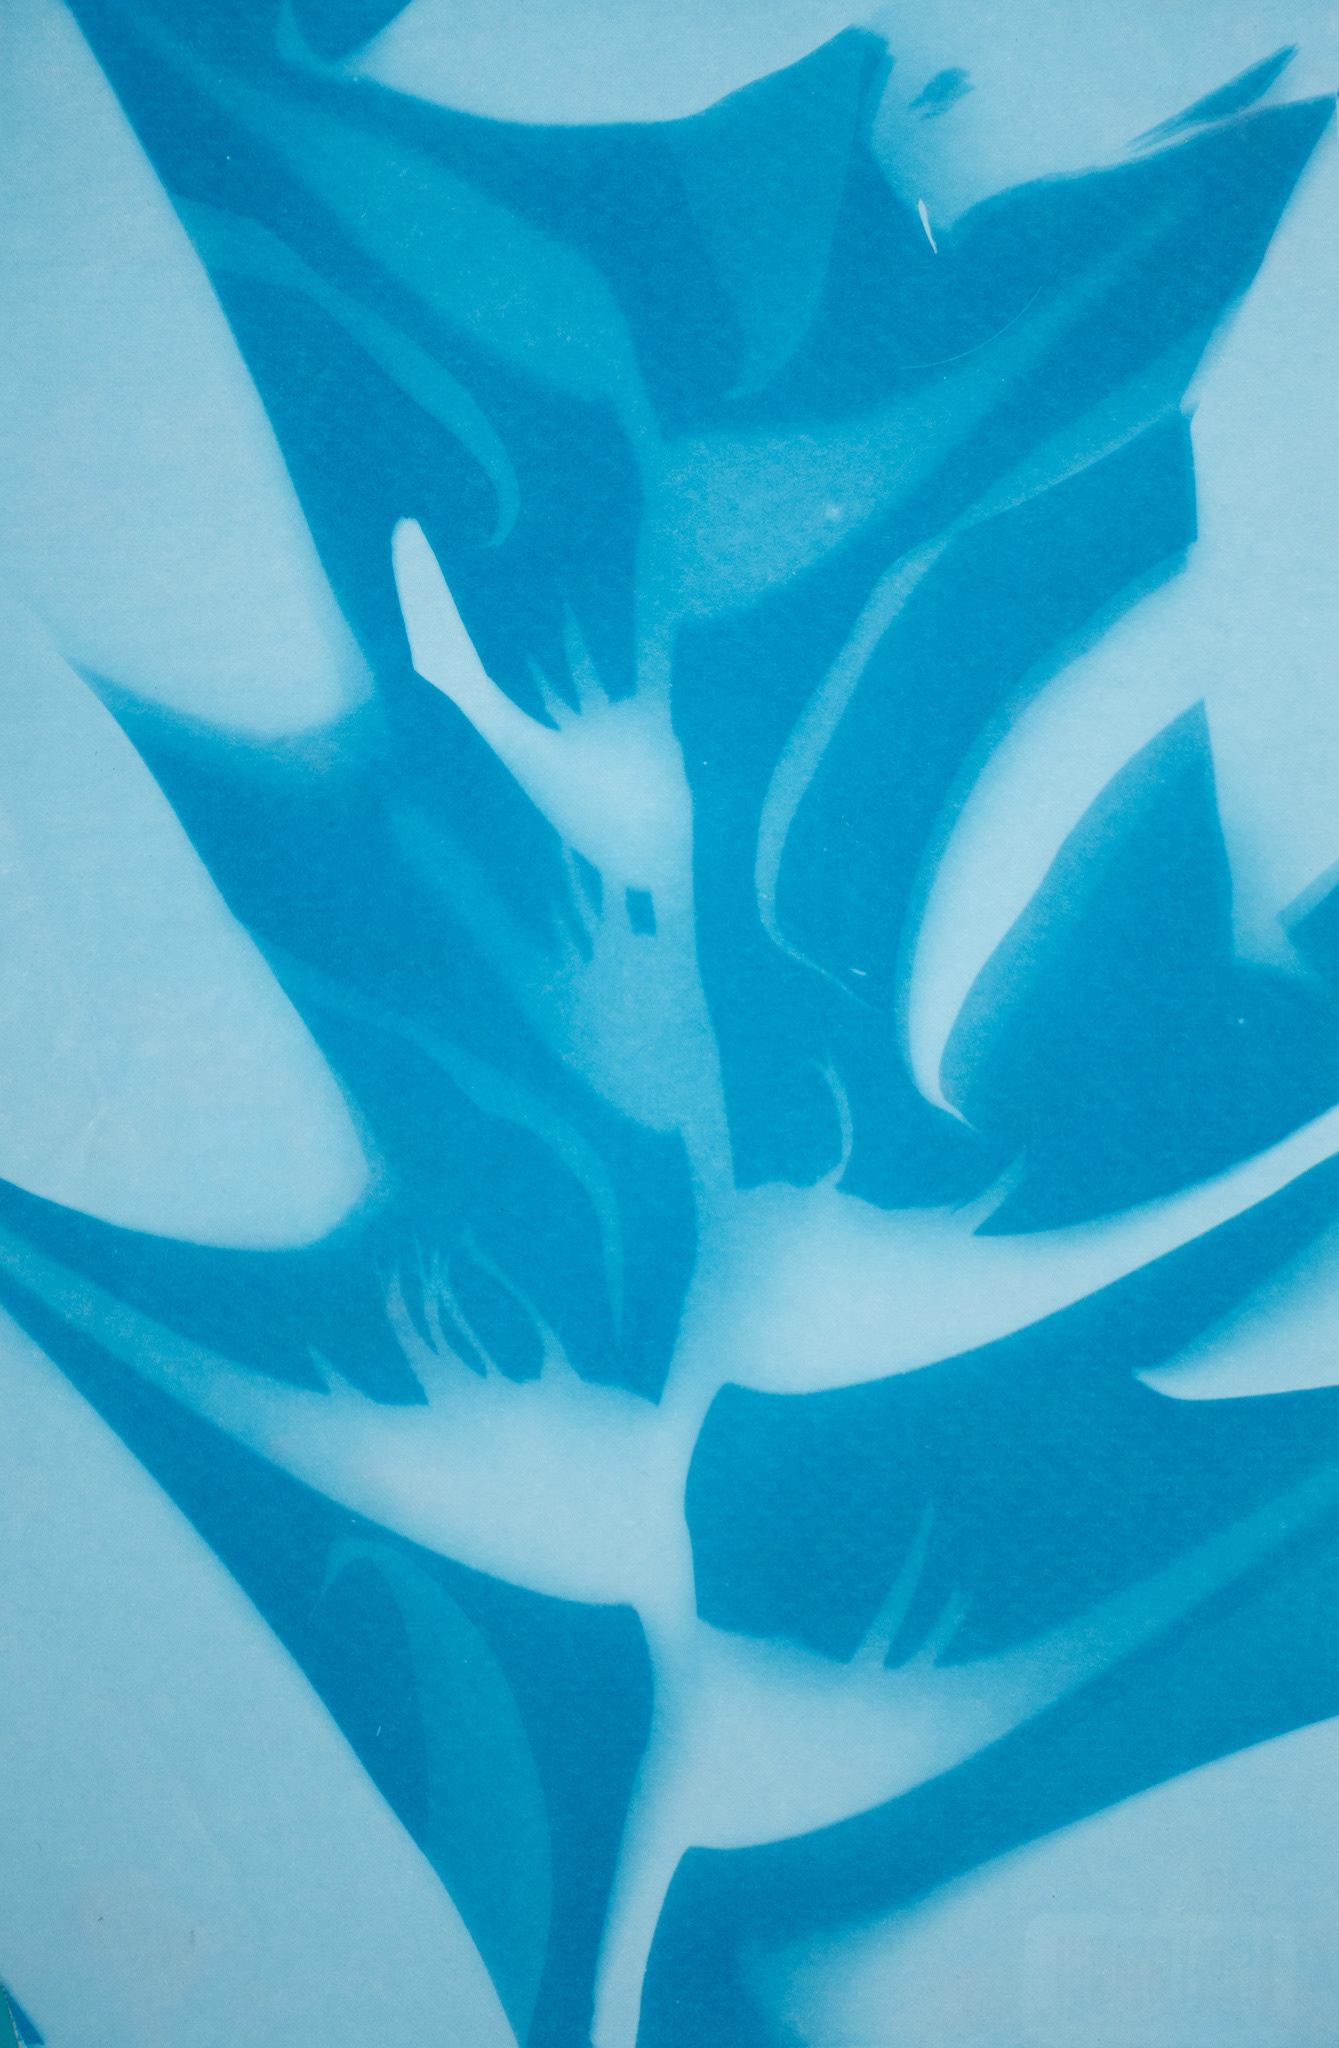
The below solar print was made later in the day–notice the long shadows. It was also in the partial shade of a tree, so the bottom left corner of the print darkens. If you turn the 3D model to its side you’ll see how that light falloff results in a thinning of the model. I also took this photo before the print had fully developed the deep blue it would eventually reach, and that lack of contrast results in the faint seedpod in the bottom left not differentiating itself much from the background in the 3D model. I found that these prints could take a couple days to fully “develop.”
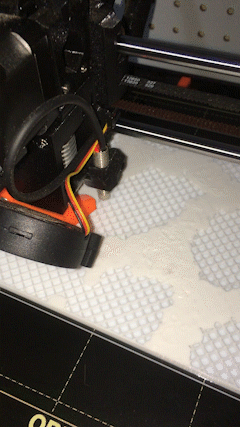
STEP 3: 3D PRINT THE MODEL
The 3D models that Photoshop spits out through this process can sometimes have structural problems that a 3D printer doesn’t quite know how to deal with. I explain these problems and how to fix them in greater detail in the How To page for this process.
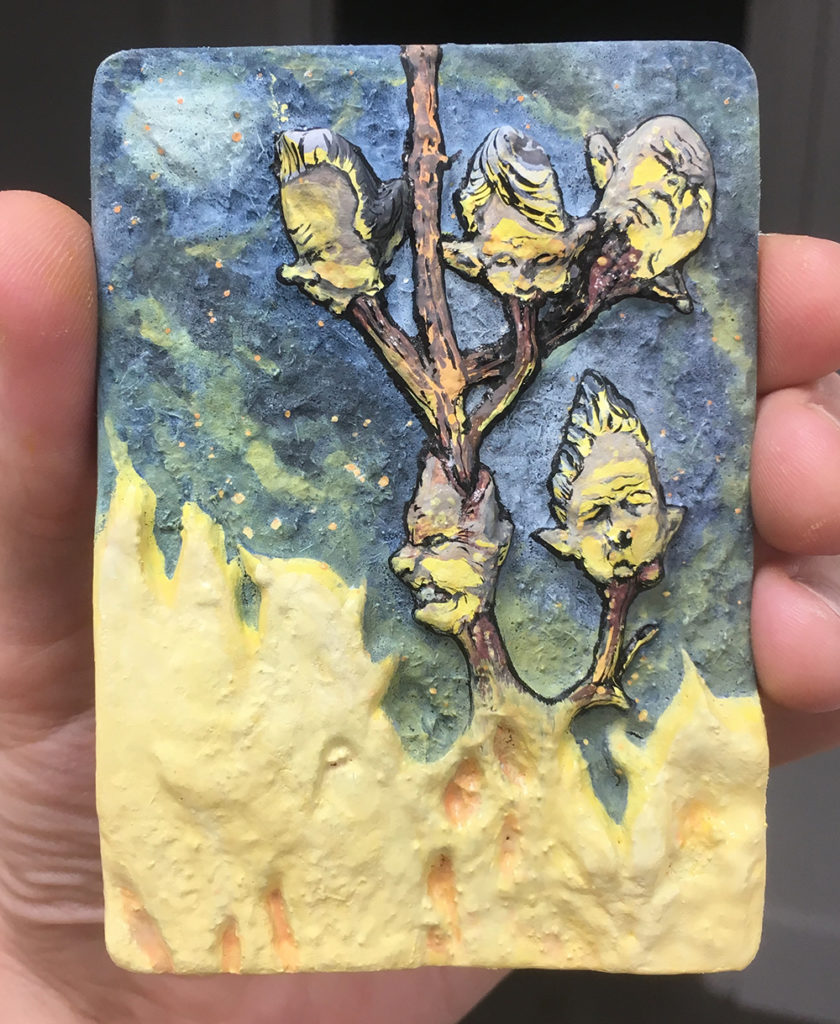
STEP 4: PAINT THE 3D PRINT
Now we get back to my musings about Plato’s cave. My goal in the painting stage was to find meaning and story in this extrapolation of 3D forms from a 2D projection. As of this writing I have only finished one of these paintings, pictured below.
Priming the PLA print with an absorbent ground.
Death of the Patriarchs, 2019.
FUTURE DIRECTIONS
– Carve the models out of wood with a CNC milling machine to reduce plastic use. I actually used PLA, which is derived from corn starch and is biodegradable under industrial conditions, but is still not ideal. This will also allow me to go BIGGER with the sculptural pieces, which wouldn’t be impossible with 3D printing but would require some tedious labor to bond together multiple prints.
– Move away from right angles! Though I was attempting to make some unusual “canvasses” for painting, I ended up replicating the rectangular characteristics of traditional painting surfaces, which seems particularly egregious when modeling irregular organic shapes. Creating non-rectangular pieces will require making prints that capture the entire perimeter of the objects’ shadows without cutting them off. I can then tell the software to “drop out” the negative space. I have already made some prints that I think will work well for this, I’ll update this page once I 3D model them.
– Build a custom solar printing rig to allow for more flexibility in constructing interesting prints. A limitation of this process was that I wanted to create complex and delicate compositions of shadows but it was hard to not disturb the three-dimensional objects when moving between the composition and exposure phases. My general process in this iteration of the project was to arrange the objects on a piece of plexiglass on top of an opaque card on top of the solar print. This allowed me time to experiment with arrangements of the objects, but the process of pulling the opaque card out to reveal the print inevitably disrupted the objects and then I would have to scramble to reset them as best I could. Arranging the objects inside wasn’t a good option because I couldn’t see the shadows the sun would cast, which were essentially the medium I was working with. The rig I imagine to solve this would be a frame with a transparent top and a sliding opaque board which could be pulled out to reveal the solar paper below without disrupting the arrangement of objects on top.
– Solar print living creatures! I attempted this at Dinacon with a centipede, as did Andy Quitmeyer with some leafcutter ants. It’s difficult to do! One reason is that living creatures tend to move around and solar prints require a few minutes of exposure time. I was thinking something like a frog that might hop around a bit, stay still, hop around some more would work, but still you would need to have some kind of clear container that would contain the animal without casting its own shadow. I also thought maybe a busy leafcutter ant “highway” would have dense enough traffic to leave behind ghostly ant trails, but Andy discovered that the ants are not keen to walk over solar paper laid in their path. A custom rig like the one discussed above could maybe be used–place the rig in their path, allow them time to acclimate to its presence and walk over it, then expose the paper underneath them without disturbing their work.
– Projection map visuals onto the 3D prints! These pieces were created to be static paintings, but they could also make for cool three-dimensional animated pieces. Bigger would be better for this purpose.
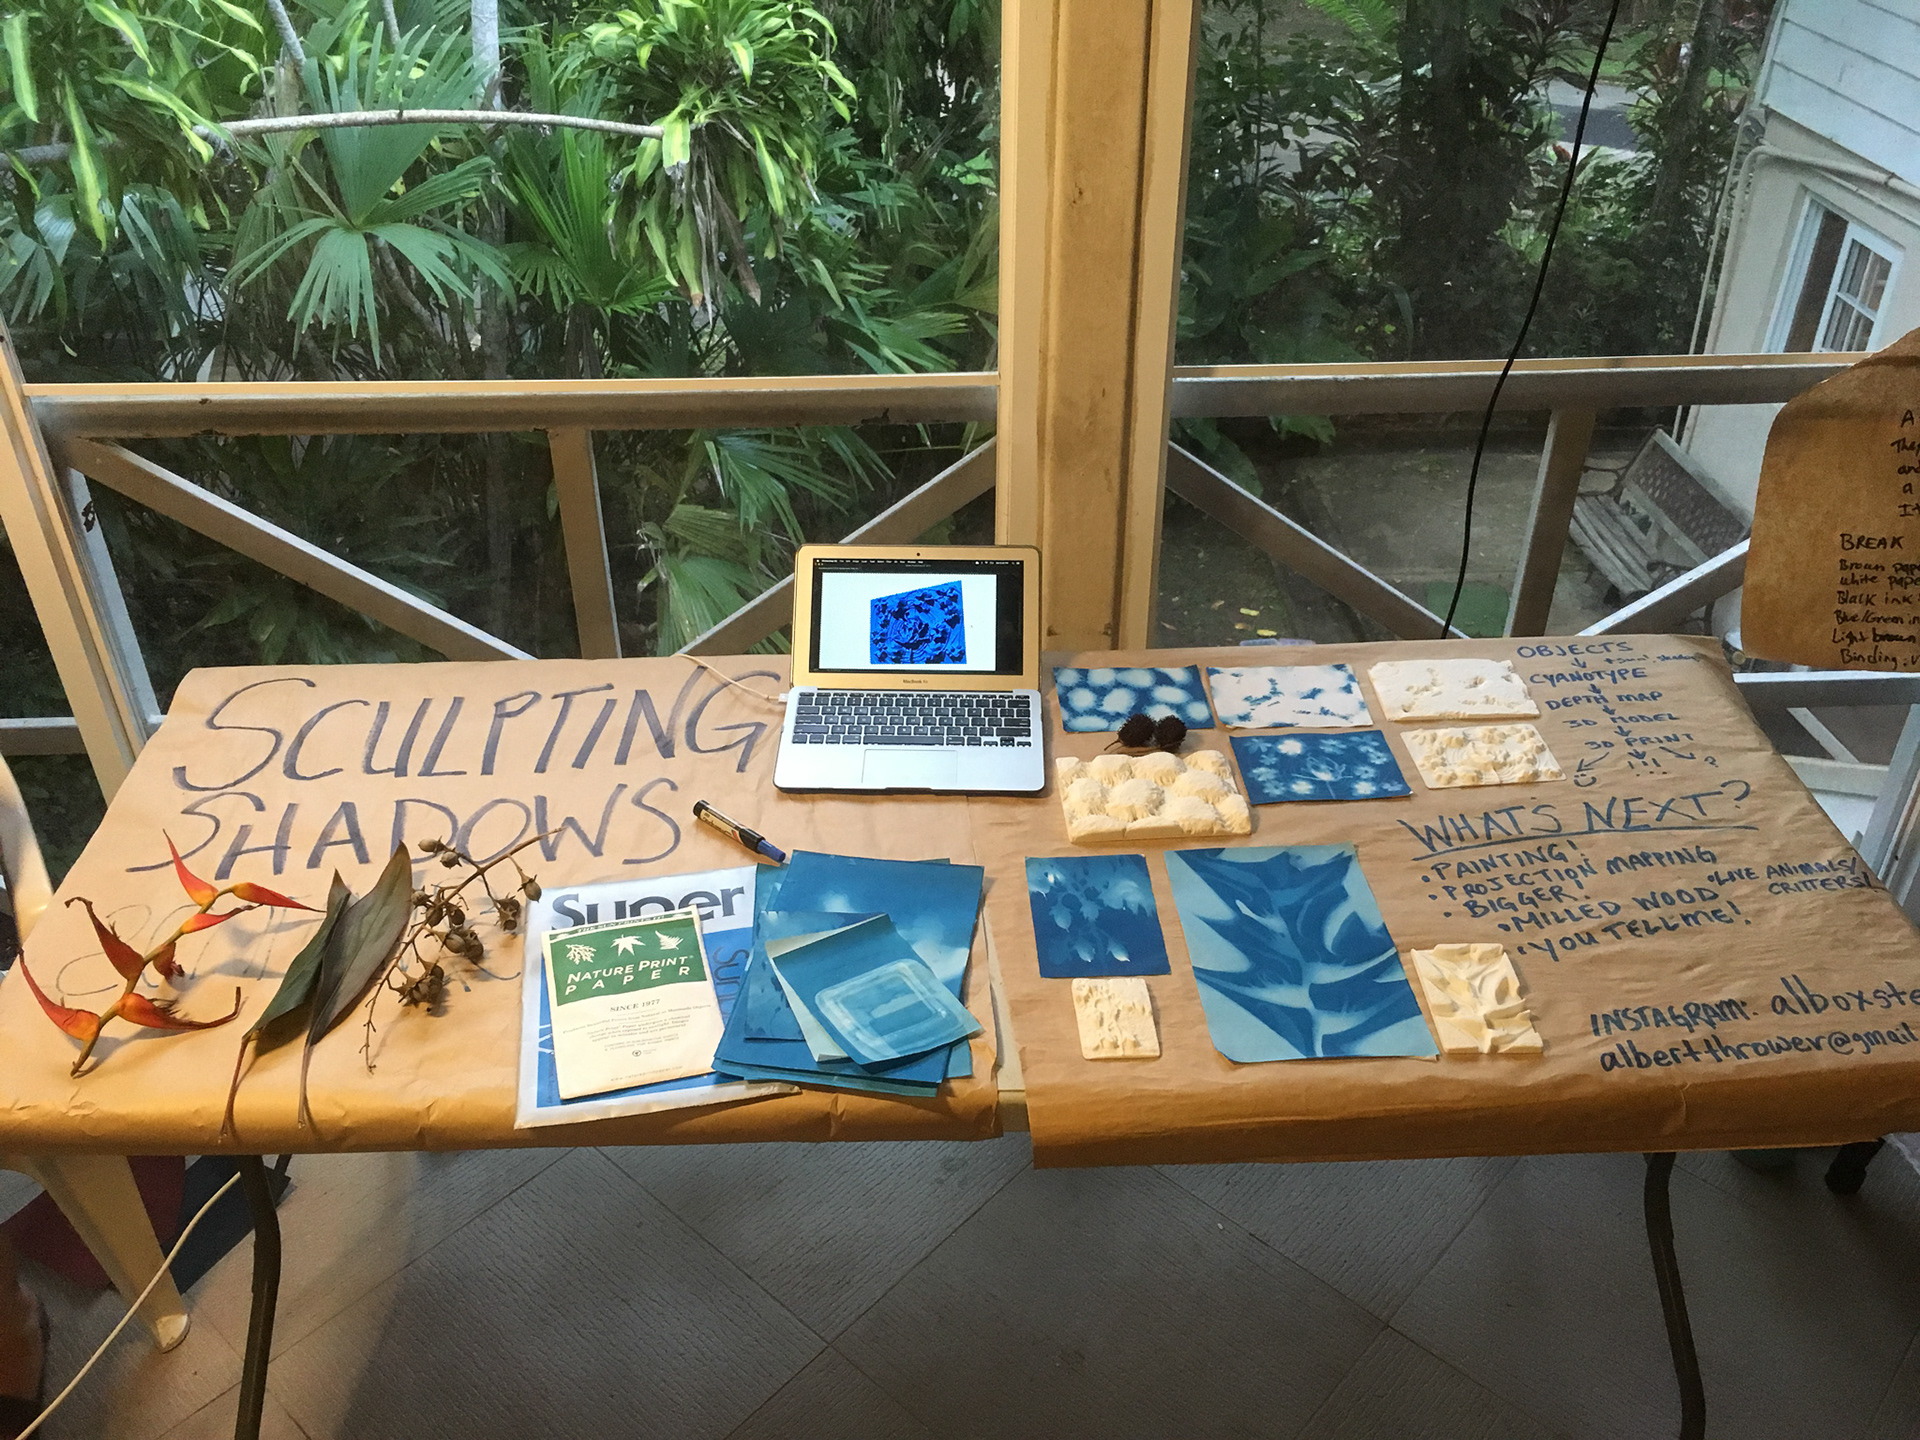
My project table at the end-of-Dinacon showcase.This kiddo immediately began matching the objects I had on display to their respective solar prints!
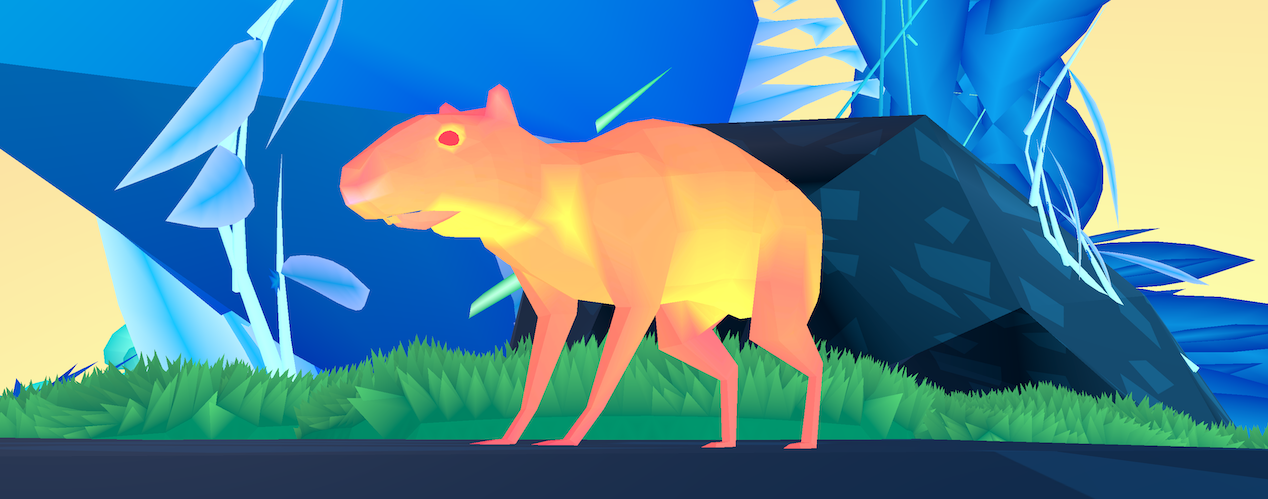
Agouti, Agouti! is a work of interactive digital art (i.e. a videogame) which aims to capture the spirit of the loveable agouti, a rodent commonly seen eating scraps and frolicking about in the backyards of Gamboa, Panama. They play an important role in the spread of seeds in the forest and are adorable to boot.
This prototype work can be played on a modern Mac or Windows computer with a two-stick game controller. The player is invited to explore a jungle, eat some fruit, and — as the agouti does when frightened — puff up the hair on their butt.
The humble Central American agouti.
The Virtual Agouti
The agouti featured in the game is an original model created in the modelling and animation software Blender. It has a small number of animations — enough to simulate some basic activities. In an effort to capture the agouti’s way of moving about, slow-motion video was taken of agoutis around Gamboa and a series of images were extracted as reference for the walking and running gaits.
Although the artist on this project has been working in videogames for many years, he is new to modelling and animating, making this work a significant learning exercise.
A low-poly agouti model created in Blender.Frames on an agouti walking extracted from slow-motion video.
The Forest
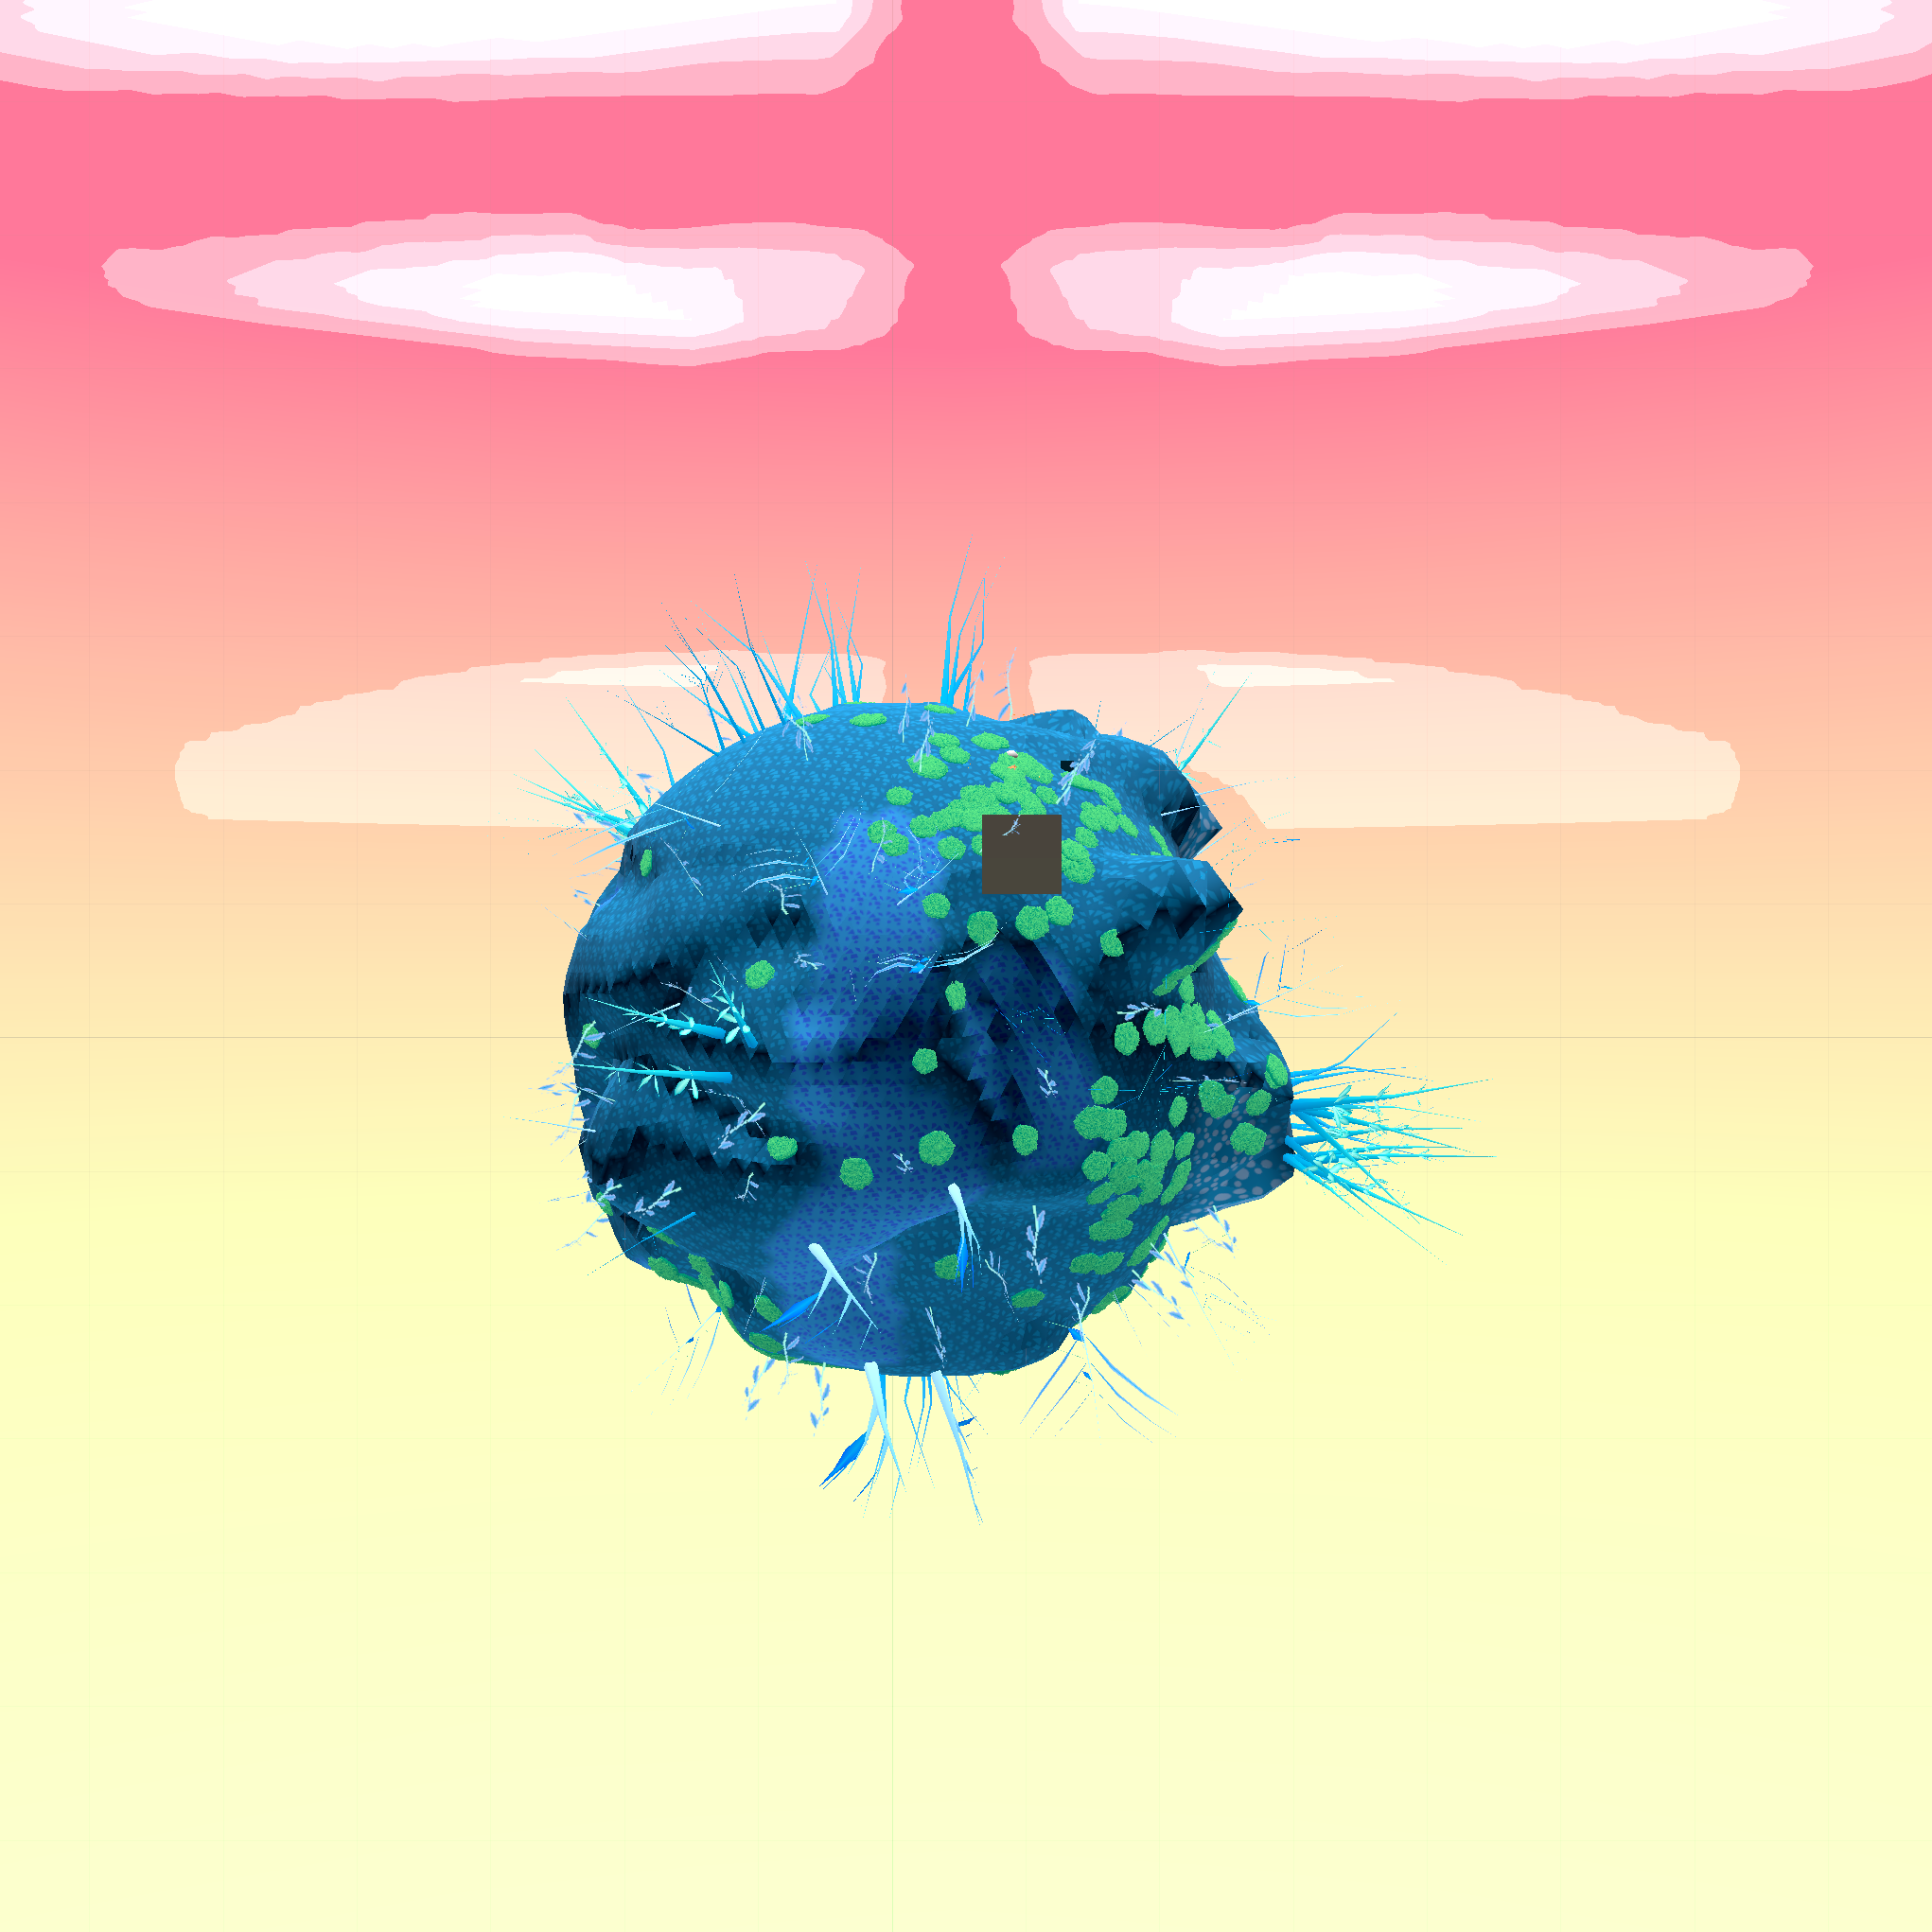
The environment of Agouti, Agouti! is filled with virtual “plants”. These forms are more impressionistic than replicative, bearing little resemblance to the actual plants of Panama, but they are meant to reflect the variety in Gamboa’s forest and to provide a suitable jungle world for the agouti to play in.
Each type of virtual plant is generated by algorithm using custom software designed for this project. In fact, this generator was intended to be the centrepiece of this project until the agouti charmed its way into the starring role.
The generator began as a simple branching algorithm not dissimilar from L-Systems — a common procedural generation technique — beginning with a trunk and randomly splitting off branches to create a tree-like structure. Inspired by the epiphytes of Panama, this algorithm was modified to take a more additive approach: any number of different forms can be attached to any part of the structure.
Because the results of this generator can be quite chaotic, some crude tools were developed to rapidly filter through them for the best stuff. This includes a mutation tool which can take a plant with some potential and produce interesting variations on it until the user is happy with the results.
A screenshot of the plant generator, showing three mutations of what was once the same plant.
Each plant is encoded with a growth animation so that it can begin as a simple seedling and gain branches and leaves over time. The agouti’s world can start out bare and grow a massive, abstract canopy.
The agouti’s planet with hundreds of small seedlings.
The planet after all plants have grown to full size.
Available Materials
The game and agouti model are freely available for download at:
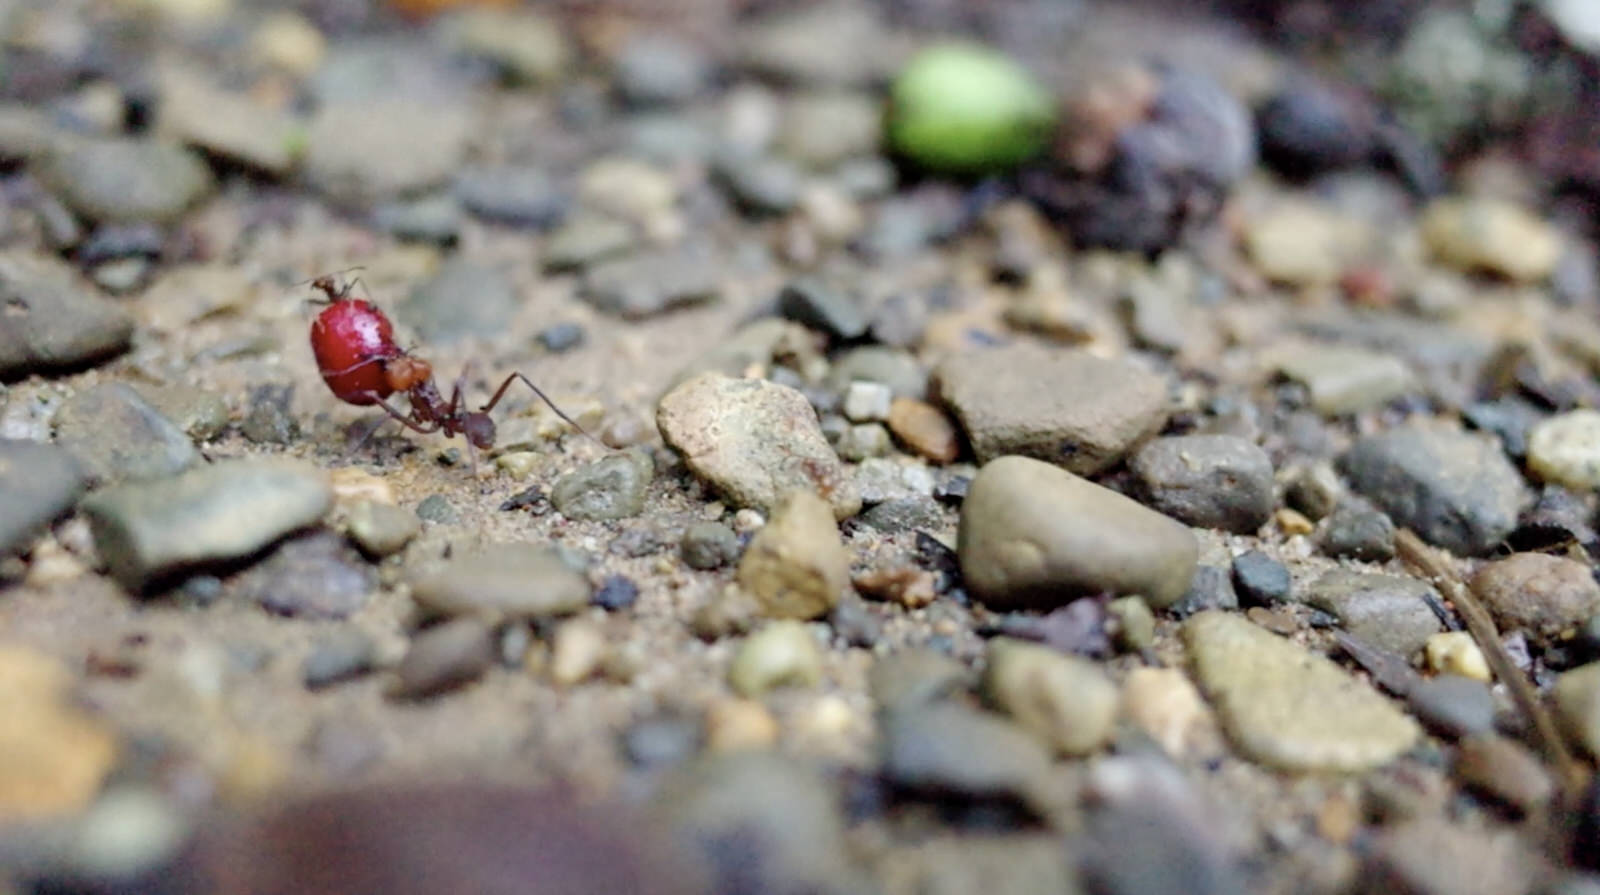
The shimmering, industrious leafcutter ants that build highways on the forest floor make up a complex adaptive system – the sophisticated structures and patterns that they build are well beyond the sum of their individual parts. The ants’ collective intelligence emerges through the repetition of simple tasks, and somehow through self-organization they build cities without architects, roads without engineers. There’s something magnetic about their energetic movement as they carve through the jungle – wherever I found them at Gamboa, I found that I could not look away.
from pipeline trail and laguna trail, Gamboaant, Atlasgoing around the stick barrier
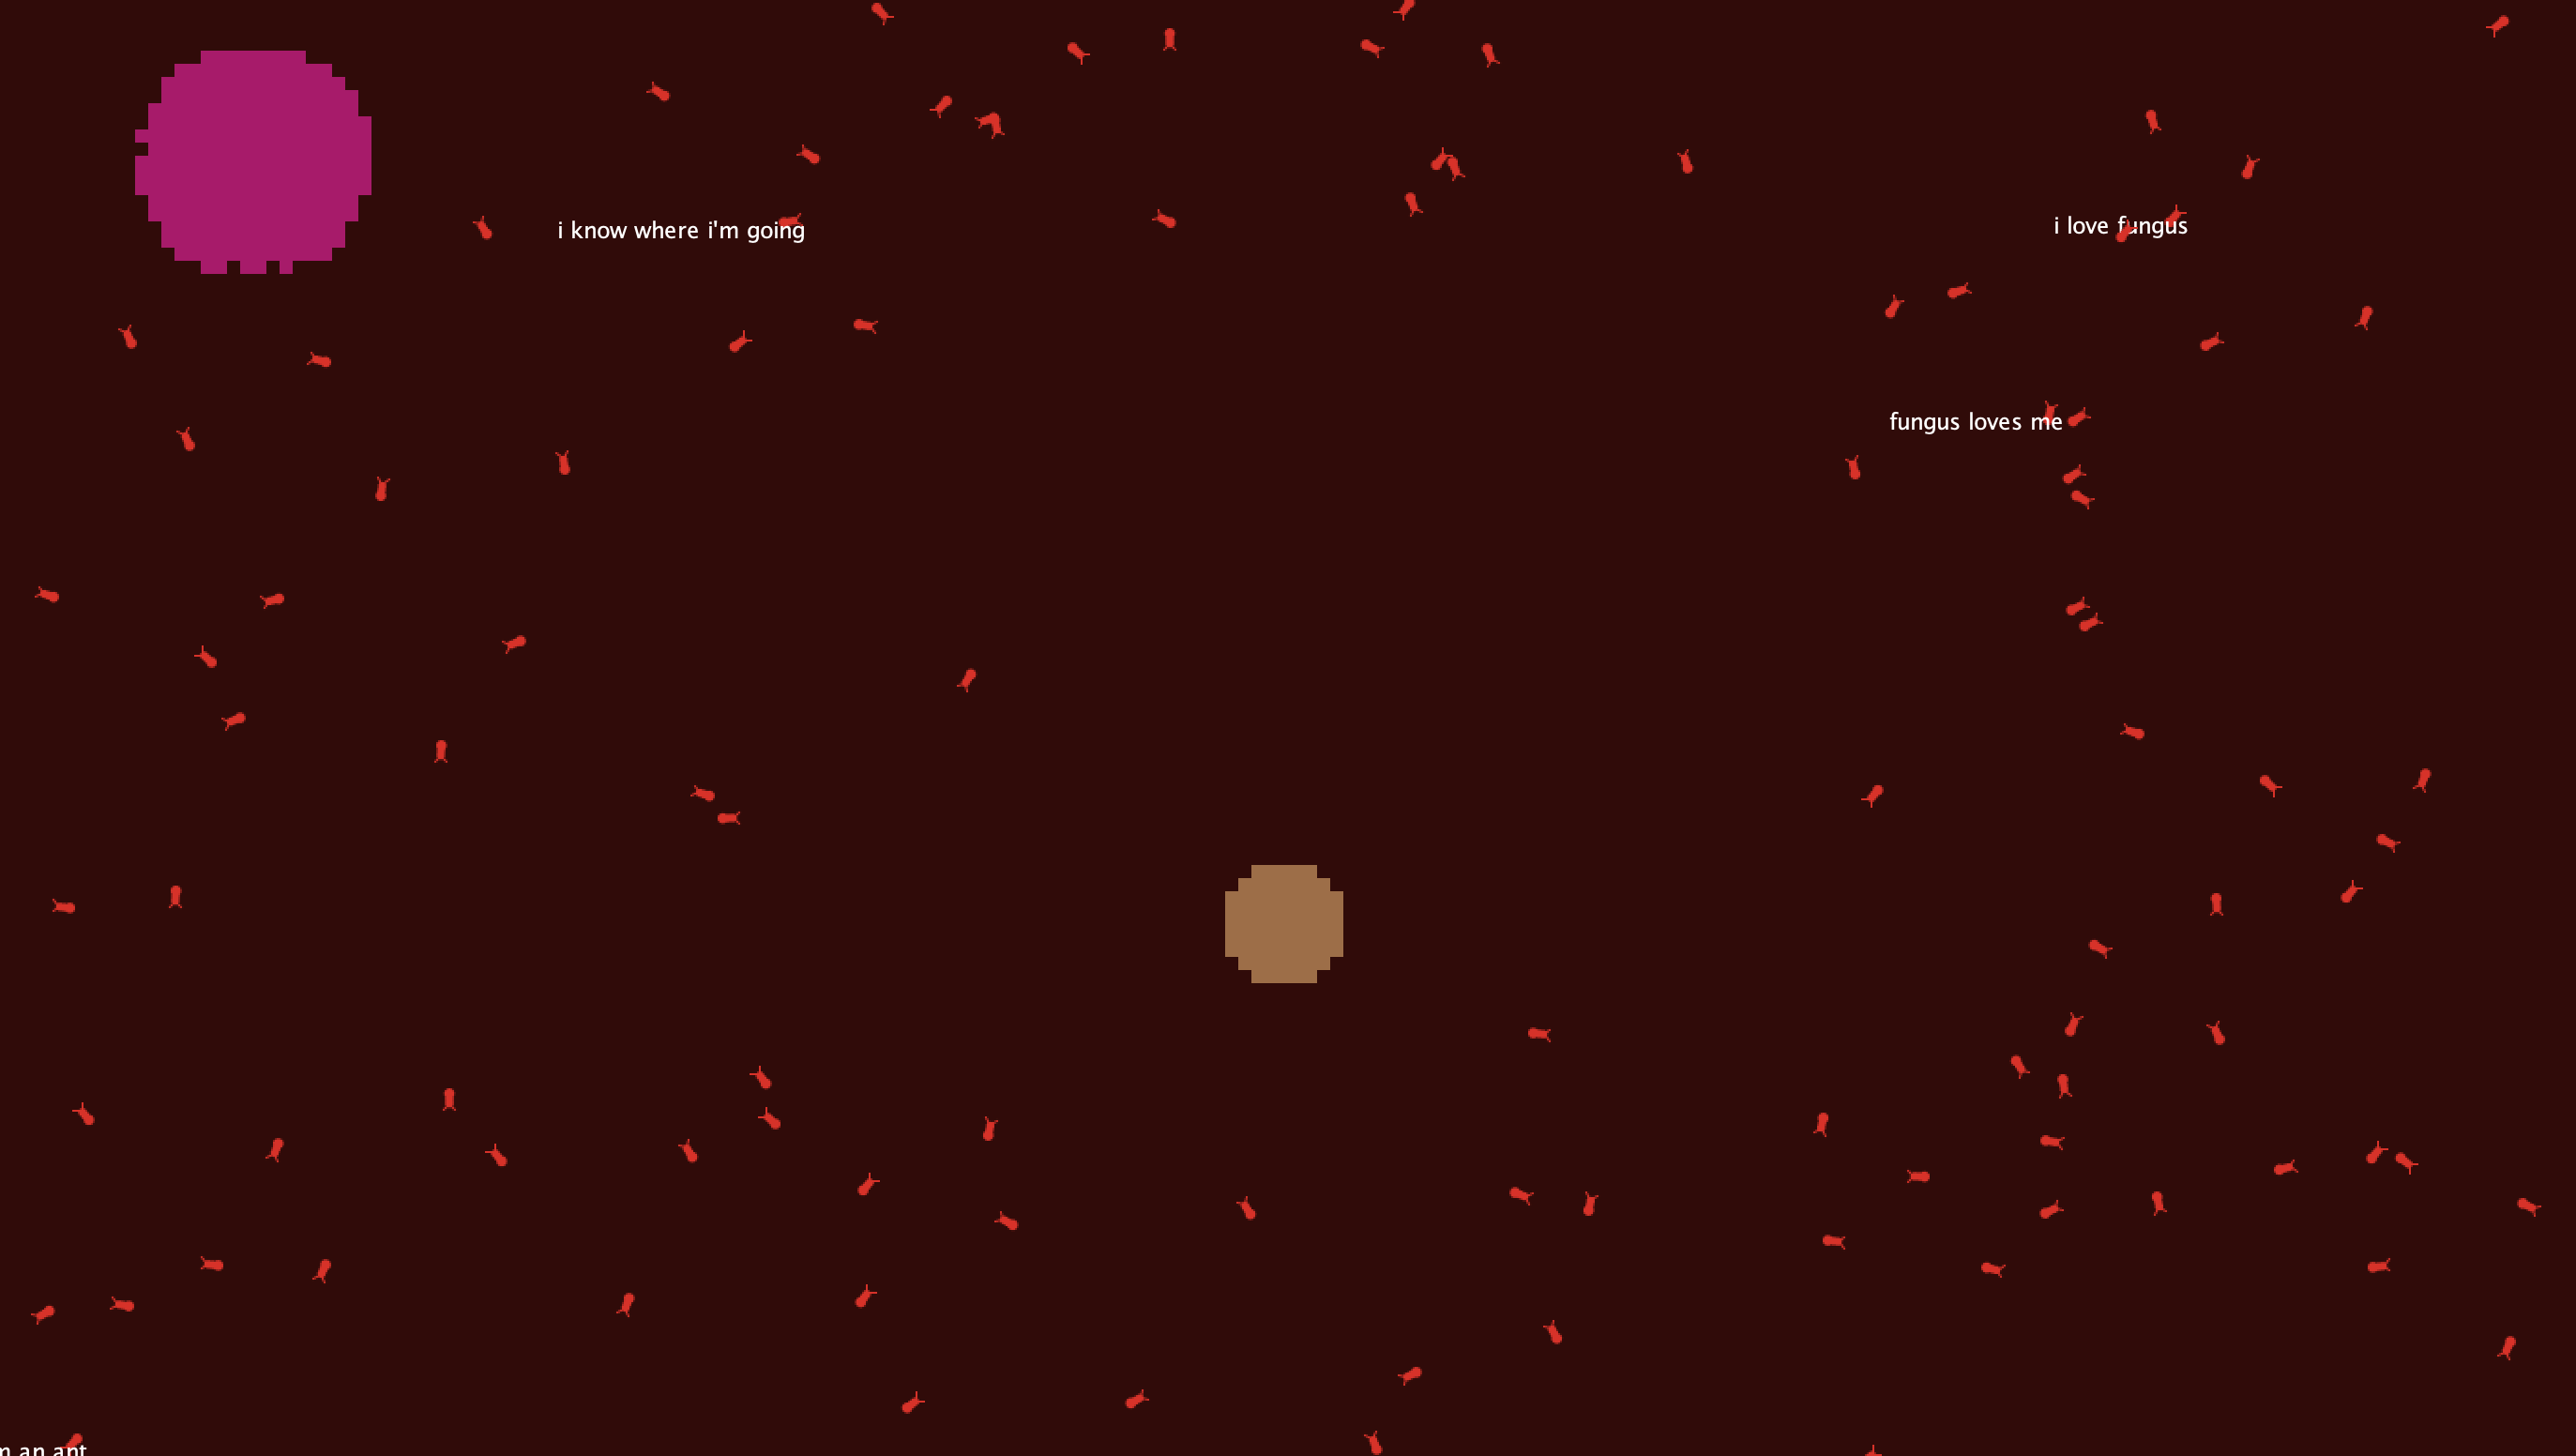
I altered the code from a classic NetLogo simulation to model the behavior of the leafcutters. NetLogo allows you to code agent-based models and watch them play out over time – each of the ants acts as an autonomous “agent” with a simple task to perform, and the iteration of multiple ants performing these tasks begins to simulate how the ants behave in the jungle. What starts out as random walking drifts into road-like patterns as the ants pick up pixel leaves and deliver them to their digital fungus…
Ant Tasks: 1. choose a random angle between -45 and 45 degrees 2. walk 1 unit in that direction 3. repeat. 4. IF there’s food (green leaves or pink flowers), pick it up by turning green, and deliver it back to the fungus at the center. 5. IF you sense digital pheromone (ants carrying food tag the pixels they walk over with digital “scent” as they head to the center), follow that pheromone.
The Twist: music A symphony of digital fungus stockpiling An audio representation of the complex patterns and surprising order that arises from randomness…
Each ant in the simulation has an ID number, and that ID number corresponds to a note on the piano. When an ant picks up a leaf and successfully brings it back to the fungus in the middle, that ant will sound its unique note. I calibrated this so that extremely low notes and extremely high notes on the scale won’t play – instead of those extremes some ants are assigned the same middle C, which you can hear throughout the simulation over and over like a drum beat…
the simulation: turn up the sound!
The ants play their own bebop, they compose their own Xenakis-likesongs. No two ant improvisations will be exactly alike; whenever you run the simulation, each ant makes different random choices and the behavior of the model will be different. But they sound like they spring from the same mind:
ant improv #1ant improv #2the ants start searching for foodmaking highwaysone food source left…starting the last highway
Our minds love patterns too – I find myself cheering the ants on when I watch the simulation, rooting for them to find the next leaf, hoping for them to route into the highway pattern, waiting to hear their eerie plunking, playful jazz…
coding in the jungle – on the balcony, adopta
extensions for this project:
-there is a web extension for NetLogo, but without sound; could translate these ants into Javascript/p5.js so users can press “play” themselves online and control different variables (how many ants? speed of ants?)
-connect the MIDI sound that the ants are making to a score, print out sheet music written by the ants, play it on the piano
-make the model more complex, closer to the structure of actual leafcutter colonies: different sizes of ants, different tasks…
-interactive projection version
you got this, ant.
Thanks to everyone at Dinacon!
-Madeline Blount http://mab.space
NetLogo citation: Wilensky, U. (1999). NetLogo. http://ccl.northwestern.edu/netlogo/. Center for Connected Learning and Computer-Based Modeling, Northwestern University, Evanston, IL.
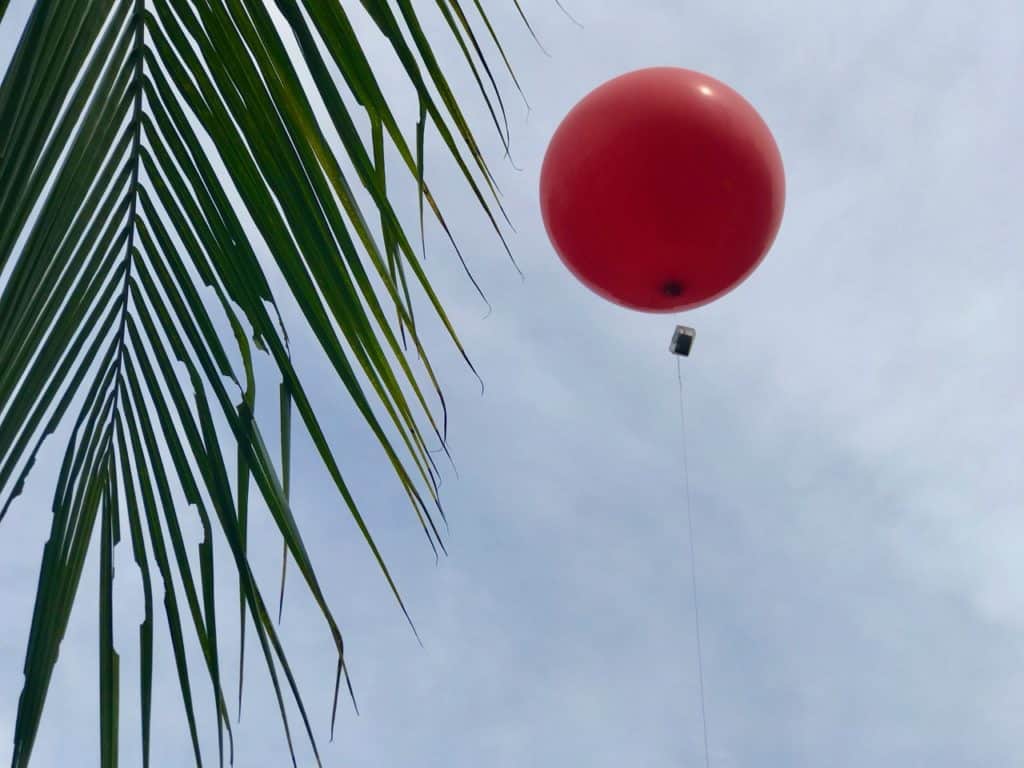
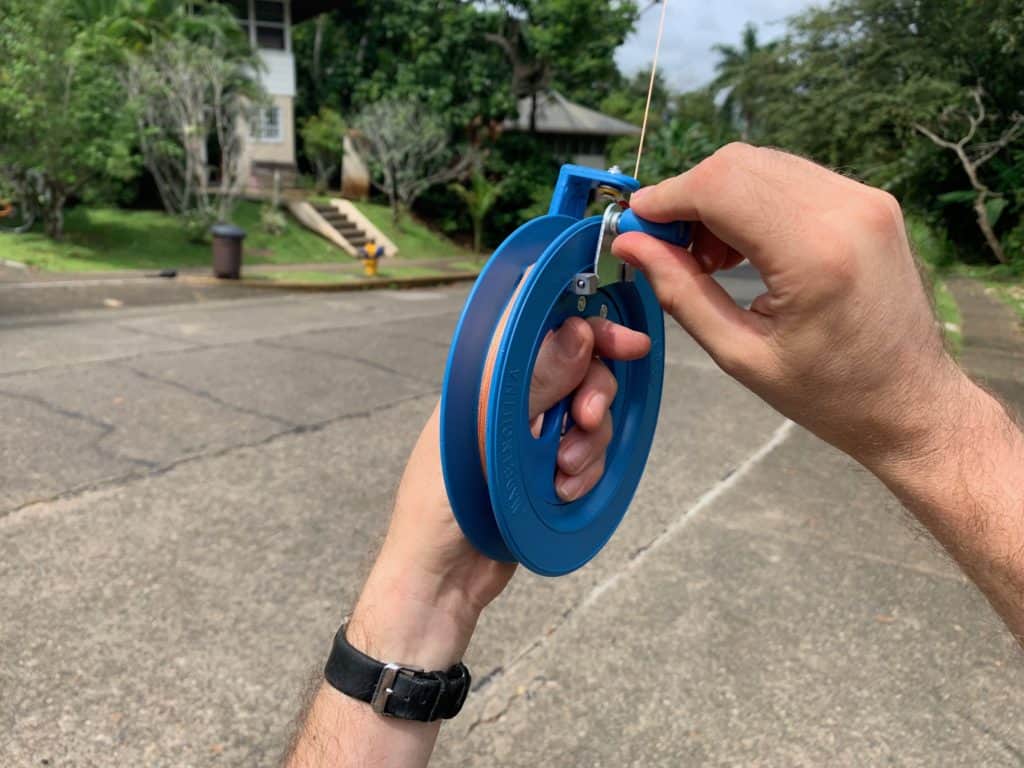
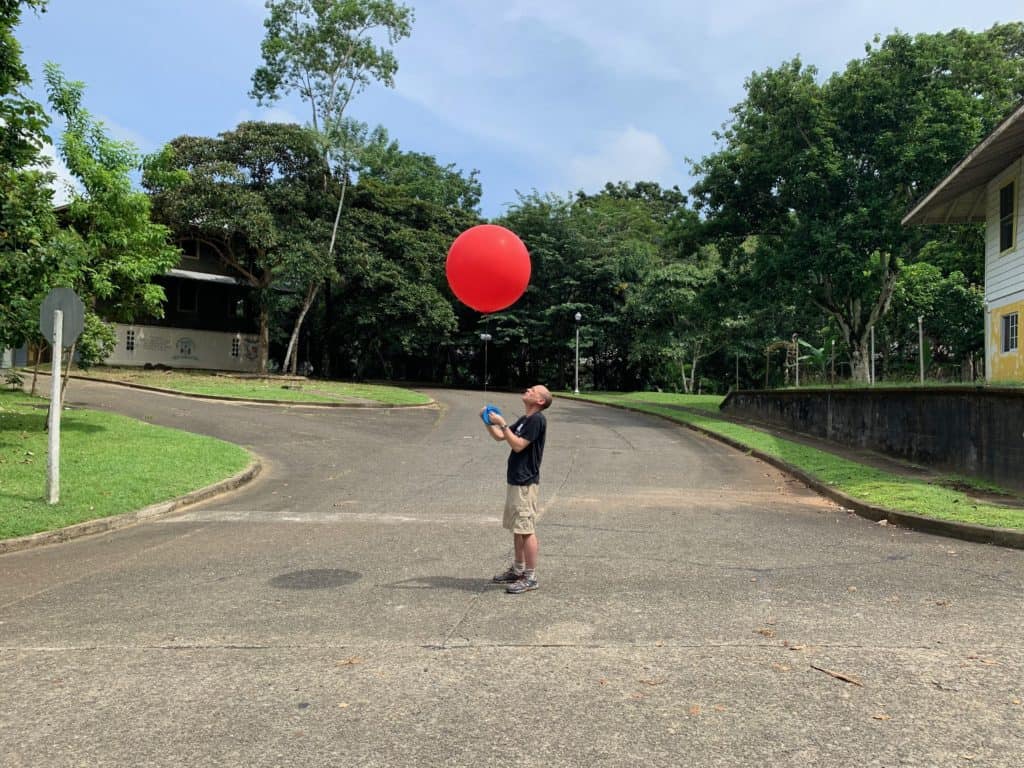
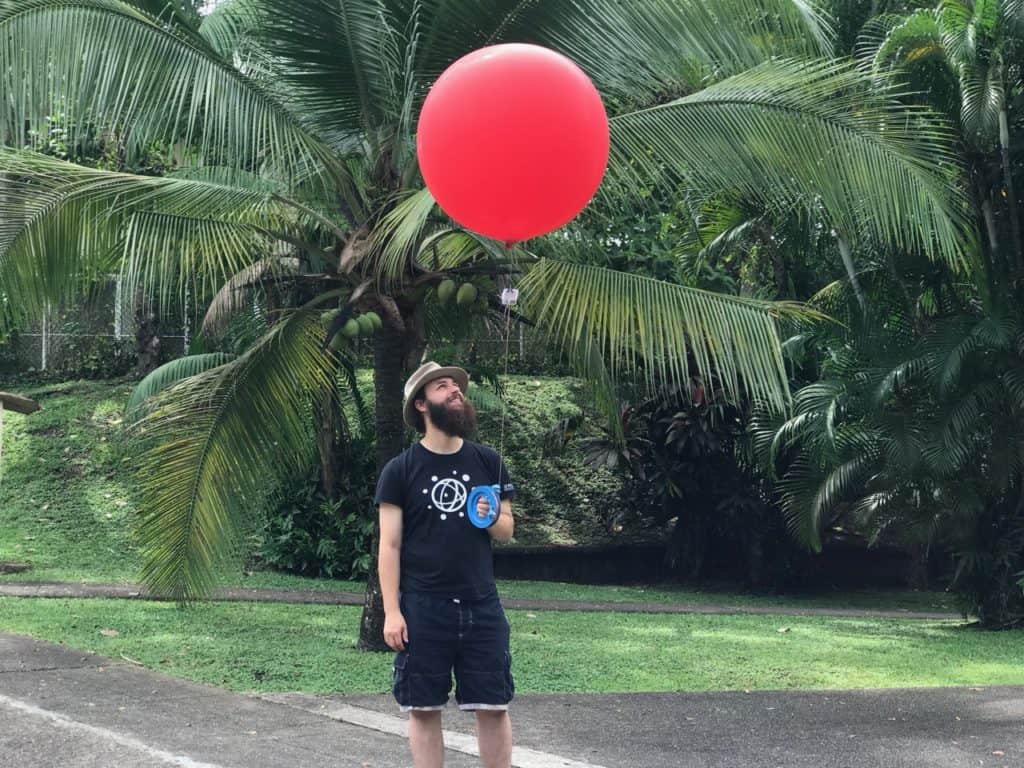
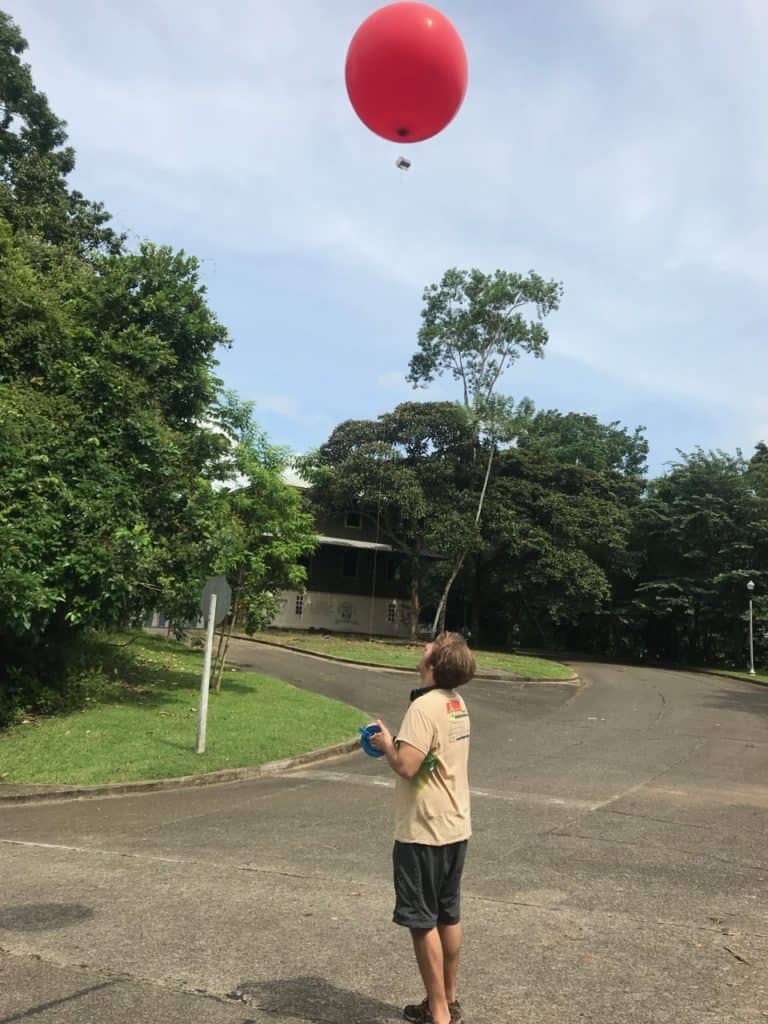
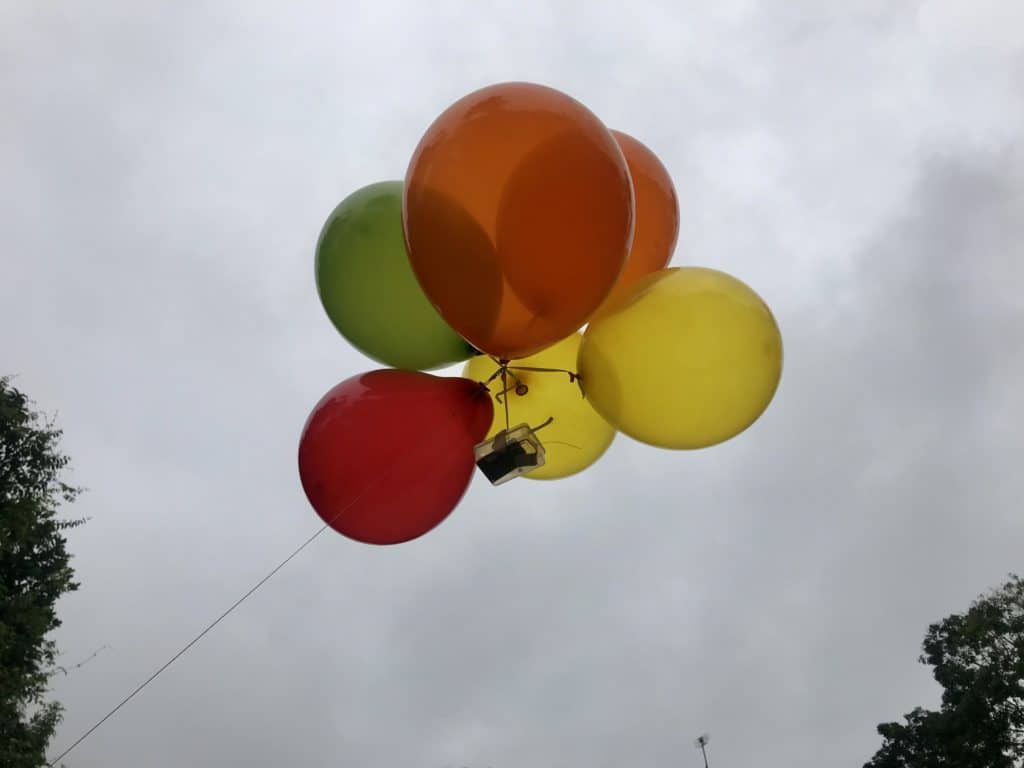
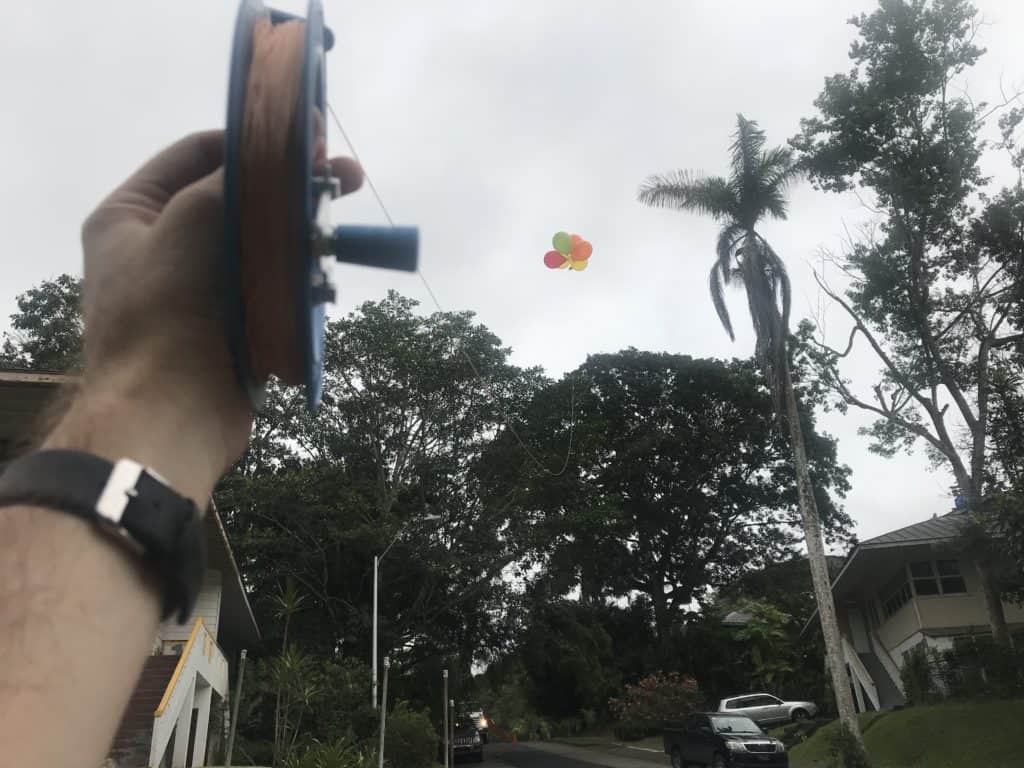
We have liftoff. My first Balloon Environmental Sensing test successfully “slipped the surly bonds of earth, and danced the skies on laughter-silvered wings” sending data back the whole time. First flight was at the Digital Naturalism Conference in Gamboa, Panama, featuring 10+ sensor values streaming from the balloon to an online data collection system and dashboard.
It was a big success!
This party-balloon platform is designed for inexpensive aerial environmental sensing. Balloon lofting is perfect for scientific research, educational programs, hacker workshops, technology art, as well as low-cost indoor or industrial monitoring. Is the humidity overhead the same as on the ground? Does wind speed change? Is it dusty up there? How much UV light penetrates the jungle canopy at different levels? These are all questions that can be answered with this platform.
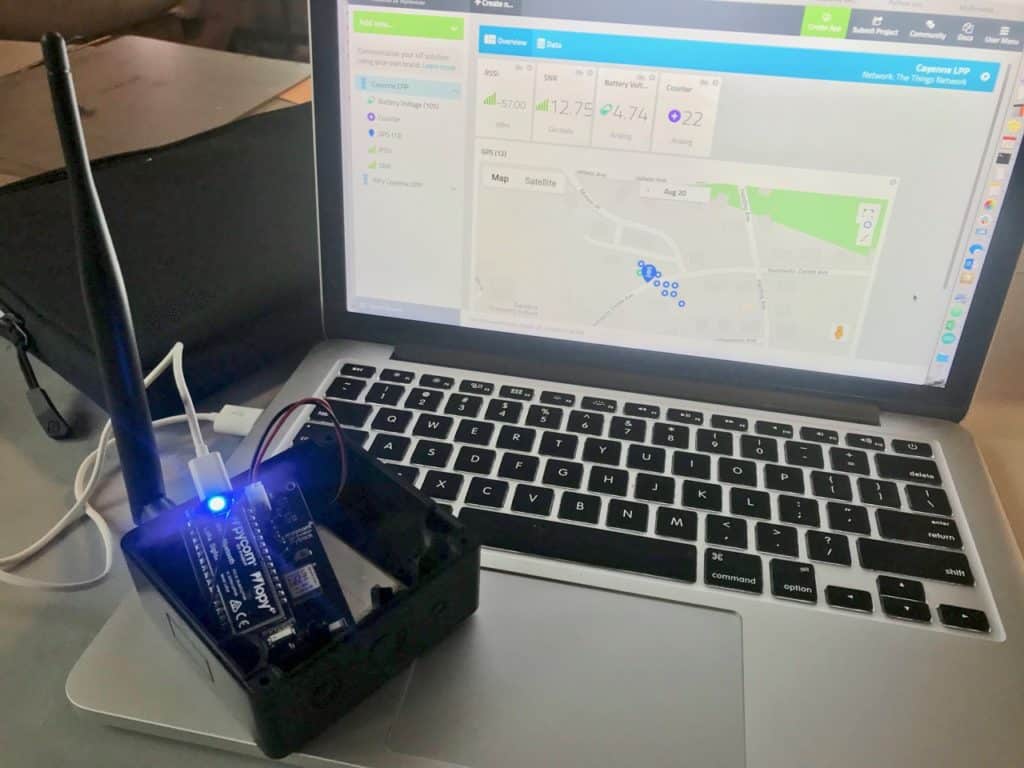
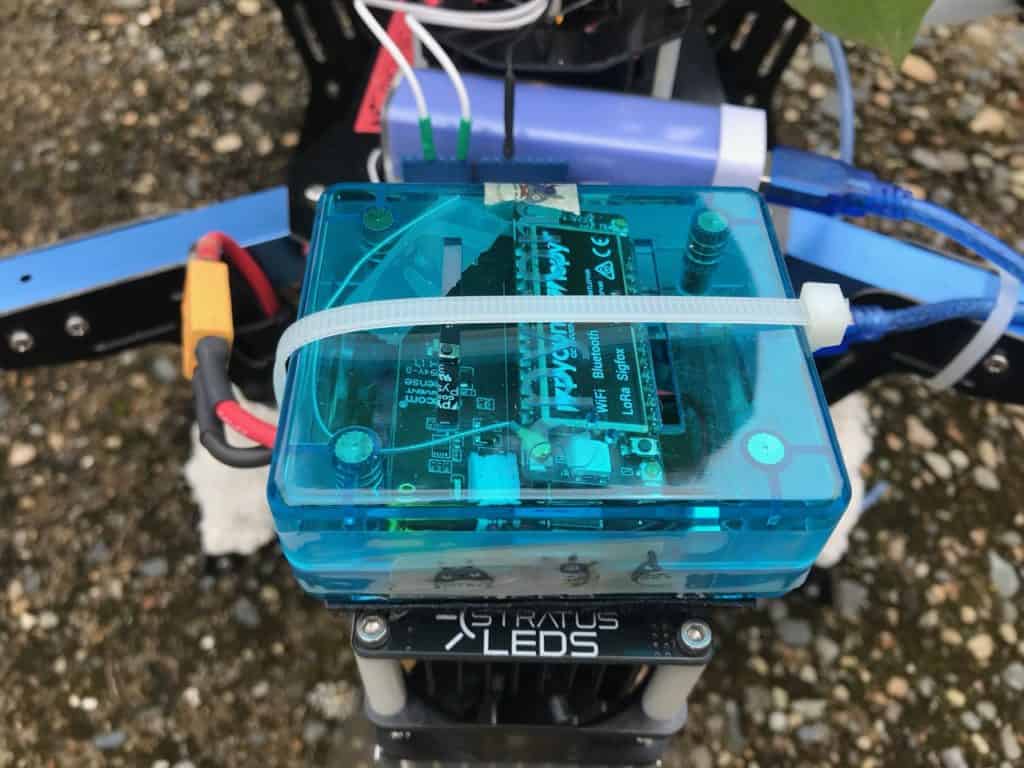
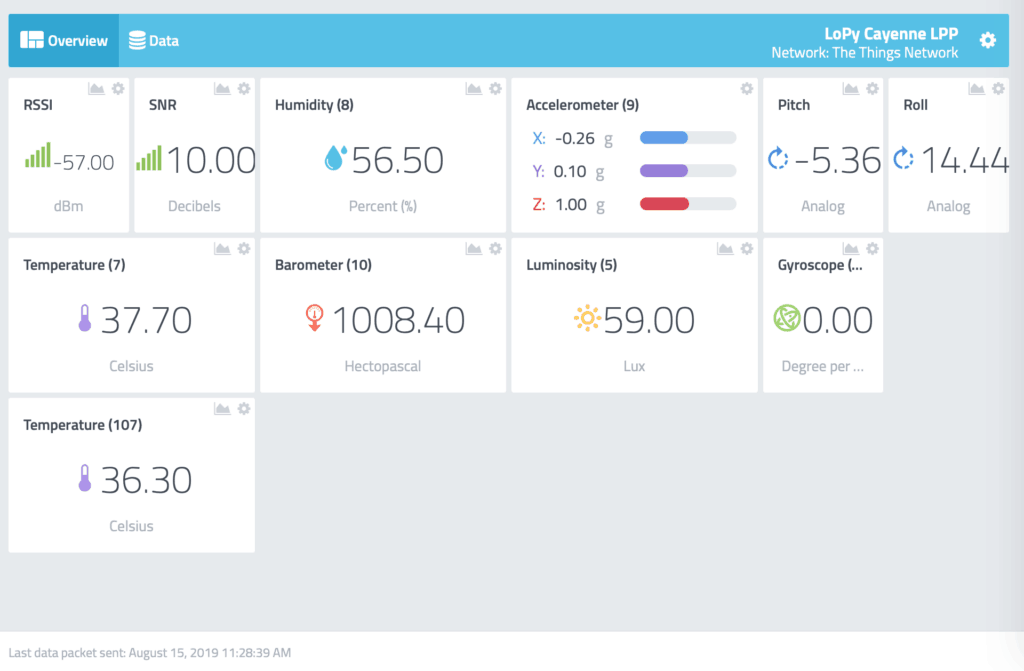
Since advanced LTE wasn’t available in Panama and SigFox coverage was absent, I decided to use the Digital Naturalism Lab’s LoRaWAN gateway—long-range radio networking that uses very little battery power. The data collection firmware code was written in MicroPython running on a LoPy4 wireless microcontroller module from Pycom. This first set of tests used all the Pysense evaluation board sensors including light, temperature, altitude, humidity, pitch, roll and acceleration in three axis. This data was taken in real time at 30-second intervals and transmitted using LoRaWAN across Things Network servers to be displayed on a Cayenne dashboard. The Pybytes cloud platform appears promising too, I’m looking forward to exploring that more in later phases of the project.
Gamboa has one very small grocery store. It does not sell helium or any other noble gas. Luckily the generous David Bowen allowed our sensor package to hitch a ride on his drone during my first week, so up we went for initial testing. As is so often the case, even this partial test resulted in lots of changes. In this case I realized we needed a frame counter, better battery connections and voltage monitoring before flying again. A second shakedown flight on Bowen’s drone proved the value of these additions, and gave us an excellent sampling of the data to come. We also did a bunch of range testing work, which is covered in a separate blog post.
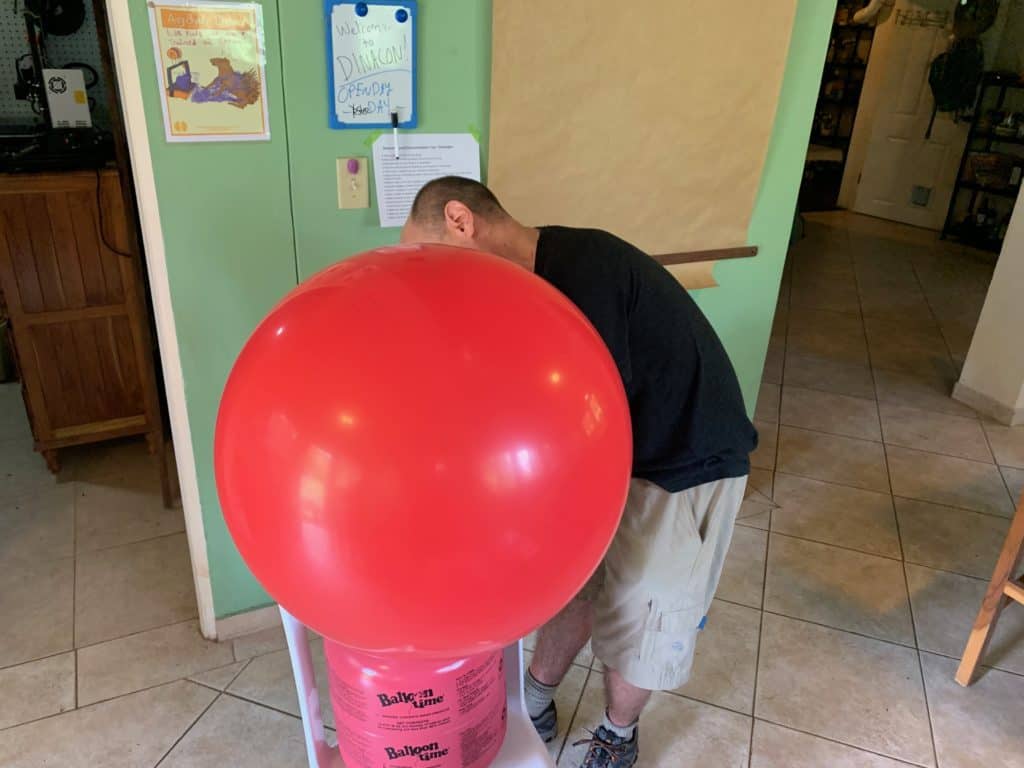
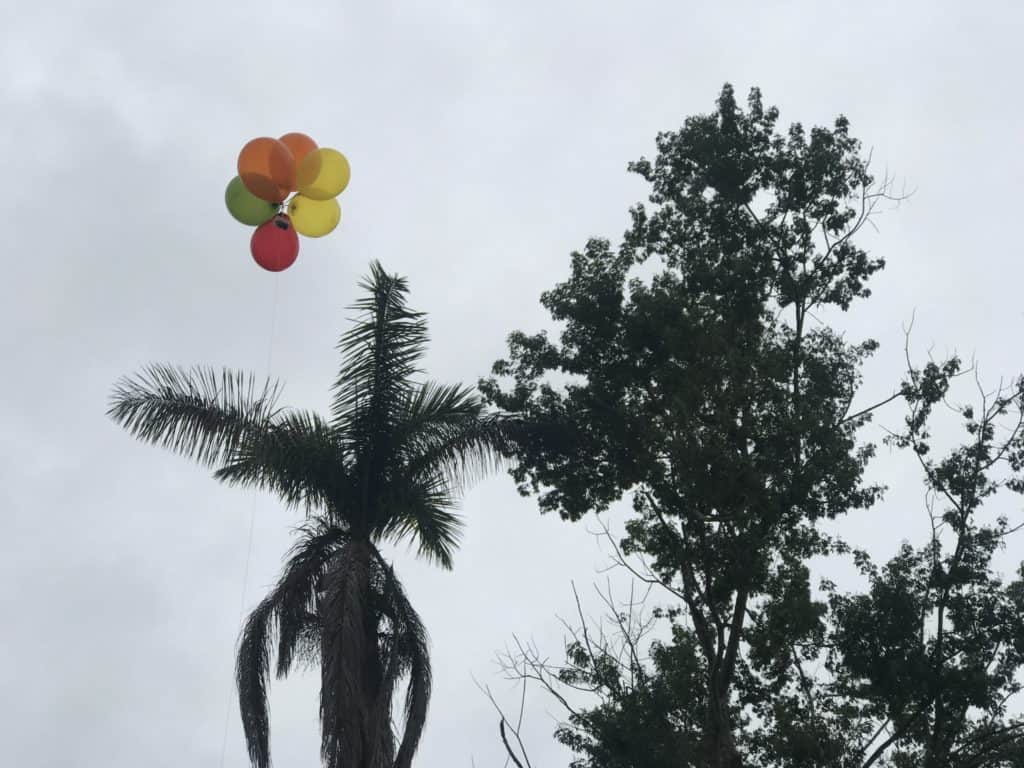
A taxi trip into Panama City brought us to Mundo de los Globos (World of Balloons) where helium tanks are available, along with 1-meter balloons in plenty of colors. With a full tank of the squeaky gas, we returned to Gamboa and I started inflating our ride to the sky.
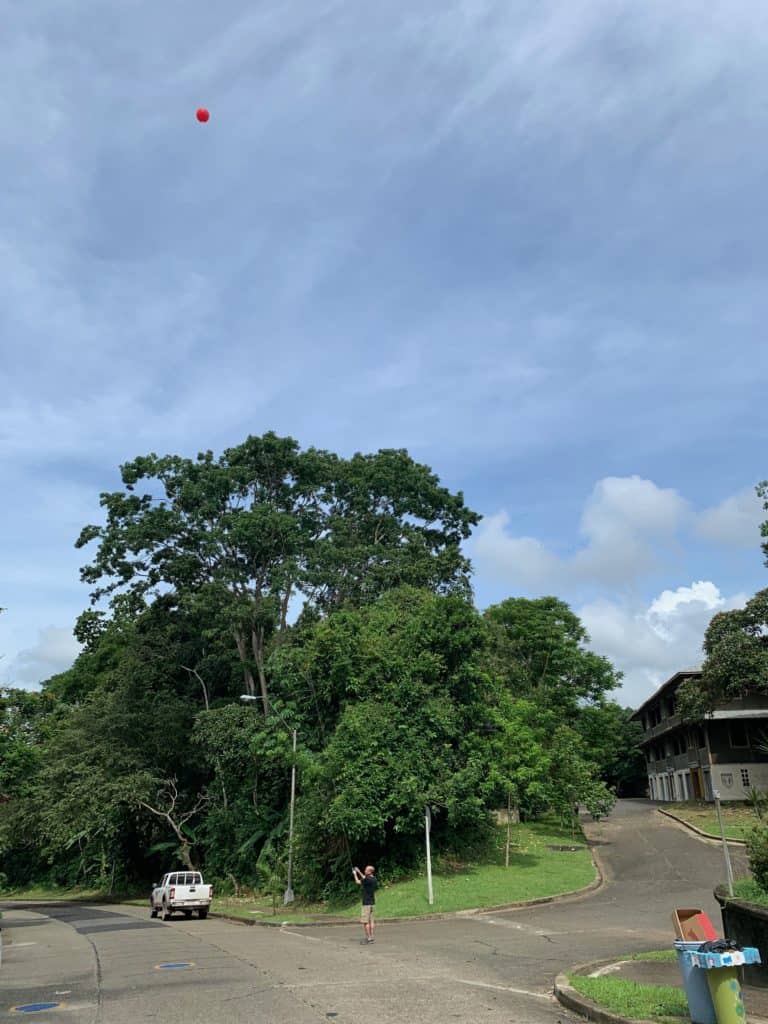
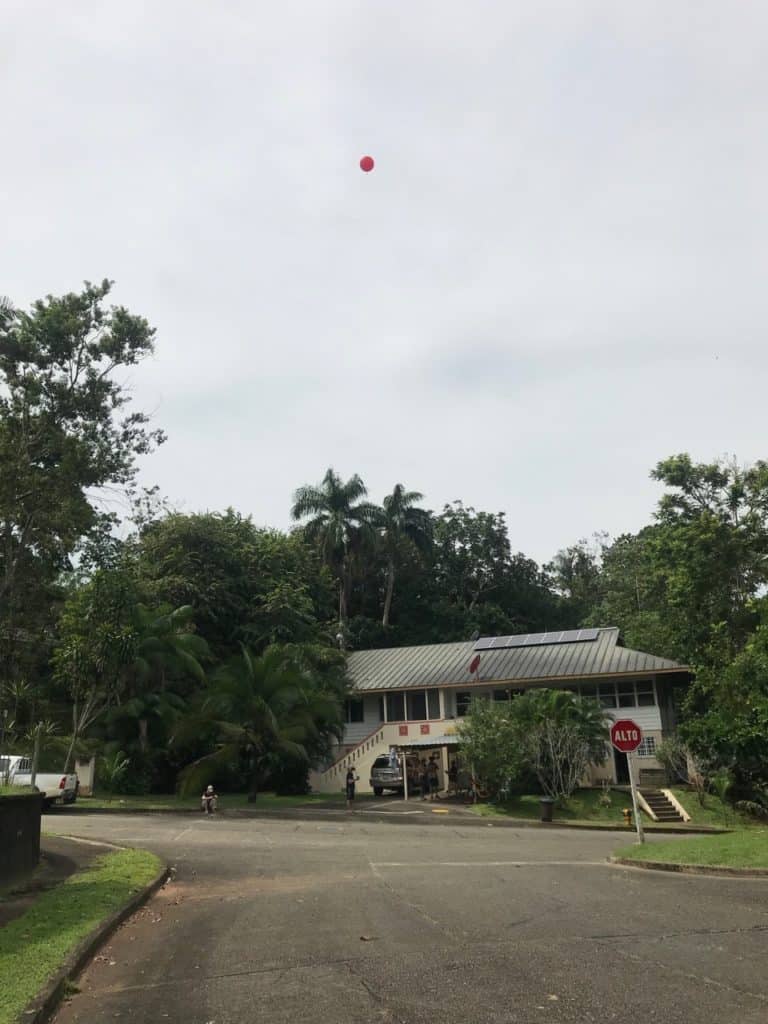
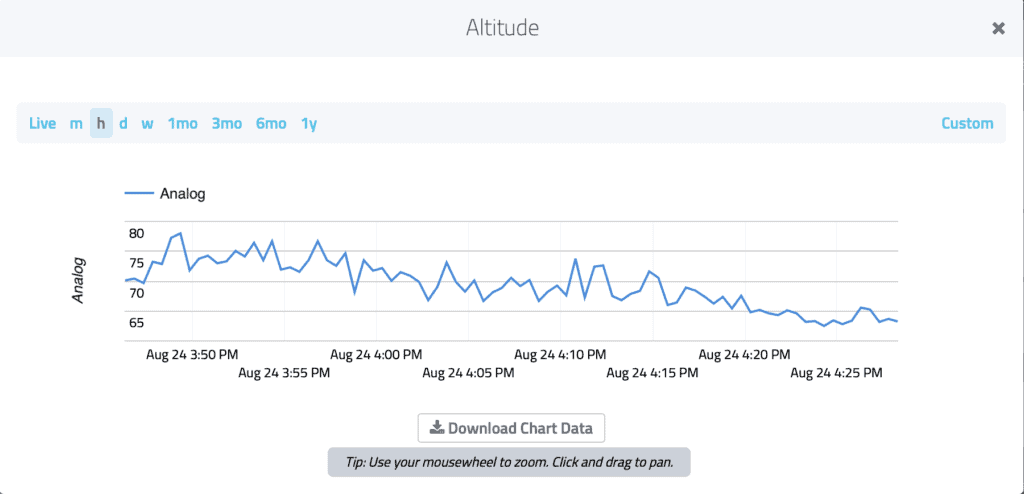
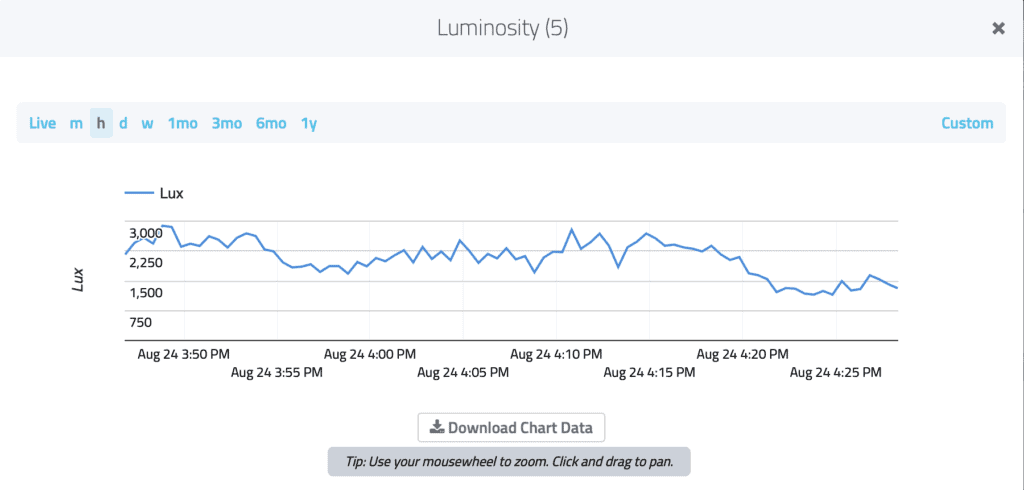
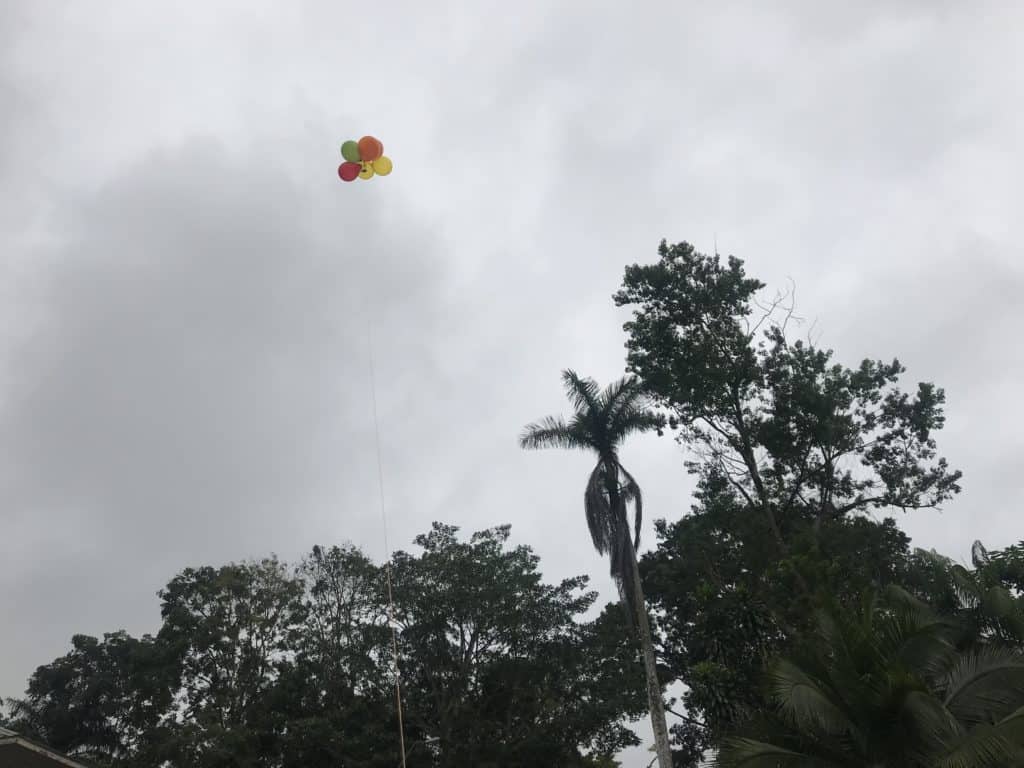
The next morning it was time for the sensor package to take its first balloon ride, and up we went. Andy Quitmeyer got some amazing footage from his drone and Trevor Silverstein shot high-end video from the ground (coming soon). I could not have asked for a better documentation team. The balloon reached 60 meters (about 200 feet) above ground level, which was the limit of the reel line I was using for a tether.
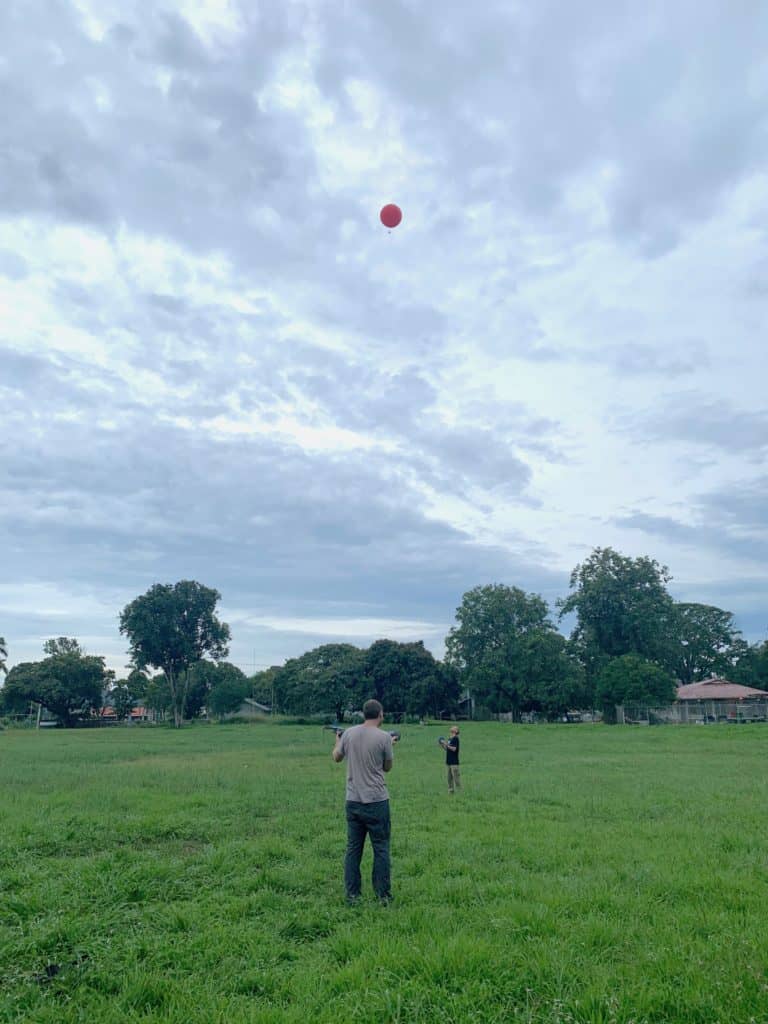
We got great data back from this flight, and soon made a second one—this time in a large field away from balloon-eating trees. It was easy to get LoRaWAN signal from altitude since LoRa works best in line-of-sight conditions. We plan to do more with the Things Network to support the biology and ecology research in Gamboa that are spearheaded by the local Smithsonian Tropical Research Institute.
Here’s a screenshot of the data dashboard from the flight.
And a few graphs:
Another afternoon was set aside for a proper party-balloon experiment. Using a smaller battery I was able to loft the sensor package using 6 small balloons and the small amount of remaining helium. This worked too, though 7 balloons would have provided more lift and handled the wind better. Next time, more balloons!
Data from these flights can be downloaded, and the MicroPython code for the LoPy4 or FiPy can be found on my GitHub.
For the next version of the Balloon Environmental Testing platform, my plan is to explore other sensors and wireless links. I’m especially interested in UV light, air quality, wind speed and loudness. In Gamboa we talked about trying some sound recording too. As the balloon itself is silent, it’s the perfect place to record. For wireless links I’m itching to explore some new cellular low-bandwidth, low-cost protocols, LTE Cat-M and NB-IoT, because they don’t require any dedicated base stations and should work great at the altitudes needed for balloon flights. Additional plans include extended day-long flights, free flight with GPS, and maybe look at hydrogen gas but not near any kids!
The initial prototype goal was to see if the full system will work, and it does! Gamboa was a great success for this project, giving me the time, venue and documentation assistance to bring this idea to life. If you get a chance to attend the next Dinacon, I strongly recommend it. And if you’re interested in balloon sensing for any experiment, class or project, let me know!
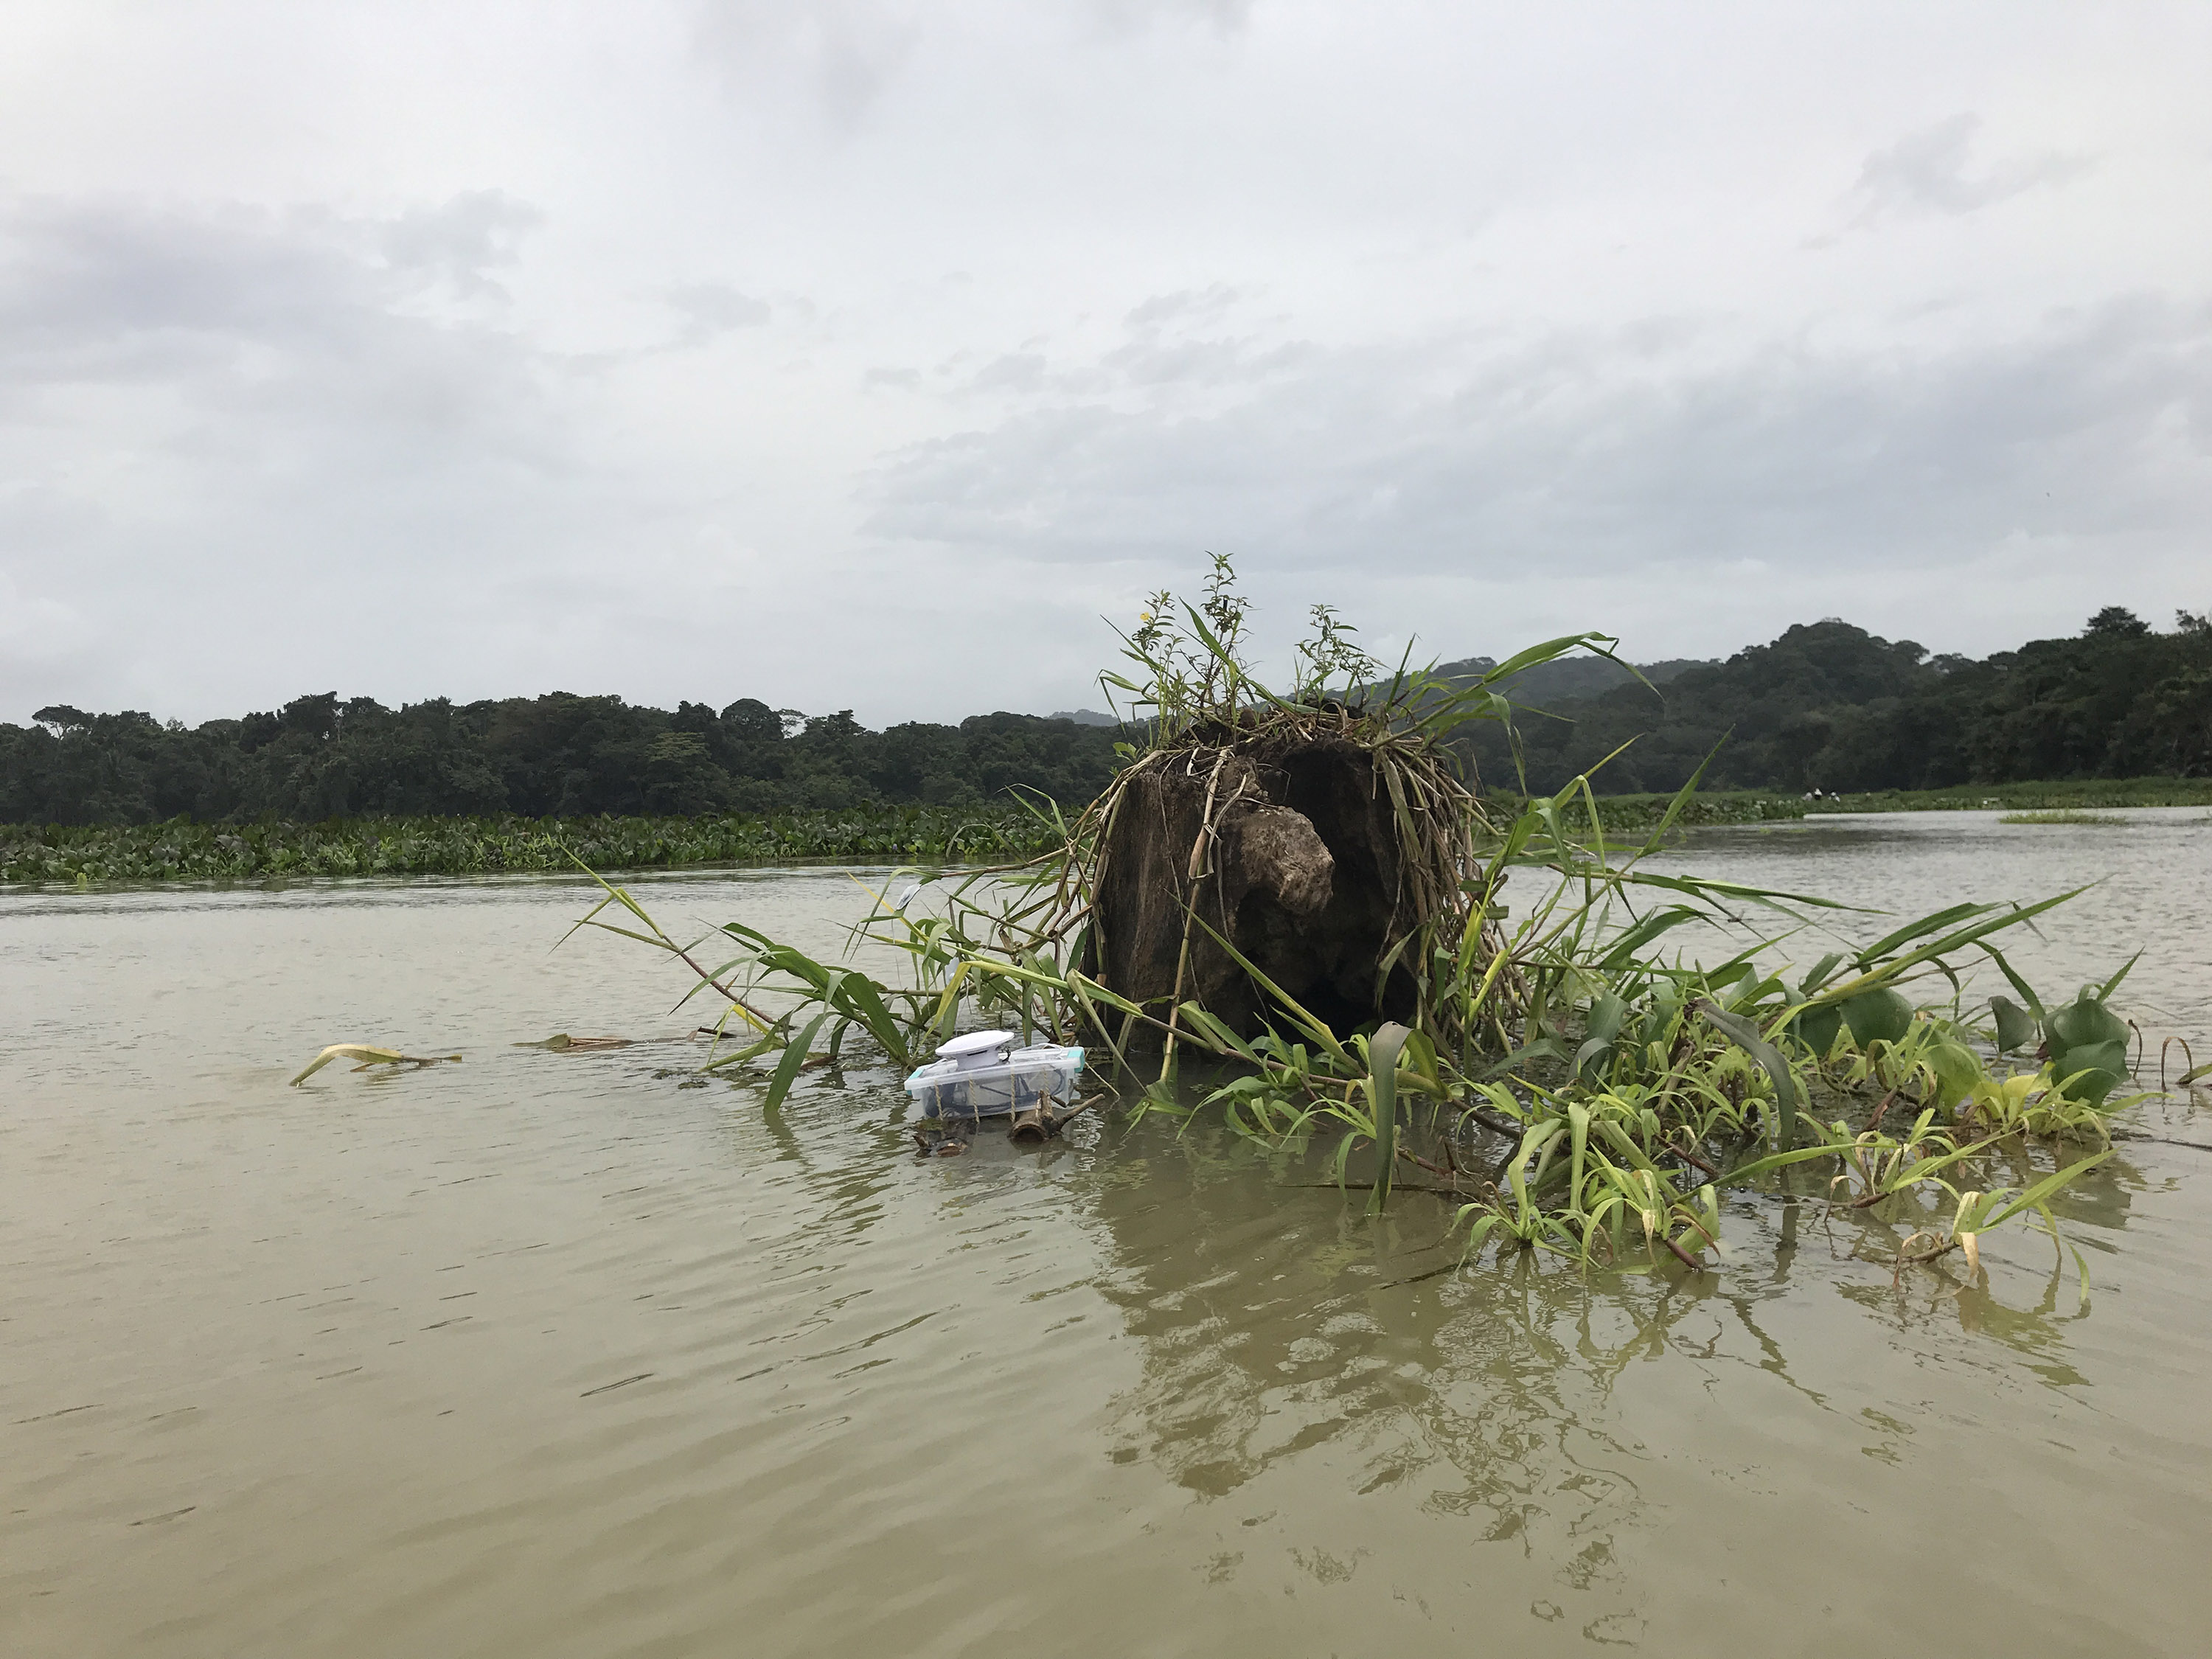
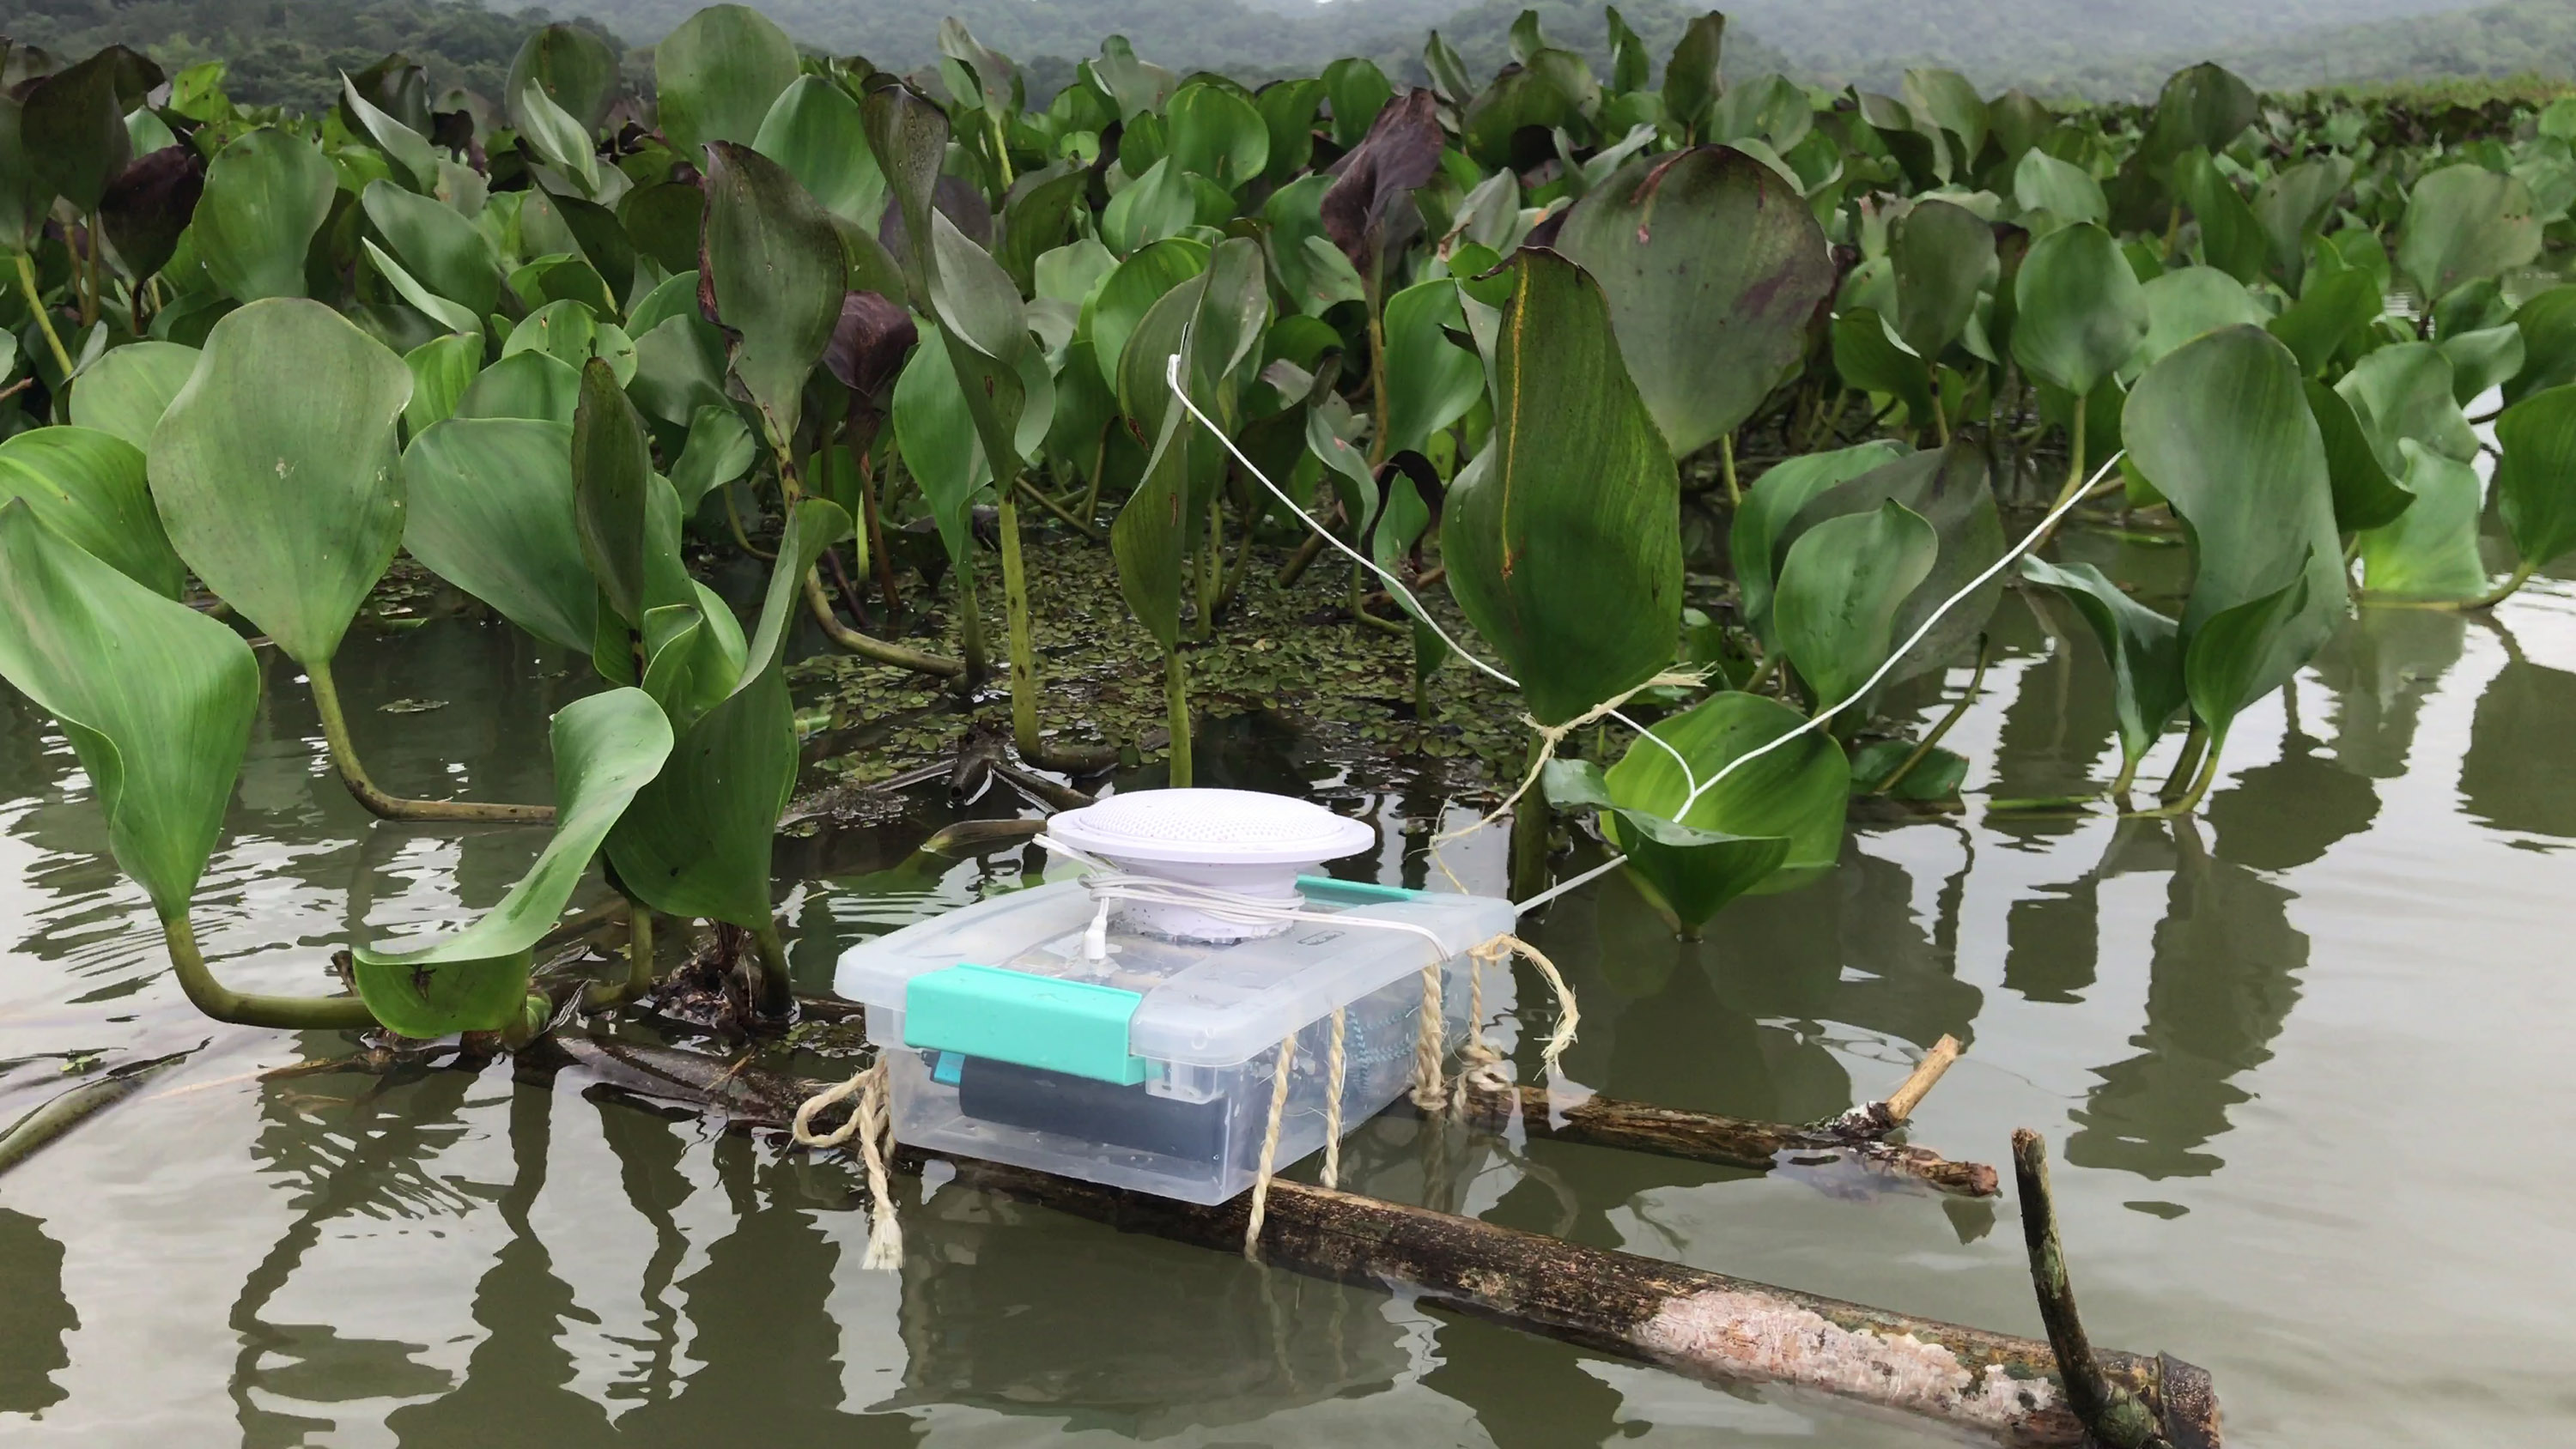
Unnatural Language, a collaboration between Michael Ang and Scott Kildall, is a network of electronic organisms (“Datapods”) that create sonic improvisations from physical sensors in the natural environment. Each Datapod has custom electronics connected to sensors, a speaker, and a wireless network. The sensed data, for example from electrodes that measure the subtle electrical variations in the leaves of plants, is transformed into a unique synthesized sound. Encased in sculptural materials (natural fiber, leather, leaves, etc) and dispersed into a natural environment, the Datapods enter into a sonic dialogue with the existing ecosystem of plants and animals.
Unnatural Language proposes that technology and nature are forming a new hybrid ecology, where innovations such as intelligent devices that occupy the natural landscape are dissolving the traditional nature-culture dichotomy. This work repurposes this technology to amplify unseen processes such as plant intercommunication, river health and subtle microclimate changes.
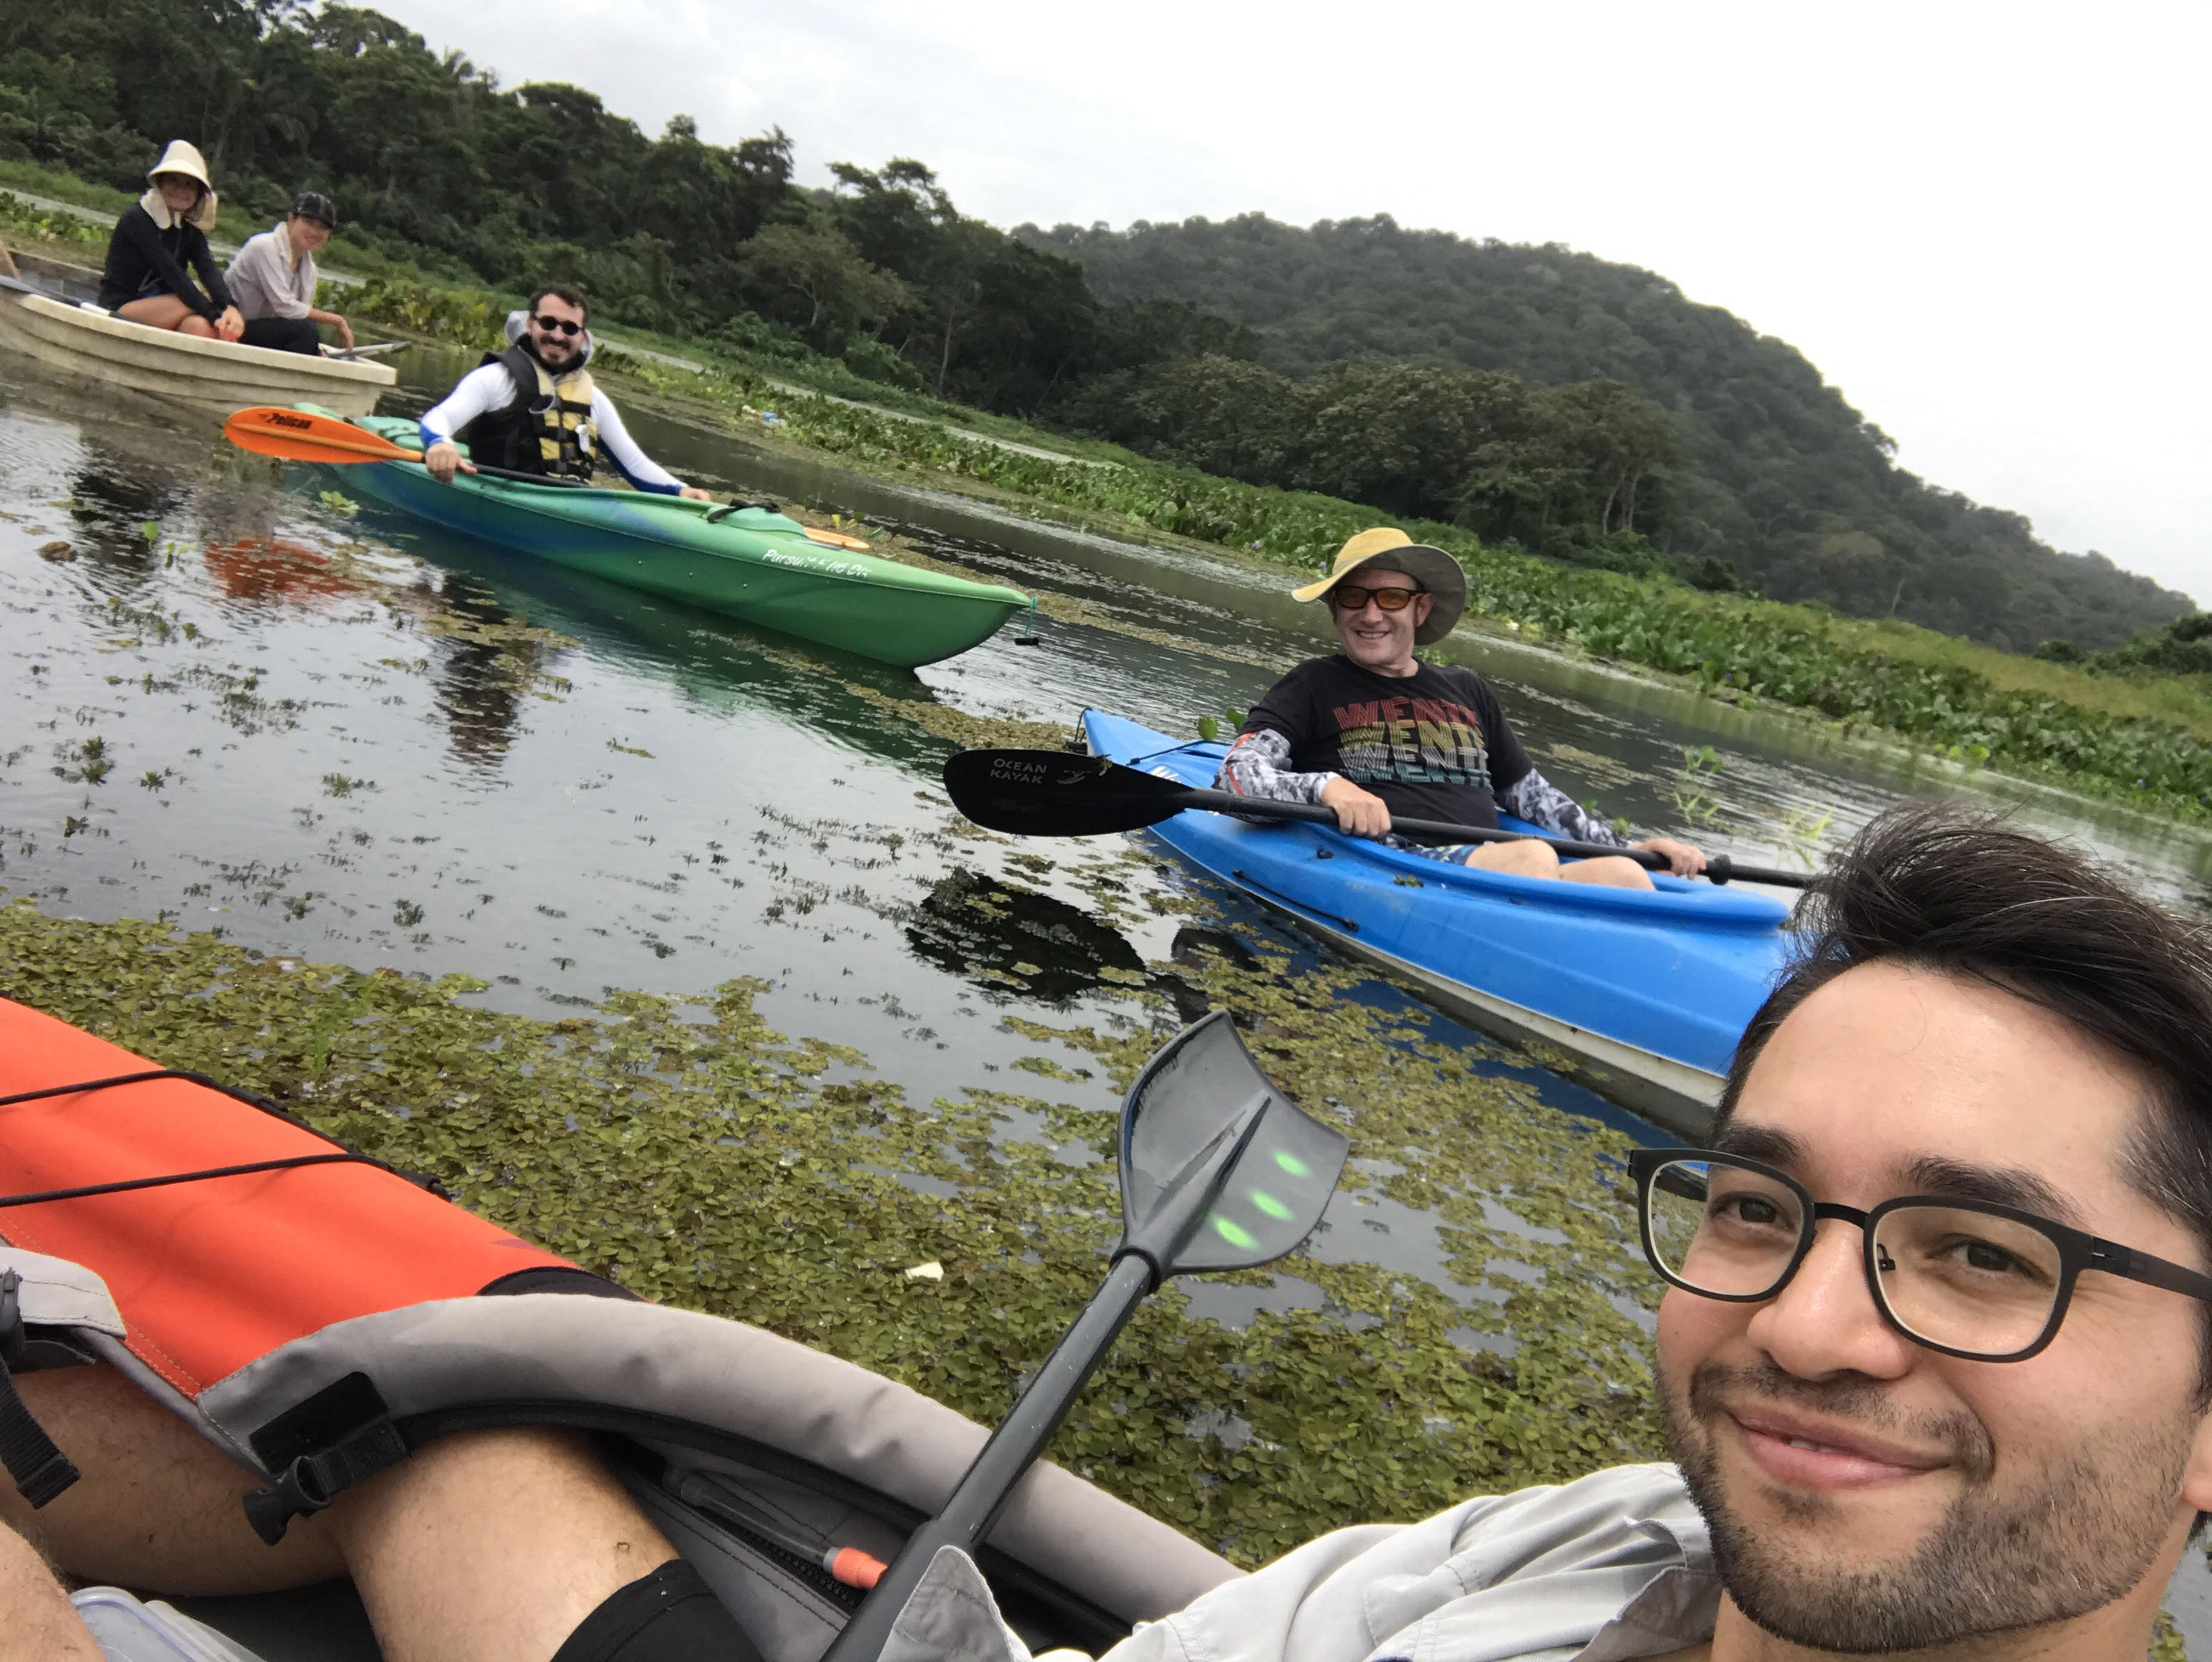
We were at Dinacon in Gamboa, Panama for 18 days and this was our first full development and installation of our project. After several adventures in the area, we decided to deploy eight Datapods in Lake Chagras, which feeds the Panama Canal, since this constitutes a transitional space: a brackish marshland, which also had signs of human outflow such as garbage floating in it.
At Dinacon, we developed two types of sensor-synthesizers. The first detected electrical conductivity levels in water and modulated different sampled sounds that we recorded of rocks sinking in water from a hydrophone. As the water quality fluctuated with these sensor readings, the output of the synthesizer played higher and lower-pitched samples accordingly.
For the water-based datapods, we put our speakers, and the electronics, which consisted of custom software synth code on an ESP32 chip with an on-board amp and water sensor onto various garbage flotillas, which we constructed from the litter that we had collected by kayak.
The second sensor-synth combination was a plant sensor, which detected electrical activity in plants using electrodes. Plants tend to respond relatively rapidly (2-3 minutes) in response to various environmental triggers. The synth we developed acted as a drum machine, modulating different tempos according the the plants that it was attached to.
We learned many things at Dinacon! Making a compelling Datapod took much longer than we thought it would. To achieve the best type of synth effect, we recorded humans performing an activity with the thing being sensed: rocks being thrown into water and water being poured through a strainer onto a plant. We then cut these up into bite-sized pieces and ported them into our software, which uses compiled C++ code on the ESP32 to make dynamic effects.
Also, the janky look for the sculptures themselves had a broad appeal and this will be a direction for the project into the future. We’re looking forward to further site-specific installations of Unnatural Language.
Many thanks to all our fabulous co-Dinasaurs for the wonderfully playful and productive atmosphere, and especially to our intrepid film crew (Monika, Ruben, Cherise, and Andy on the drone!)
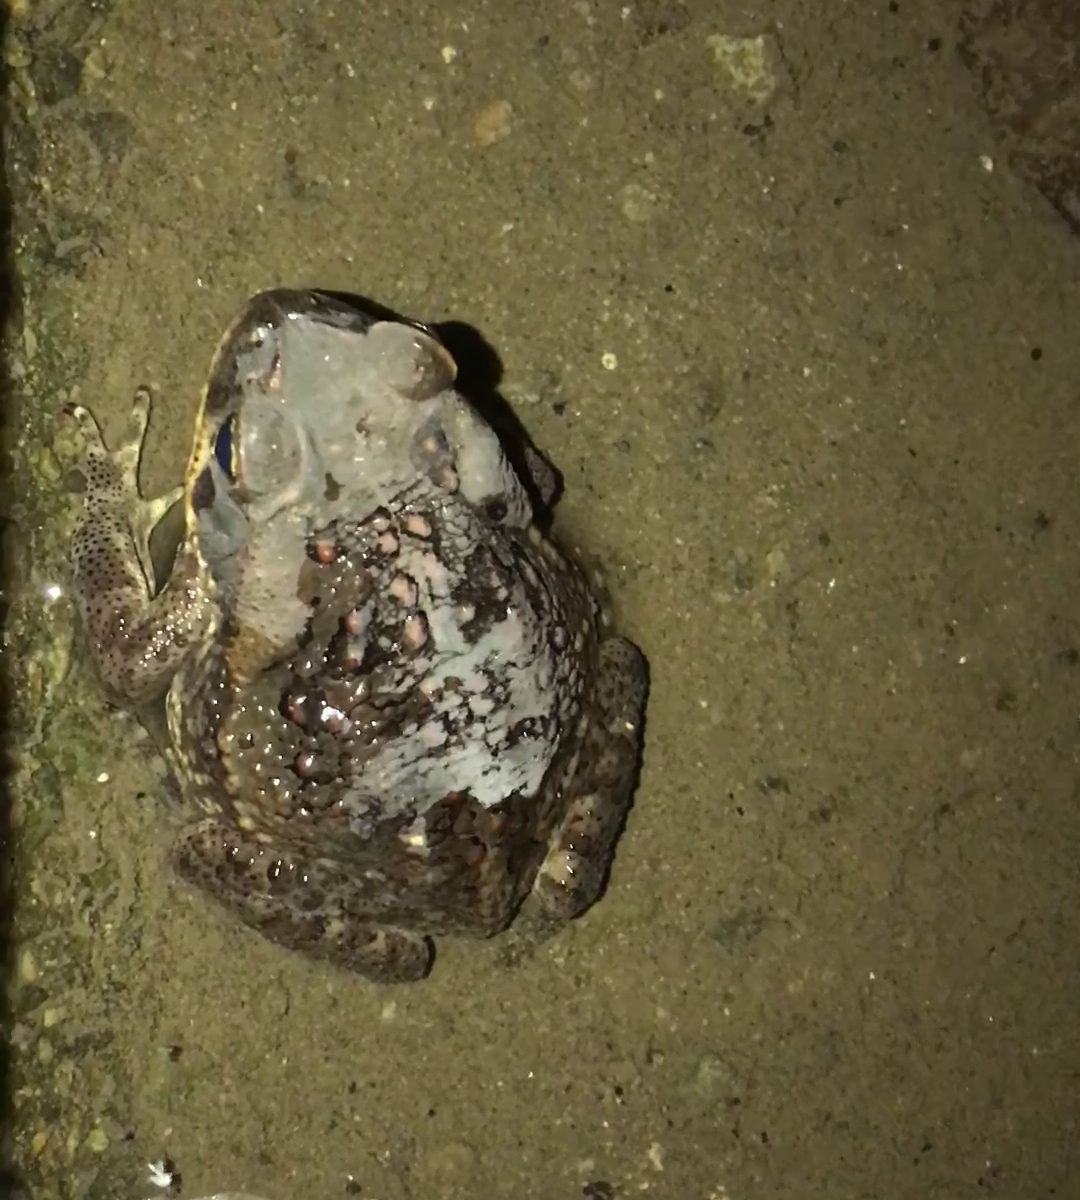
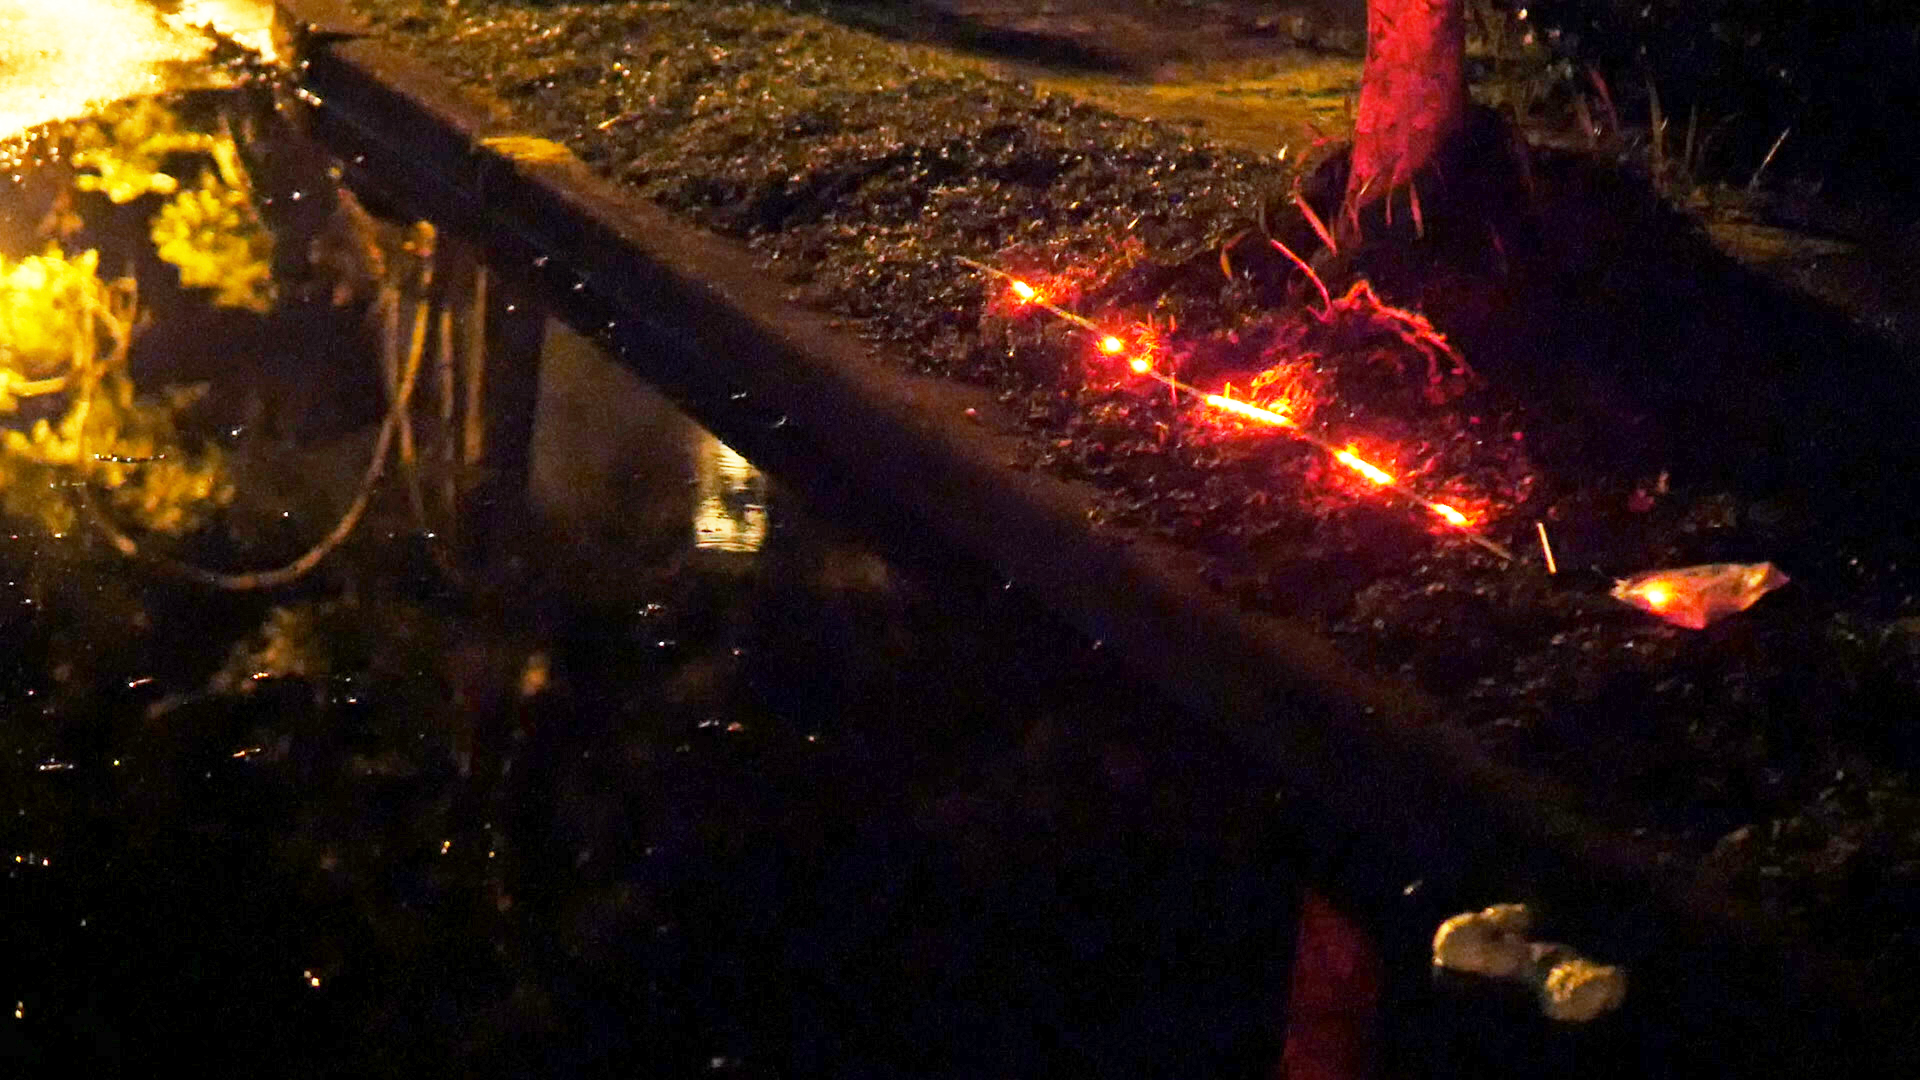
Frog Show wants to elevate the singing frogs to an audiovisual experience.
Since our arrival to Gamboa every evening we were amazed by their singing. It didn’t sound like the frogs we knew. This was more of an electronic synth-like music performance. We saw opportuniy to join the frogs and develop some visuals to add to the show.
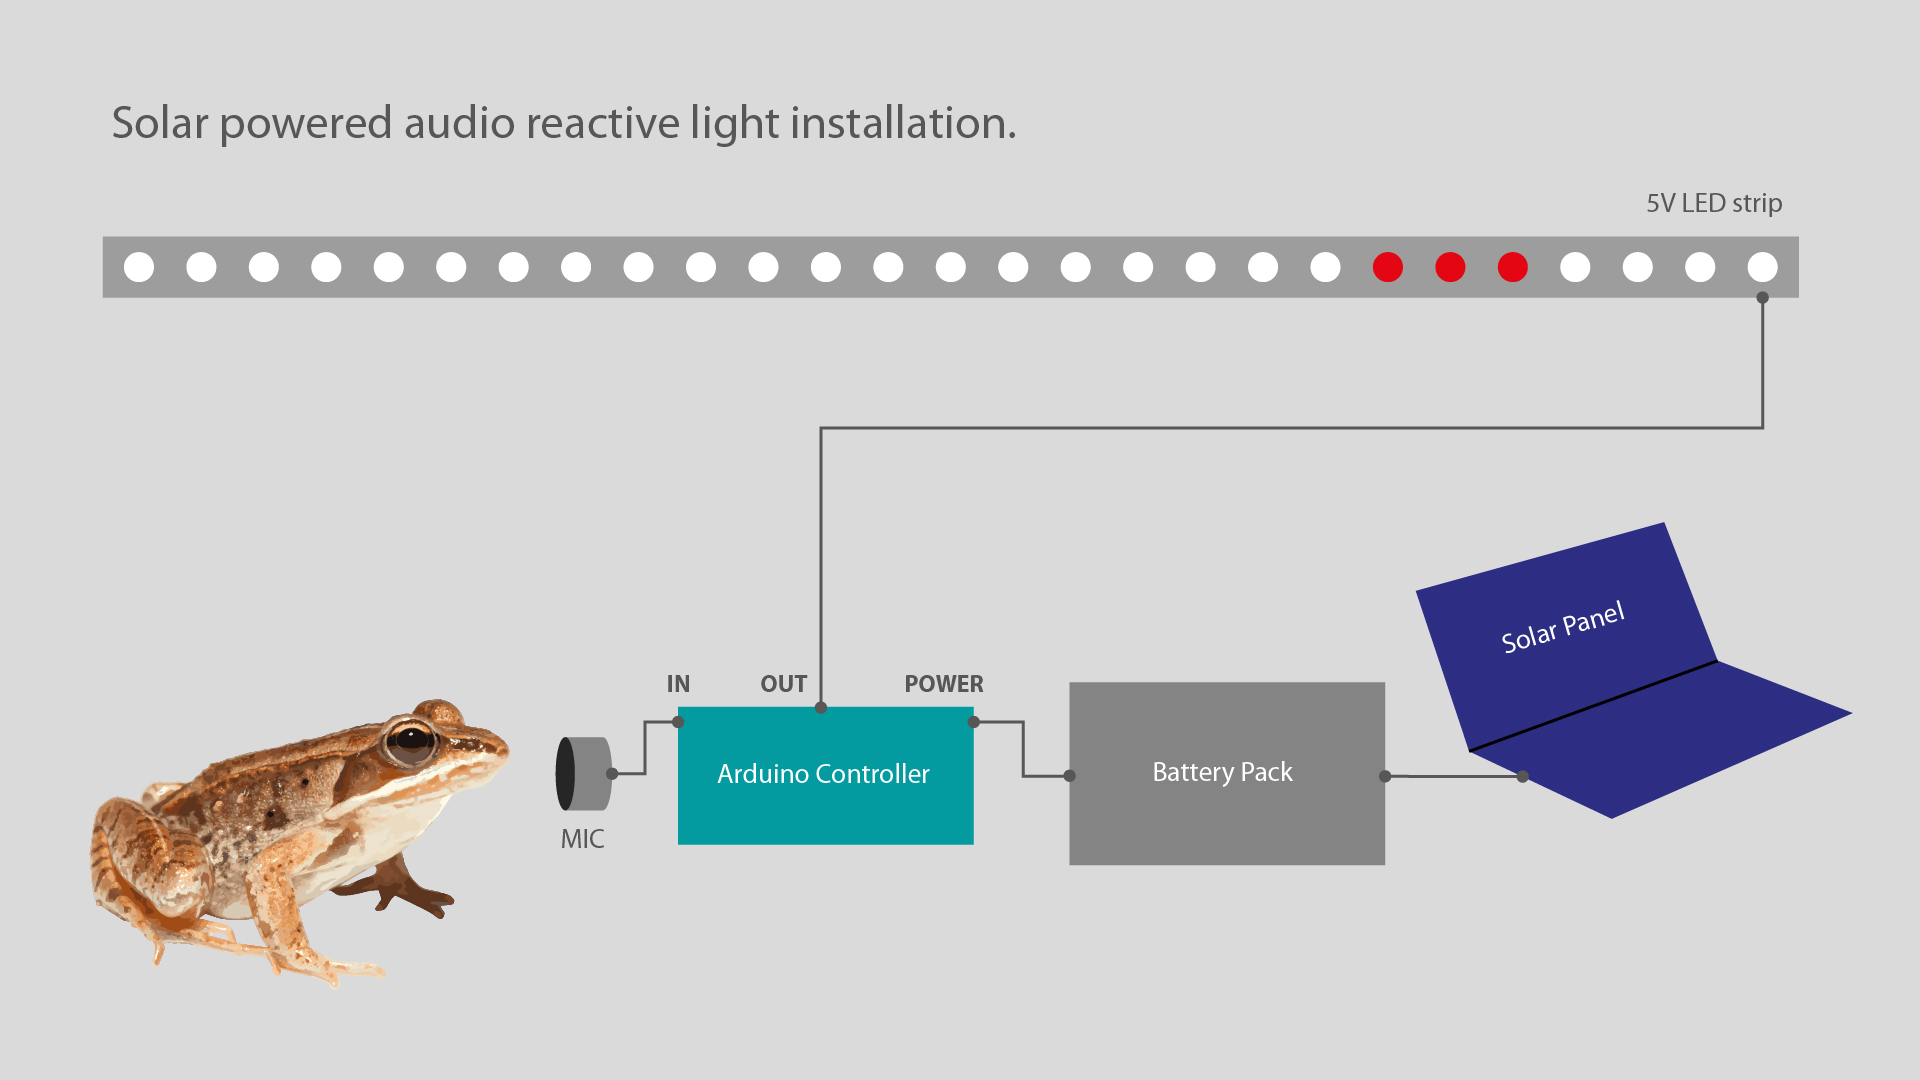
With the goal of low impact on the environment and not disturb the frog’s activity we came up with this solar-powered red LED installation. The solar power makes the system self-sufficient and the red light is known to be less perceived by frogs.
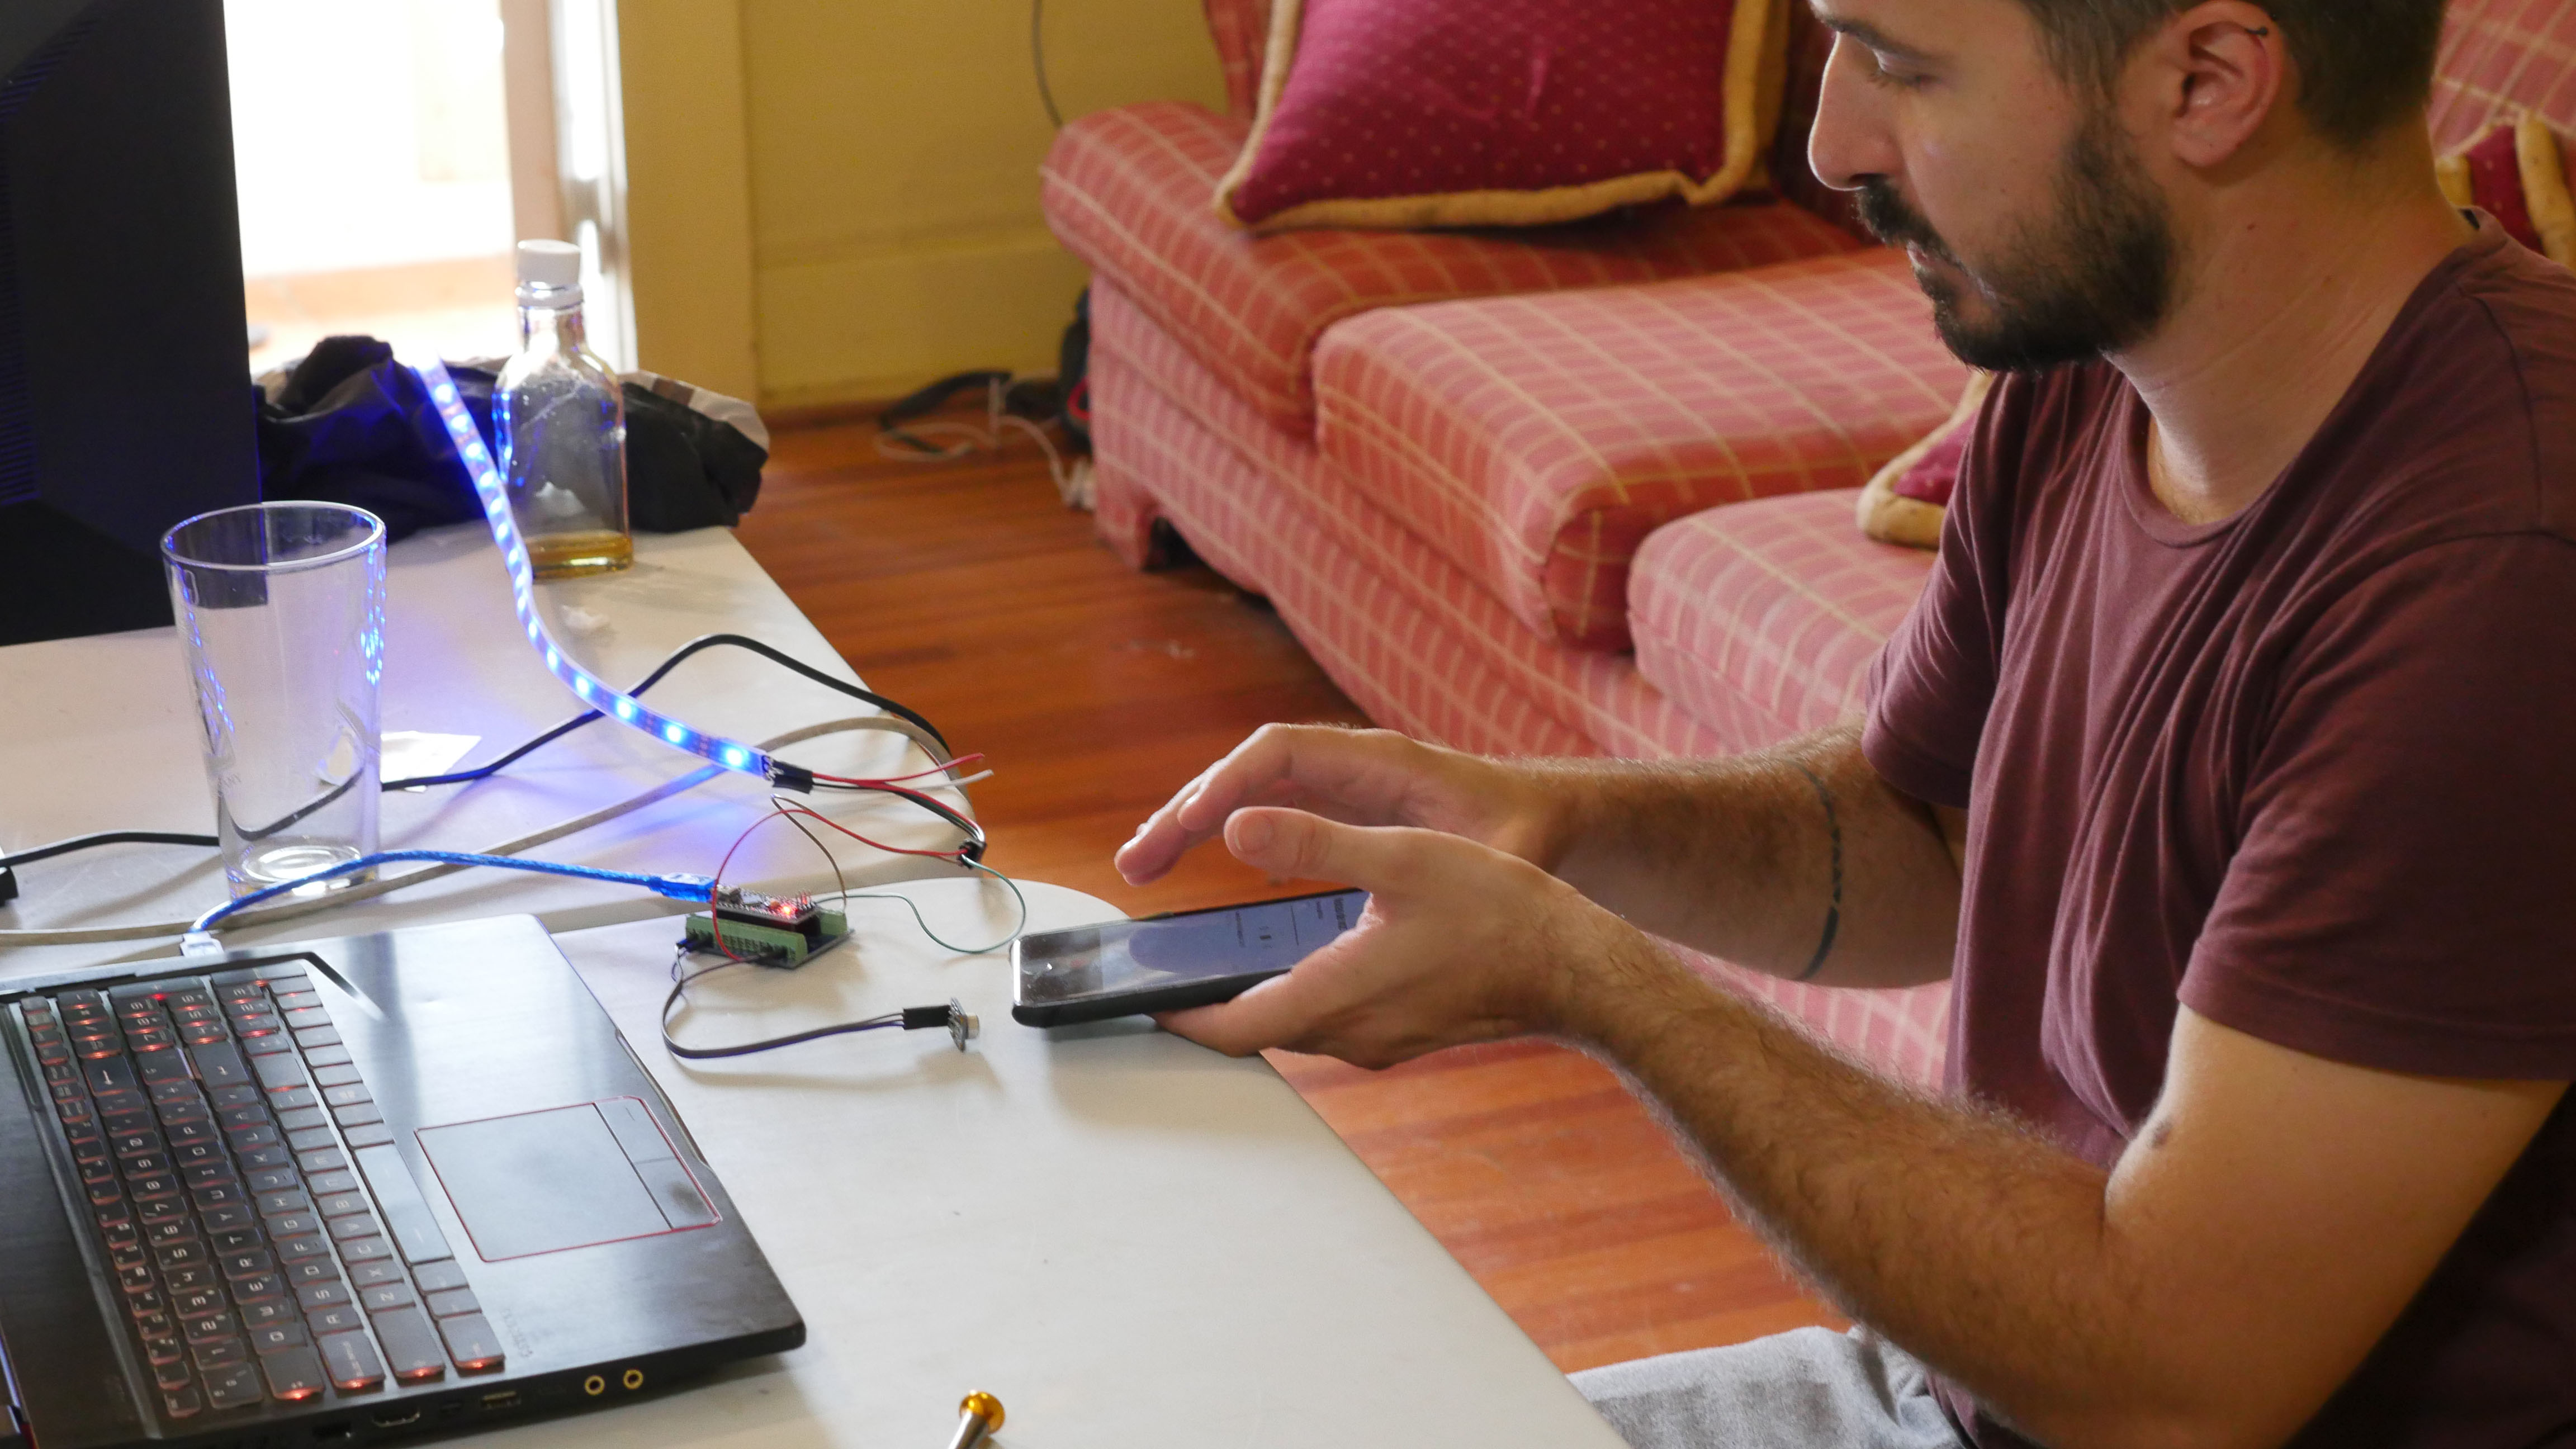
The installation relies on the following hardware: microphone, arduino board, battery pack, solar panel and LED strip.
Testing
The light effects are audio reactive and controlled through code on the arduino board. Every single frog sound triggers the LED strip depending on it’s volume.
The result is an installation that charges during daytime and activates at night with the frogs’s concert. You can read the intense activity of the animals through the light show.