Frog Show wants to elevate the singing frogs to an audiovisual experience.
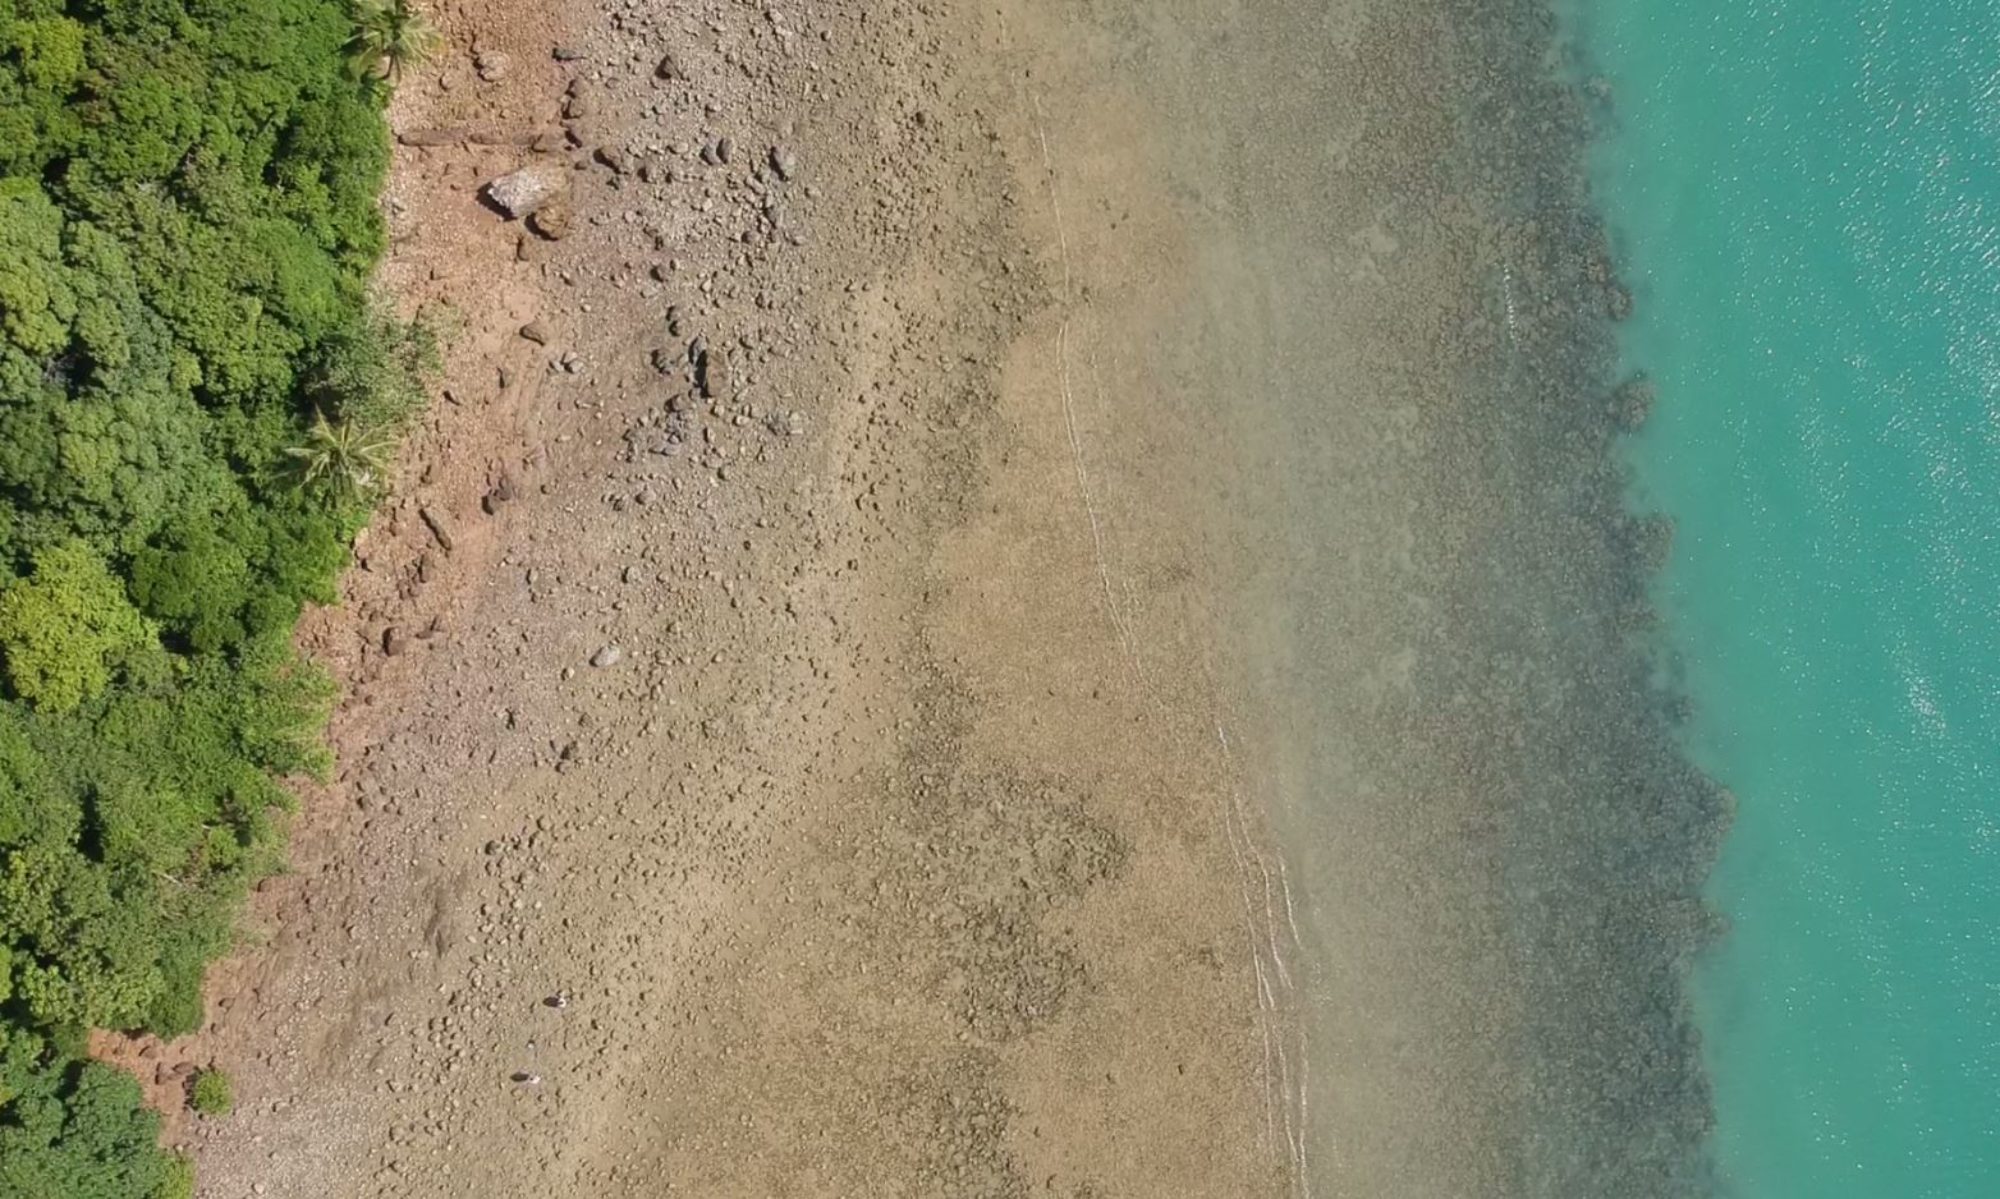
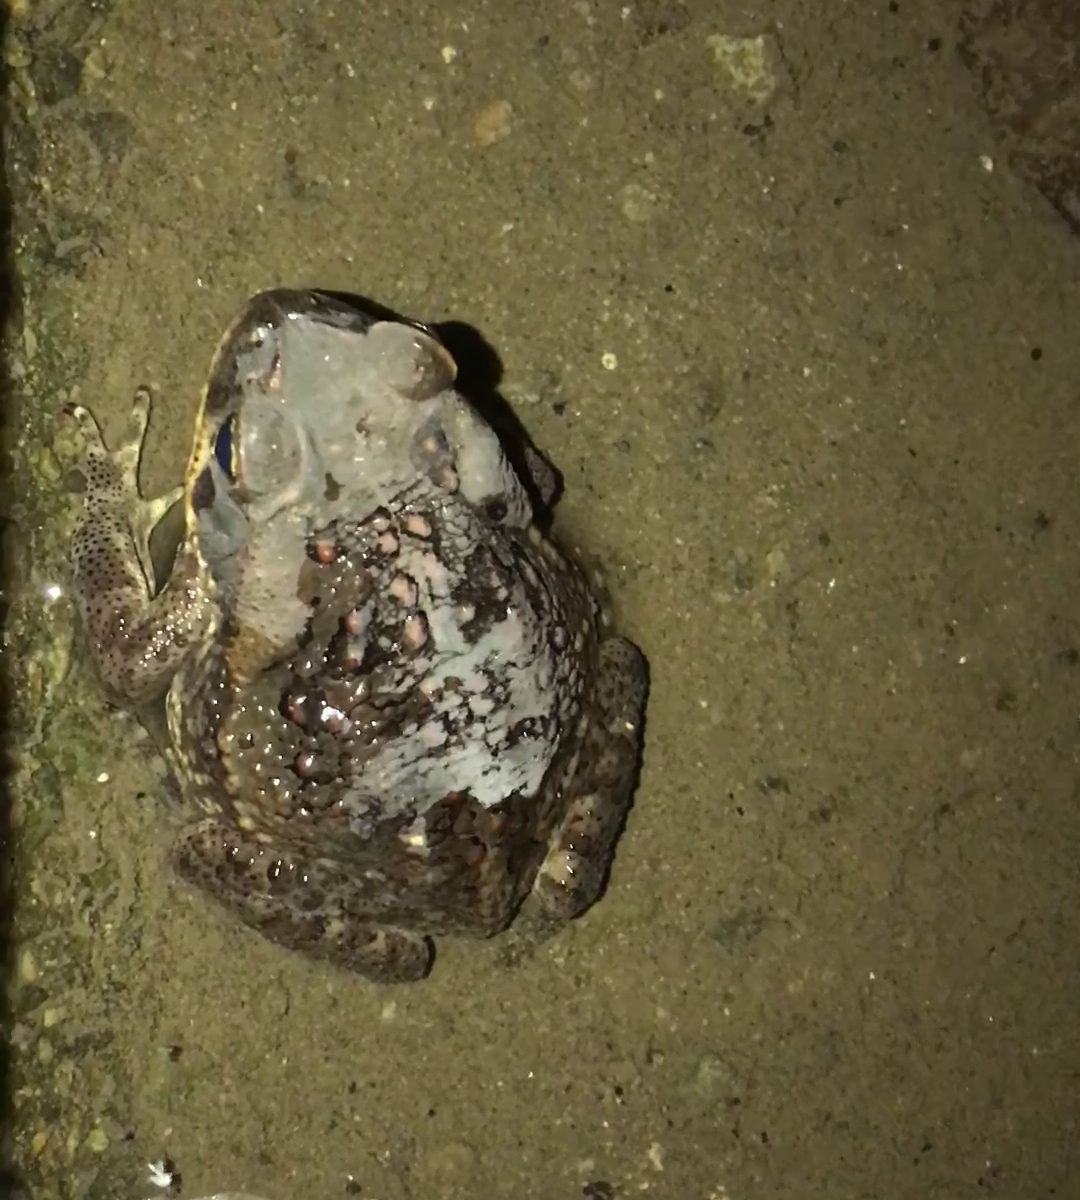
Since our arrival to Gamboa every evening we were amazed by their singing. It didn’t sound like the frogs we knew. This was more of an electronic synth-like music performance. We saw opportuniy to join the frogs and develop some visuals to add to the show.
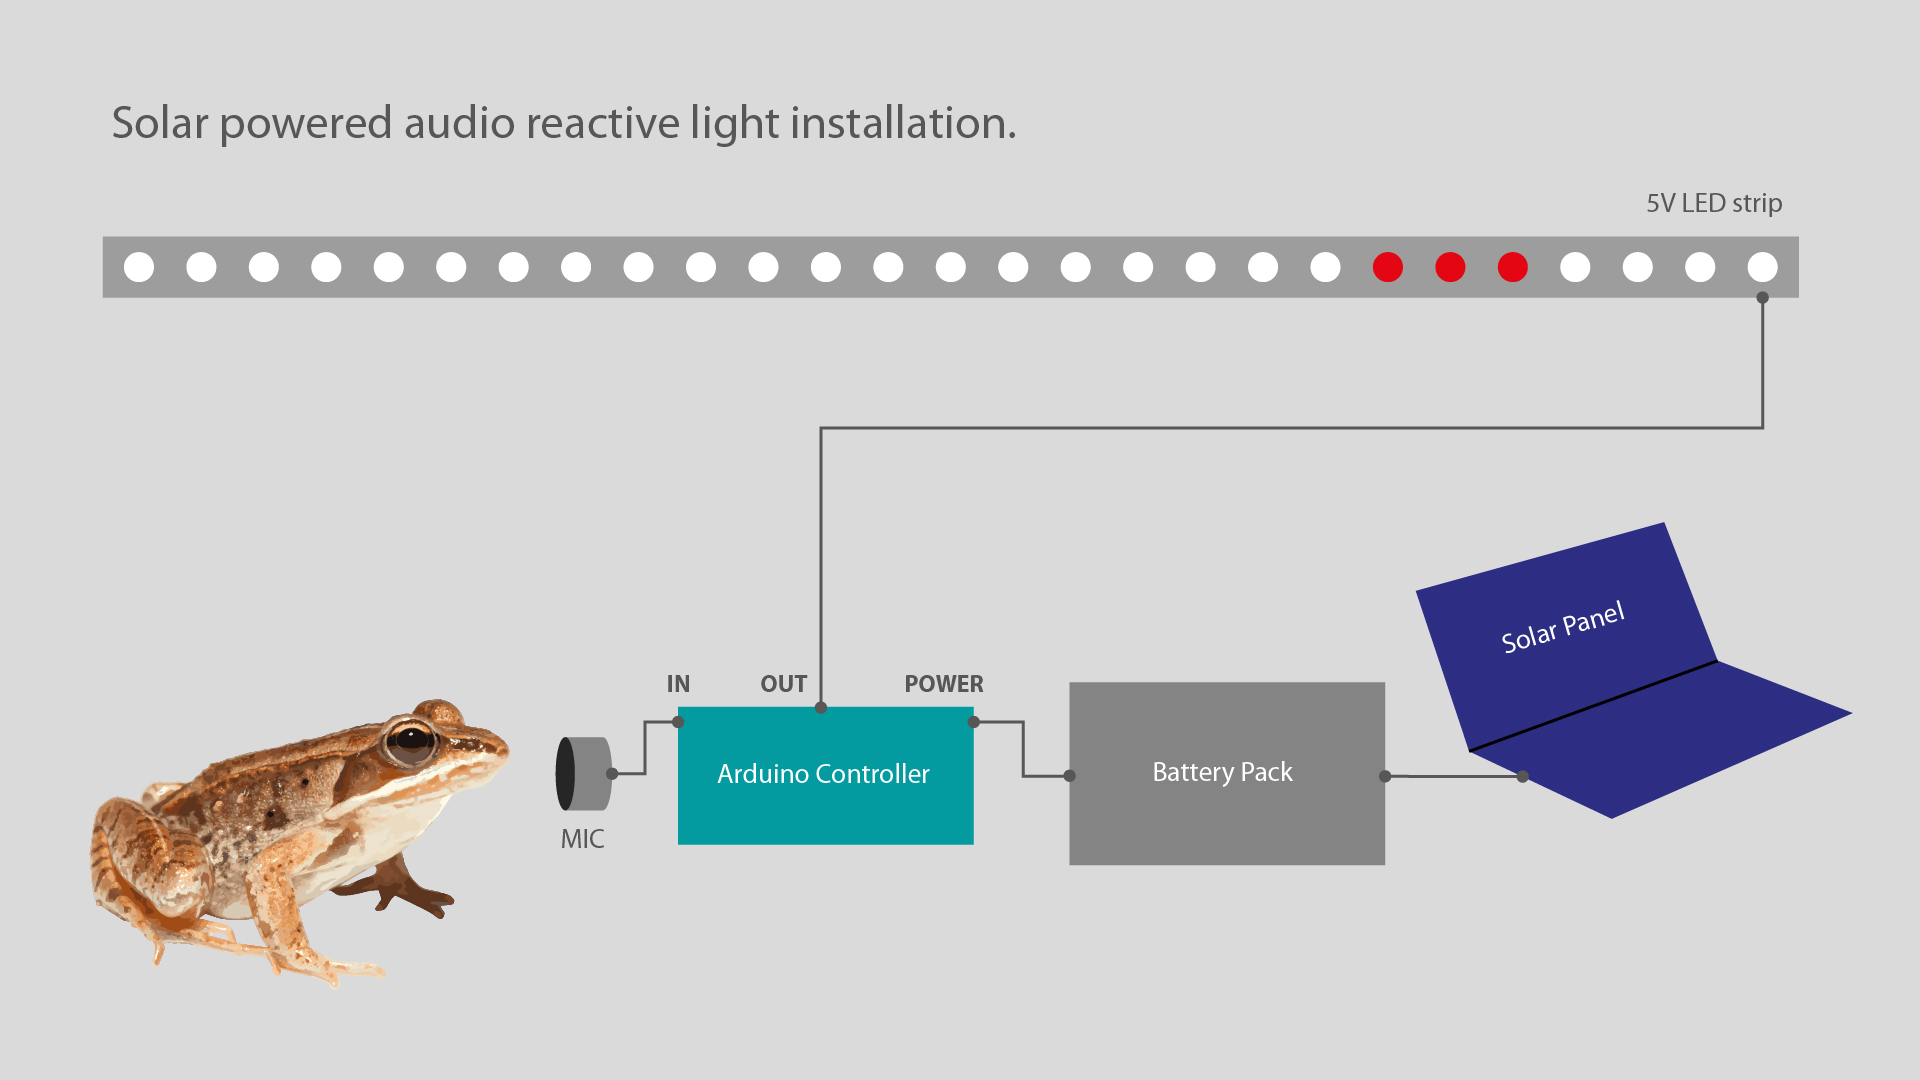
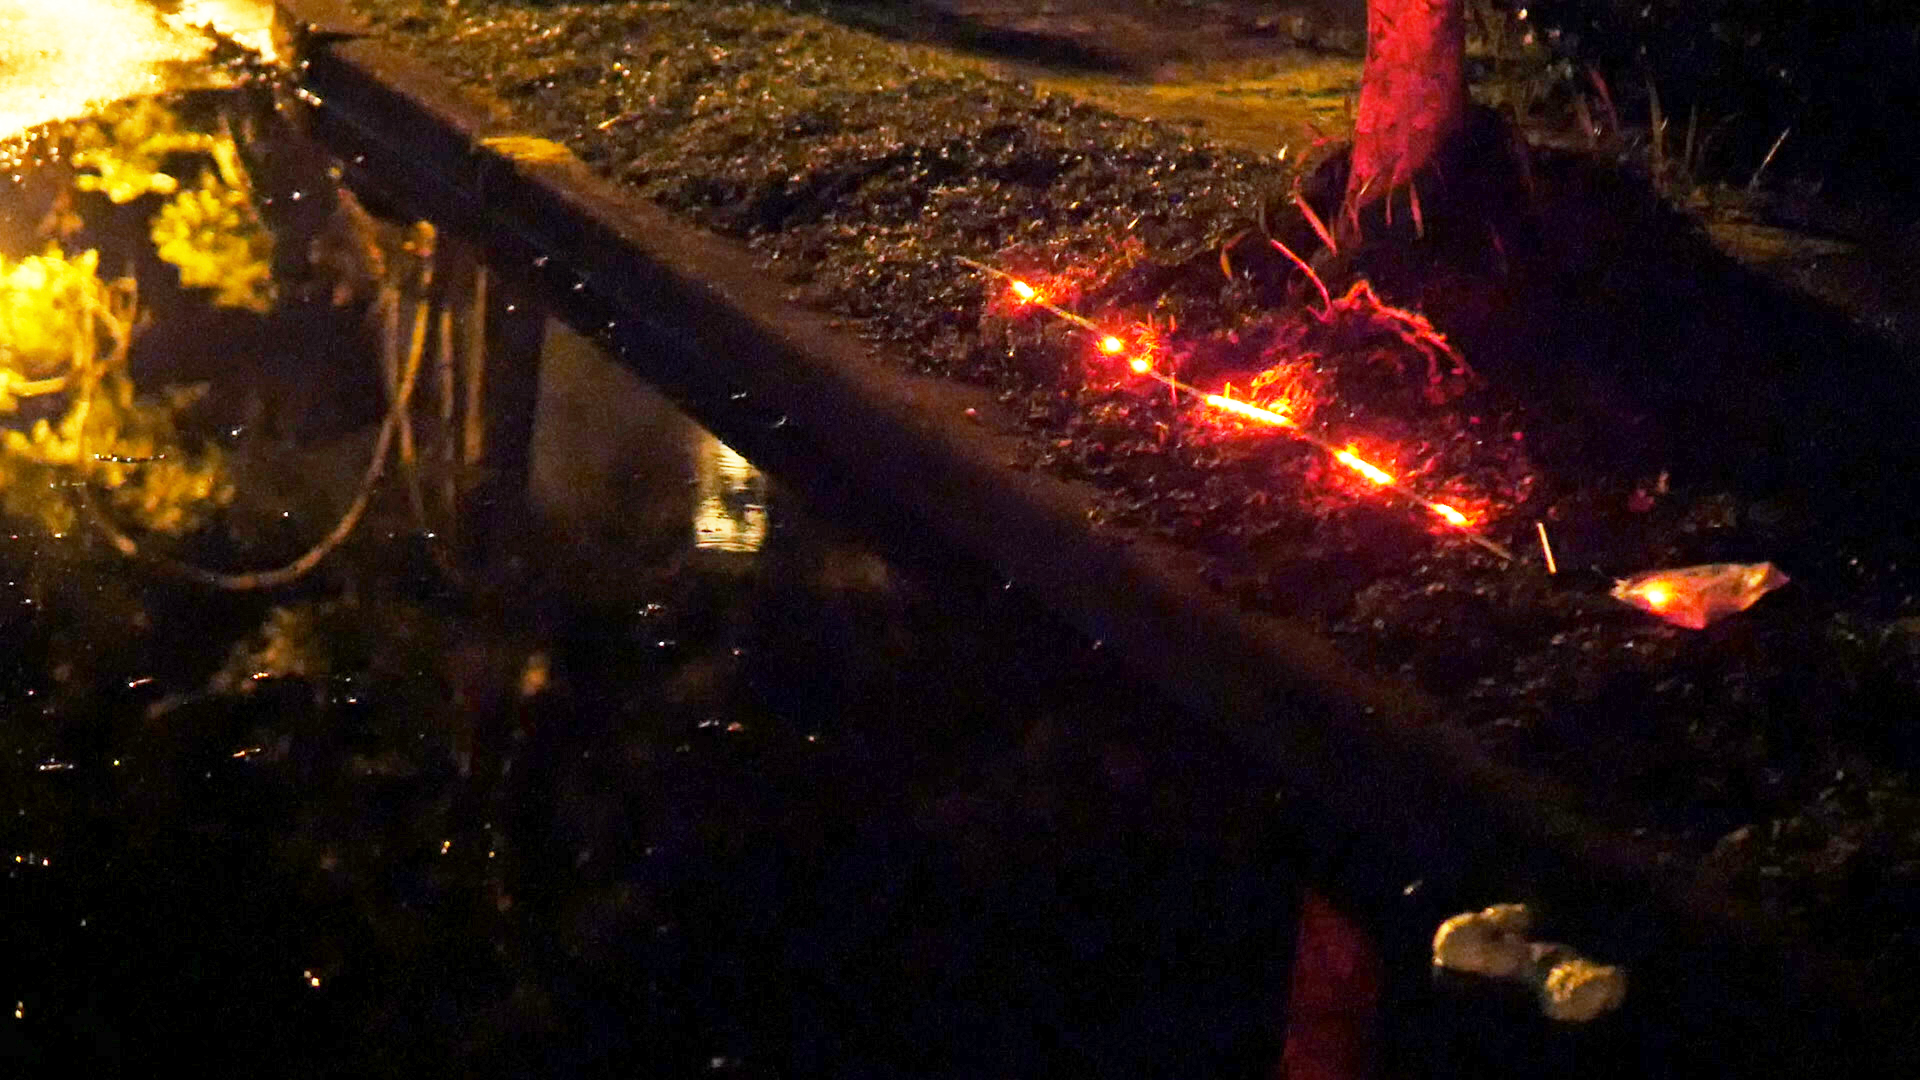
With the goal of low impact on the environment and not disturb the frog’s activity we came up with this solar-powered red LED installation. The solar power makes the system self-sufficient and the red light is known to be less perceived by frogs.
The installation relies on the following hardware: microphone, arduino board, battery pack, solar panel and LED strip.
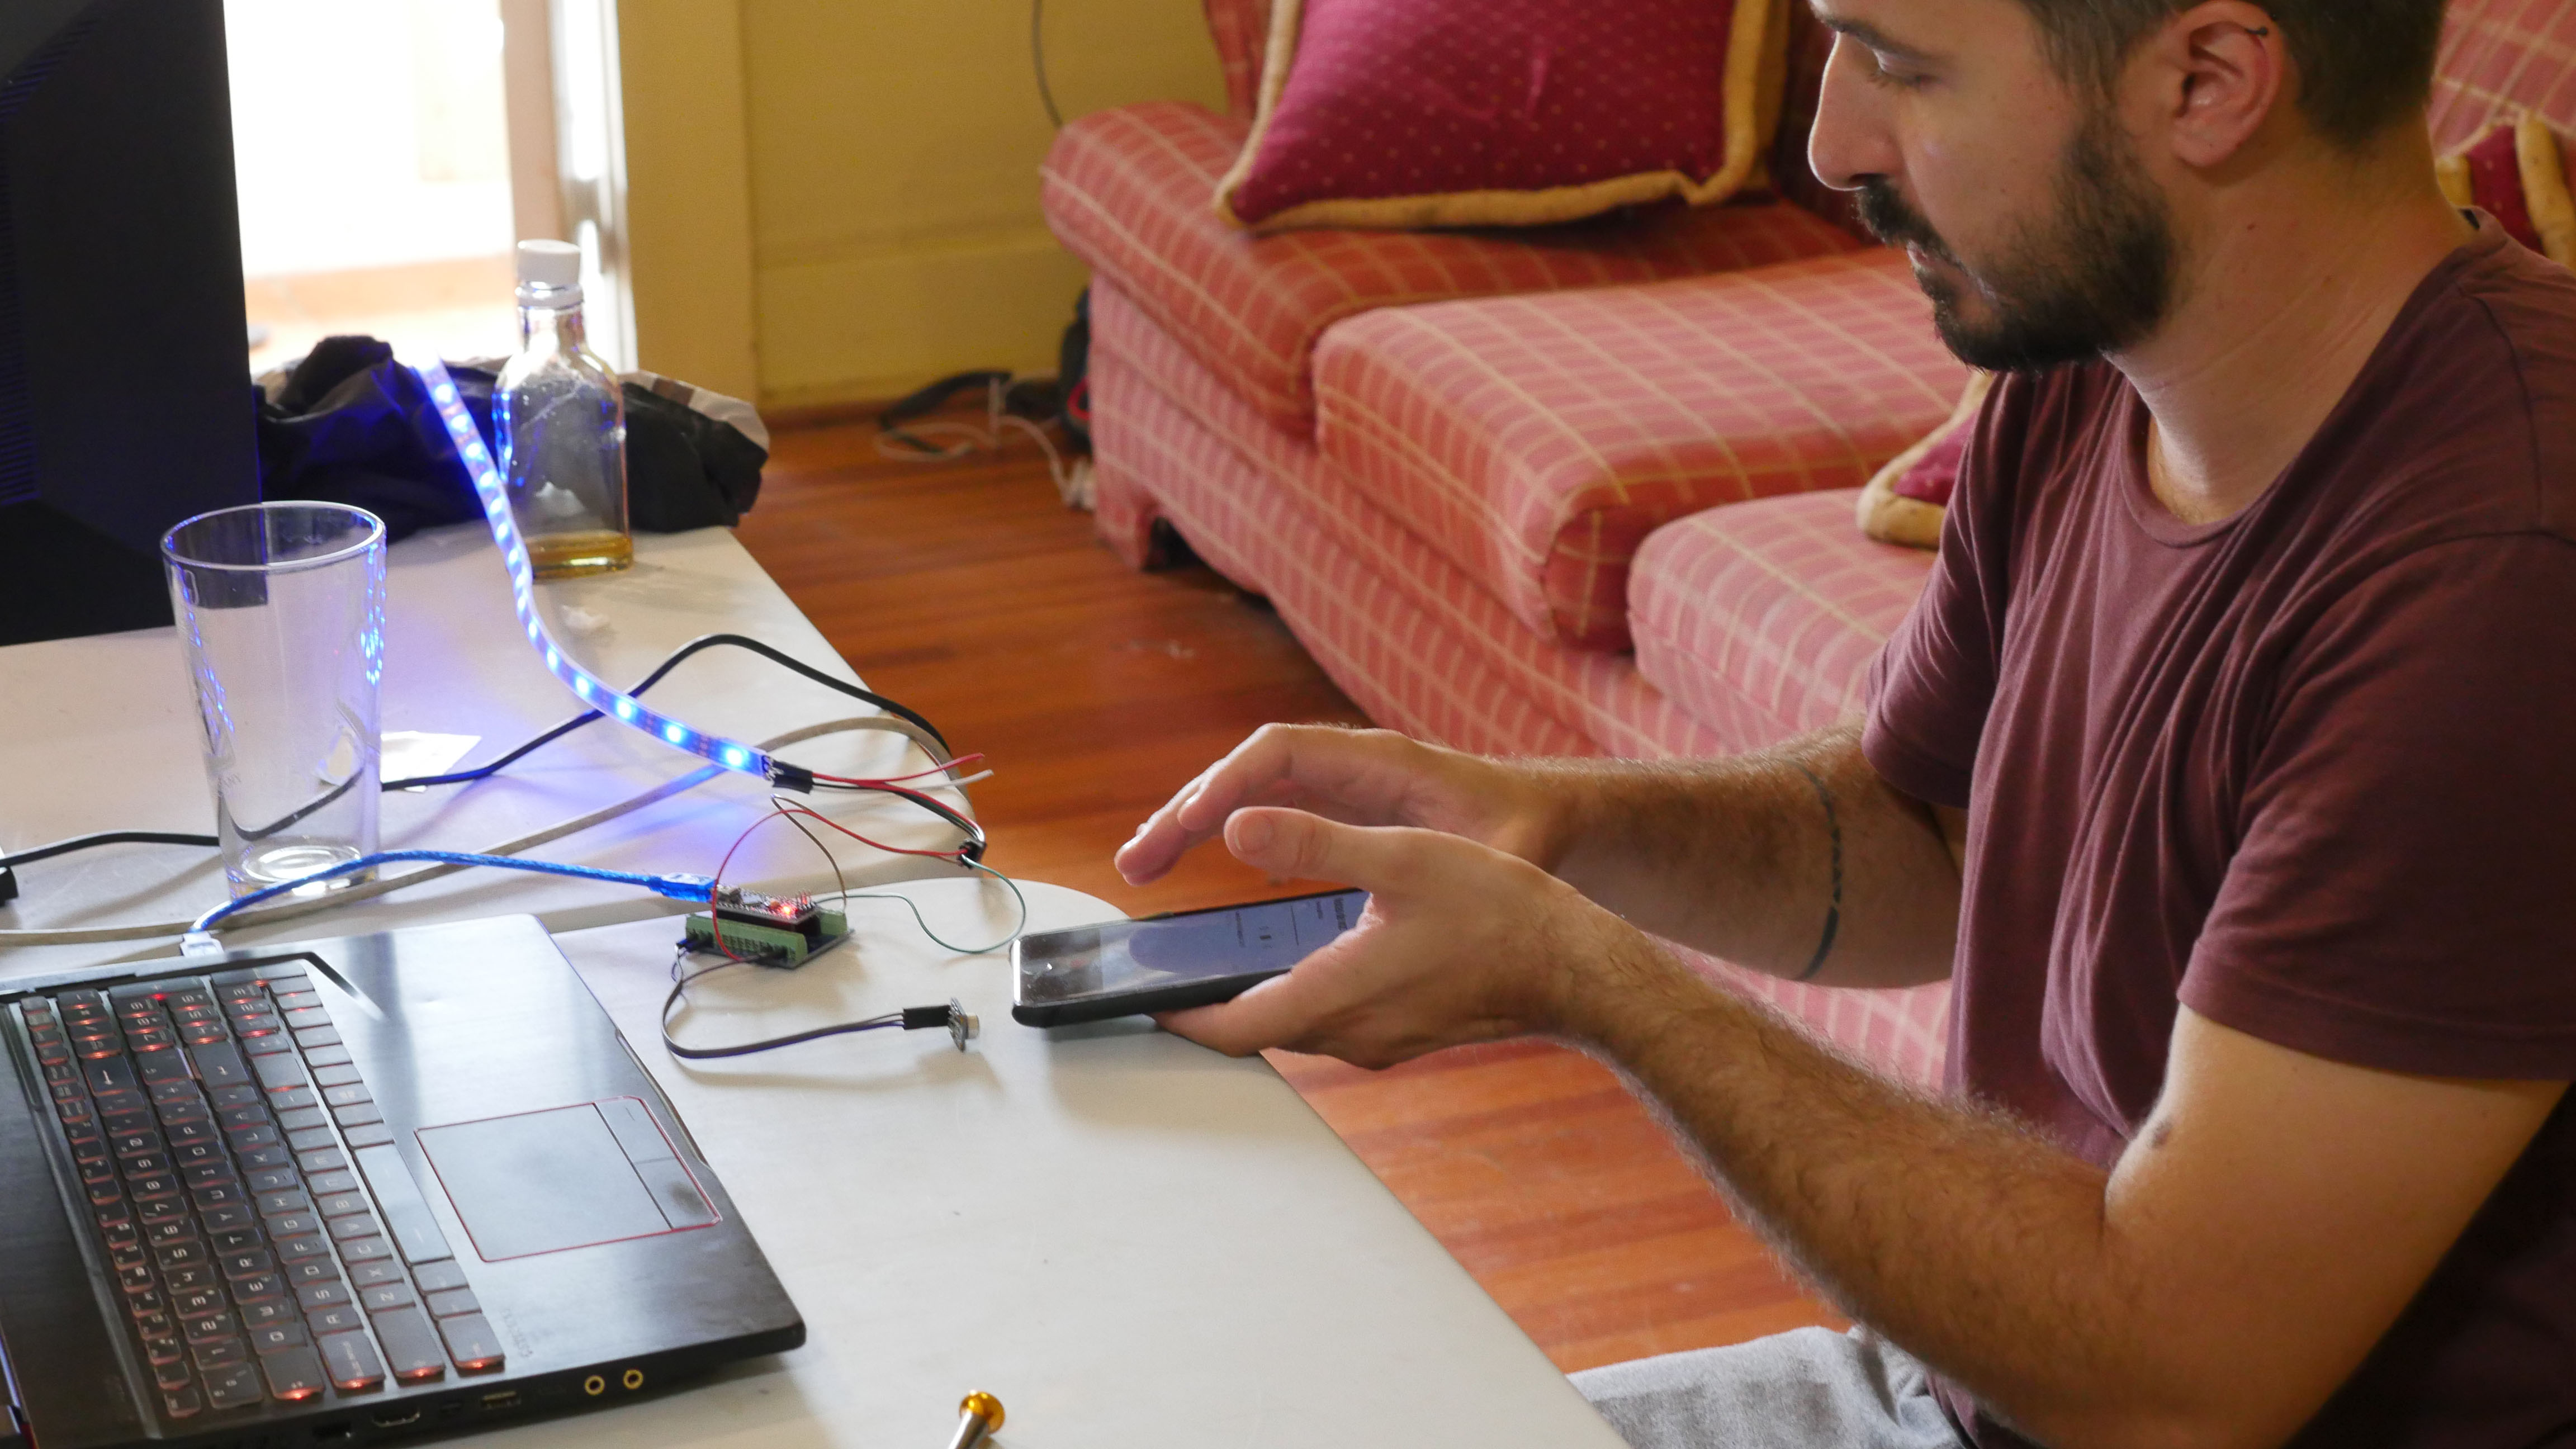
Testing
The light effects are audio reactive and controlled through code on the arduino board. Every single frog sound triggers the LED strip depending on it’s volume.
The result is an installation that charges during daytime and activates at night with the frogs’s concert. You can read the intense activity of the animals through the light show.
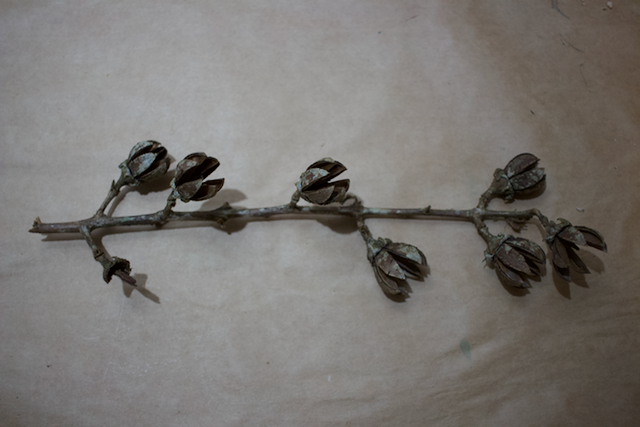
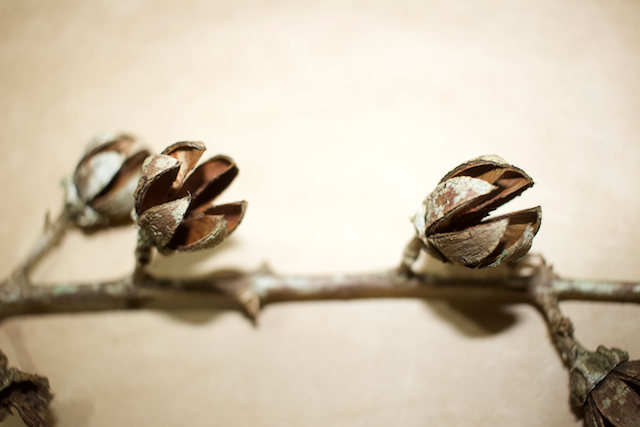
Exploring around Gamboa on trails and streets, I became fascinated with these flower-shaped seedpods. They appear as woody flowers, nearly blooming to release their inner fruit, and then expanding greater as they dry. This seedpod stalk was the first jungle object that I picked up as debris in the streets of Gamboa, and served as my first inspiration for a basic bio-hacking LED light project. What follows is a quick and easy tutorial for a basic natural object bio-augmentation project. This can serve as a simple lesson plan to explore bio-hacking to merge technology with natural objects and the directionality of LEDs.
Personal Process
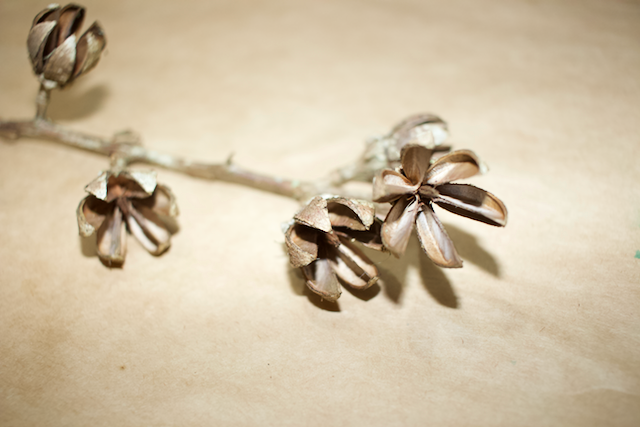
Decorative Light: Personally, I explored various ways to rig this seedpod stalk as a full LED light that could decorate a space as a hanging decorative light. For this, I experimented with various conductive materials provided by Dinalab, including conductive thread and copper tape. I hoped to use a conductive wiring material that would either blend in to the seedpod stalk, or add aesthetic detail in the form of an attractive color or form. I did not settle on a favorite method for this full-stalk augmentation, and encourage others to pick up this process to explore different modes of creating a lamp with many seed pods!
Tactile Engagement: I also explored various interaction designs using LEDs to inspire tactile and up-close exploration of this seedpod I found to have such a fascinating shape and process of opening. In this exploration, I used LEDs activated by a DIY button where squeeze intensity and location determined which LED would light, and LED brightness. These LEDs and the tactile button control were meant to encourage a viewer to pick up the seedpod stalk, and explore both its structure and LED light augmentation as a way to encourage close observation of a natural structure.
Tactile exploration of bio-augmented LED seedpods, including fun Dinacon atmosphere of giggles and sharing work with an inspiring peer!
Project Tutorial: Quick educational lesson plan to explore bio-augmentation and LED basics!
Overview
In this quick tutorial, we explore a basic bio-augmentation project of adding an LED to a dried seedpod in order to make a quick and easy light. This project highlights the directionality of LEDs, and explores how technology and nature can merge to create new and innovative forms based on personal interest and exploration of natural objects.
Materials
Seedpod!
LED
5V coin cell battery
Description
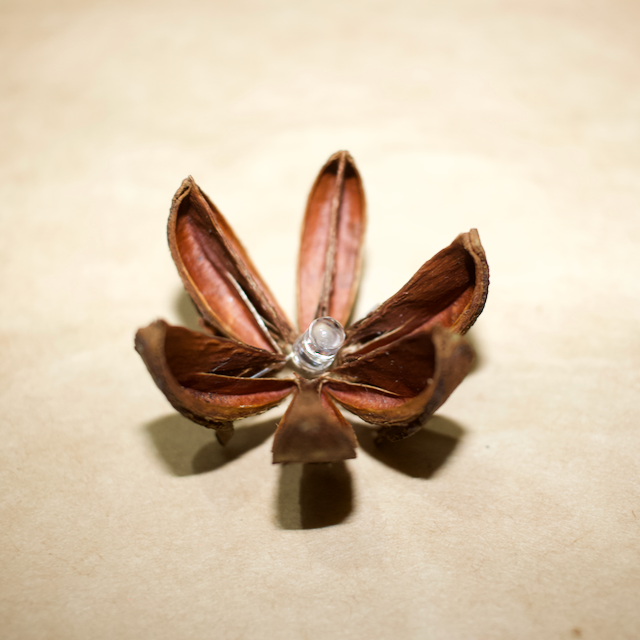
The miraculous element of this project is how perfectly the base of one of these fully opened seedpods fits a standard 5V coin cell battery. This served as inspiration for this project, and allows the little LED product to be a compact and pretty sturdy unit!
Basics of LEDs: LED stands for “light-emitting diode.” A diode is a semiconductor device which only conducts electricity in one direction. An LED is a particular type of diode that emits light when current passes through it, in the positive to negative direction. On a basic LED, you can tell which side is positive for wiring because the positive prong is longer.
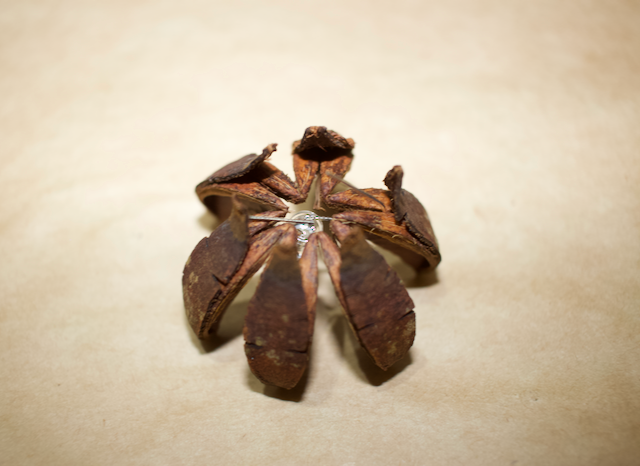
To fashion your own seedpod light, first note which side of your LED is positive (longer wire) and which side is negative (shorter wire). Then, extend the prongs of your LED horizontally, and carefully place your LED into the center of your seedpod. Position the LED prongs as close to the base of the pod as possible, and between “petals” of the pod. To secure your LED in your seedpod, carefully bend the prongs of your LED down with tension, which will secure your LED in your seed pod.
LED positioned in the middle of the seedpod, like the center of a flower. LED prongs are positioned through the gaps in the seedpod “petals,” and bent downward to secure the LED in the center of the pod.
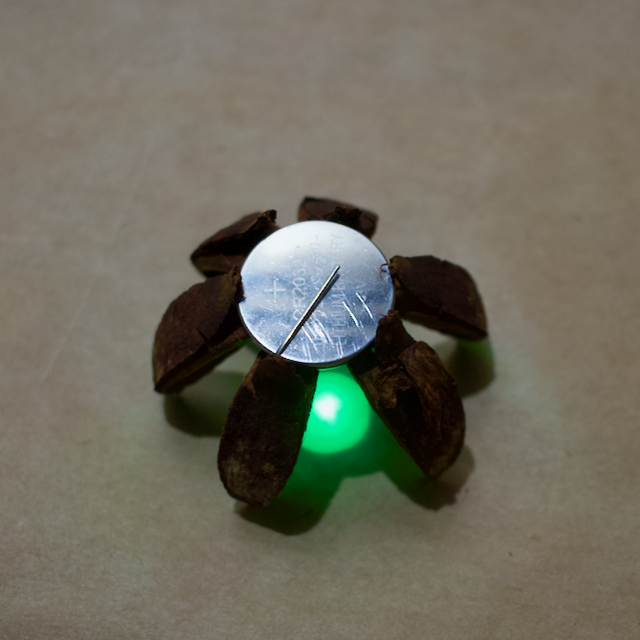
From here, bend your LED prongs. Bend the negative prong to lay horizontally across the back of your pod, as close to the base as possible. Then, bend your positive prong above this, but leave slightly more space from the back of the seedpod. Make sure the positive and negative prongs are not touching, as this will short-circuit your LED.
Negative prong is bent level with the seedpod base, very close to the surface (left wire). Positive prong is bent slightly above the surface (right wire, above).
This little pocket between LED wires forms the fixture for your coin cell battery! Place your 5V coin cell battery face up (positive side up), and secure by clamping down the positive LED prong over the battery. Keep bending until the battery is snugly secured in the seedpod, and firmly contacting the negative LED prong.
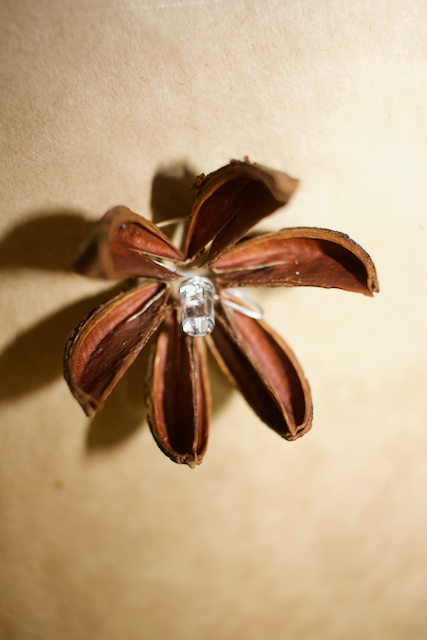
Your LED should now be lit, leaving you with a completed little bio-augmented seedpod light! Make as many as you want, now that you know the basics of LED directionality and can experiment beyond with bio-augmentation.
Finished LED seedpod light
Feedback
Feel free to reach out with any feedback or interest. Thanks!