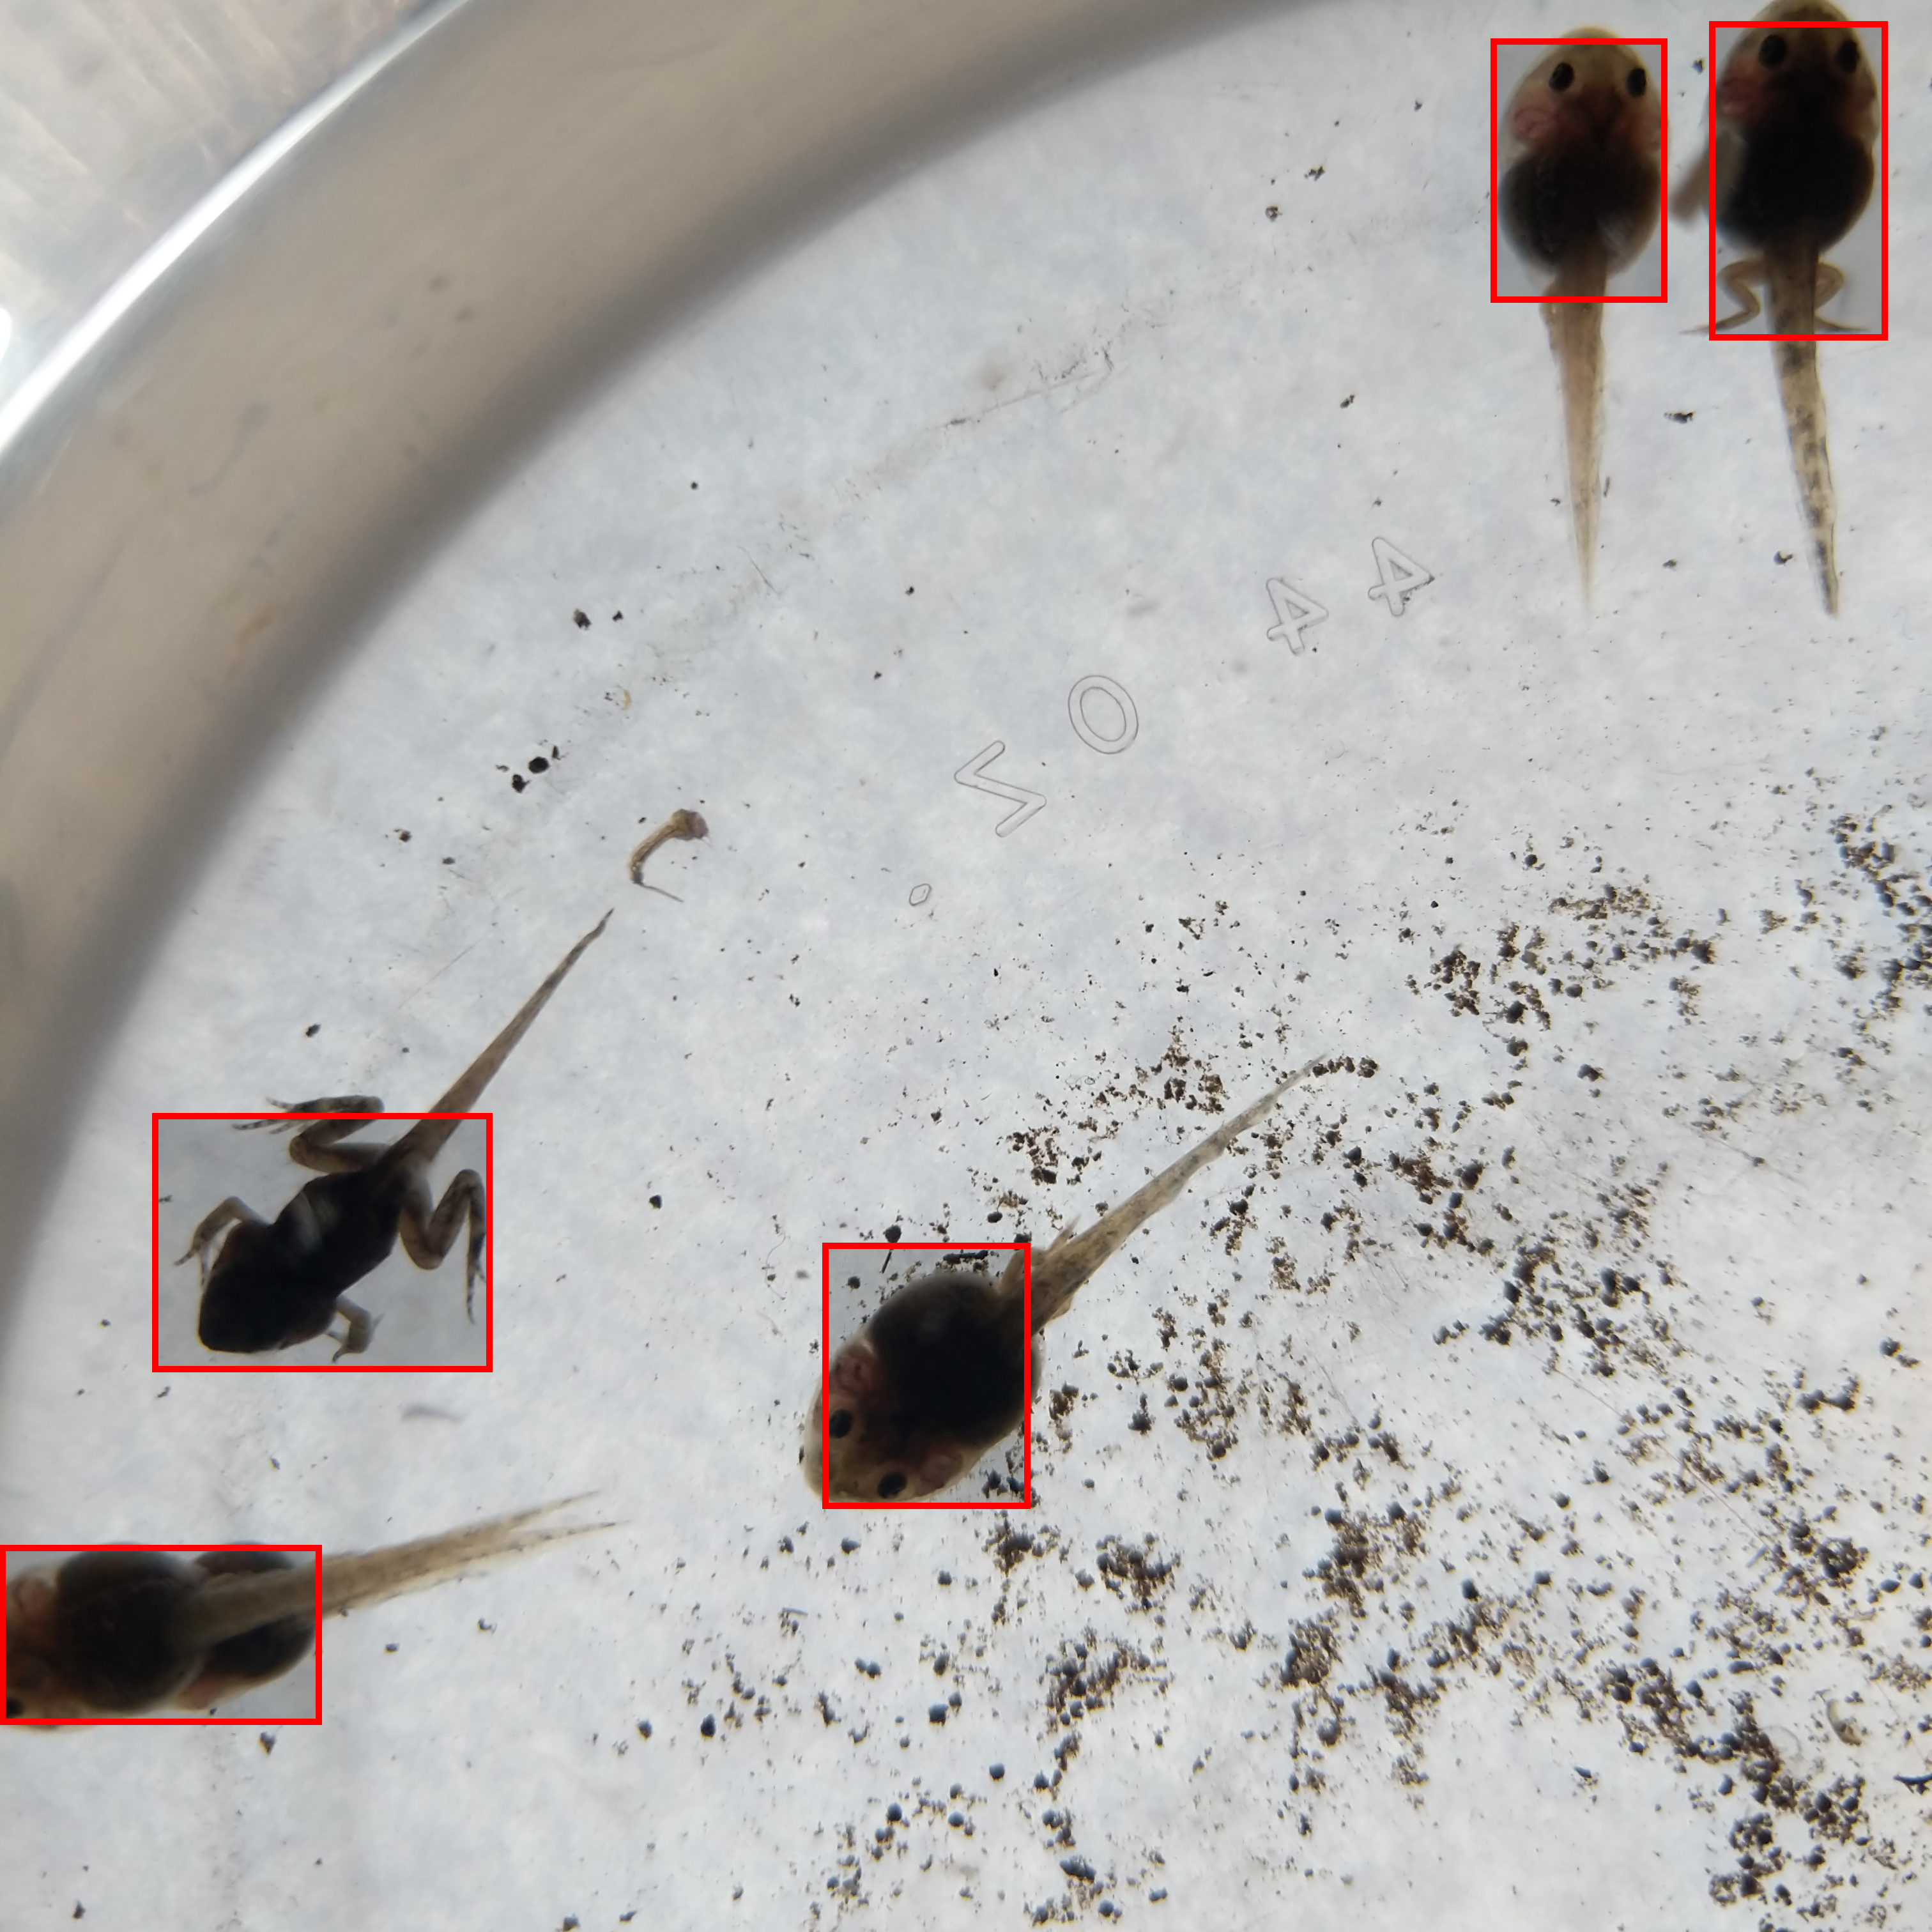
Tadpole Soundscapes of Gamboa is a generative soundscape made in collaboration with wildlife of Gamboa. The audio is generated via Processing through a live webcam feed of tadpoles. Recordings are compiled from various artists to create a unique soundscape based on the movement and patterns of the observed tadpoles. As the tadpoles move and evolve, so does the soundscape.
Recordings featured by: Peter Marting, Michael Ang, Lee Wilkins.
Ann Gerondelis, Drexel University Raja Schaar, Drexel University
Project created for the Digital Naturalism Conference, 2019 Gamboa, Panama
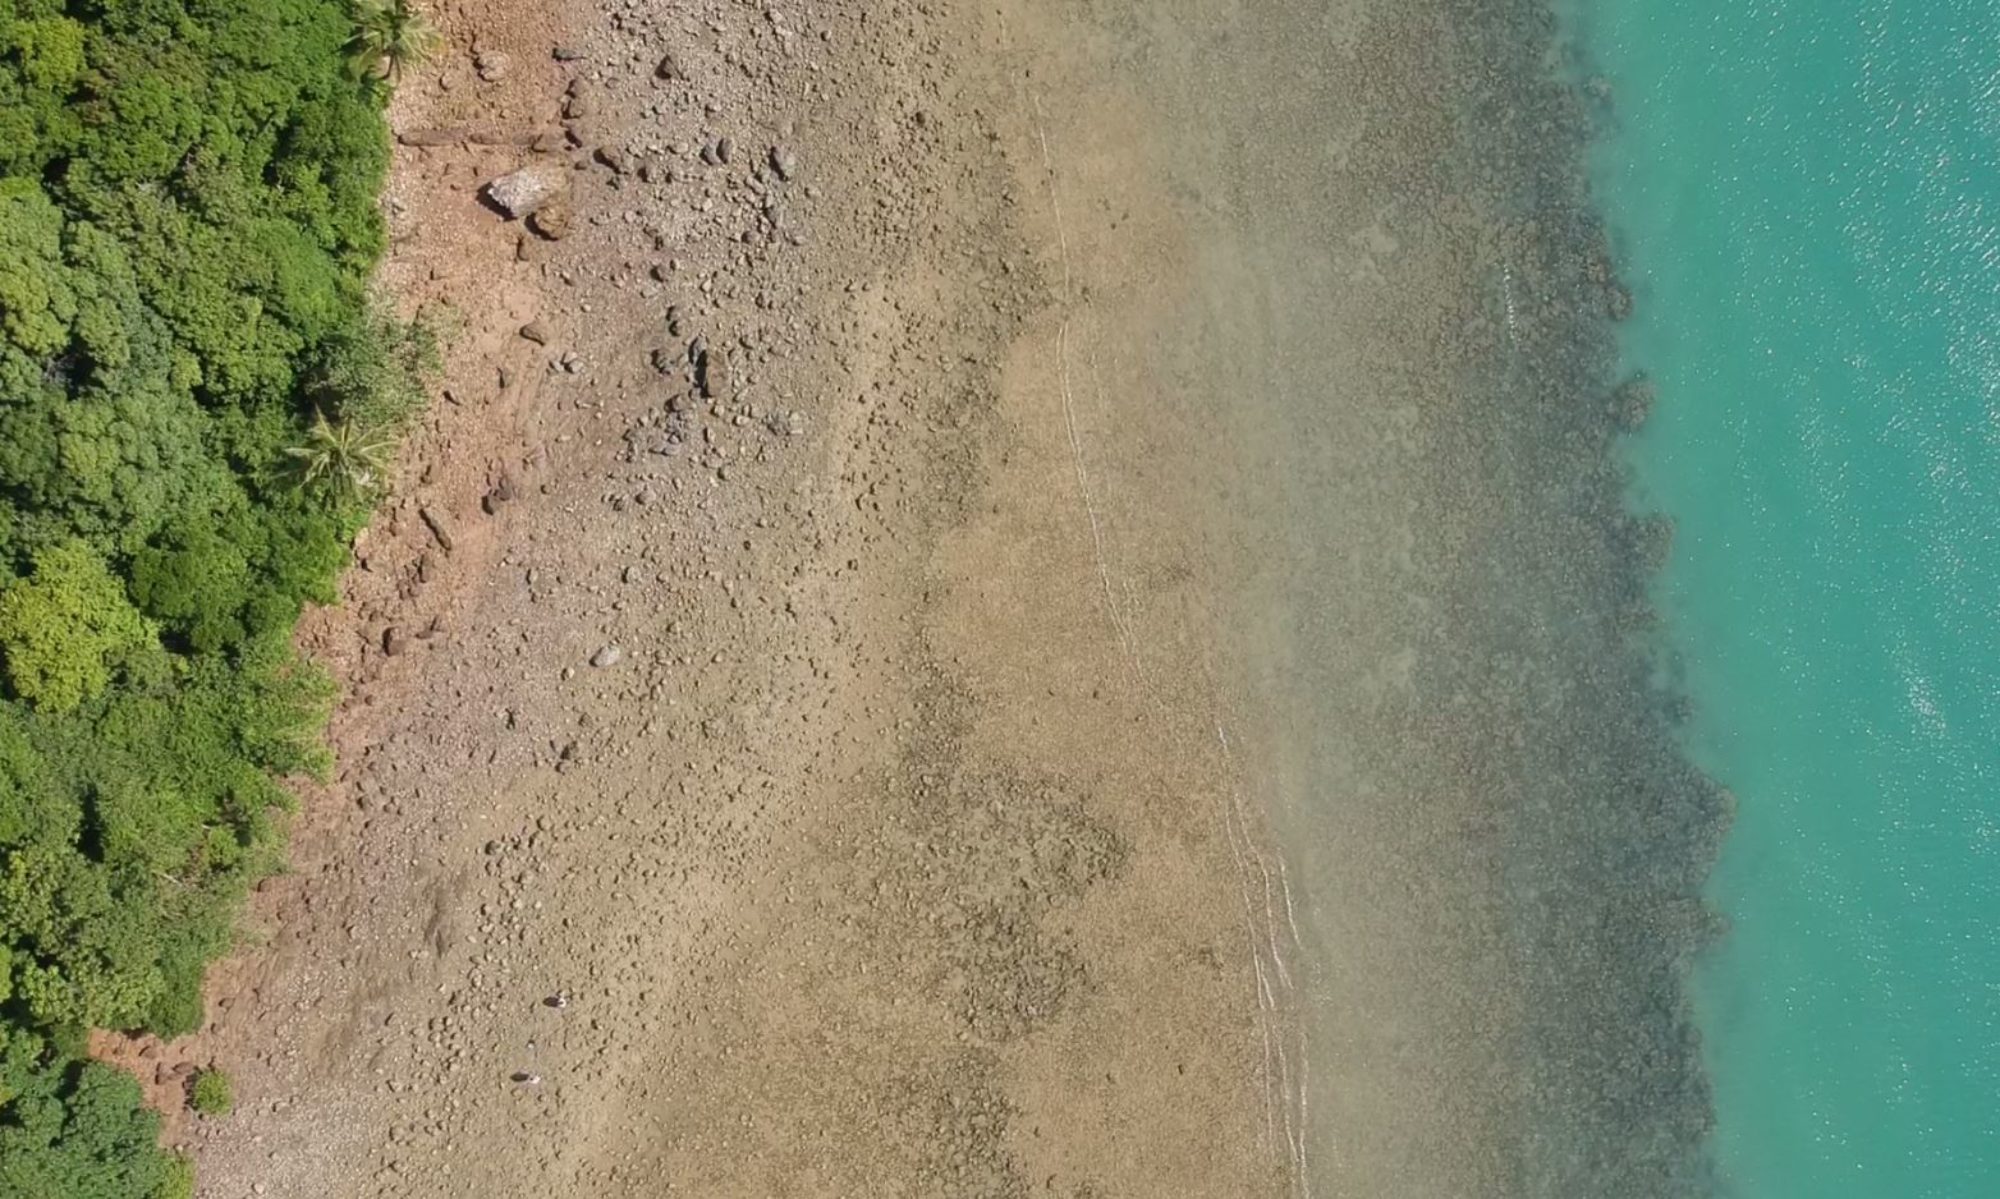
Walking around Gamboa it’s hard not to be mesmerized by the superhighways of ants recognizable by large distinct paths of wobbly leaves.
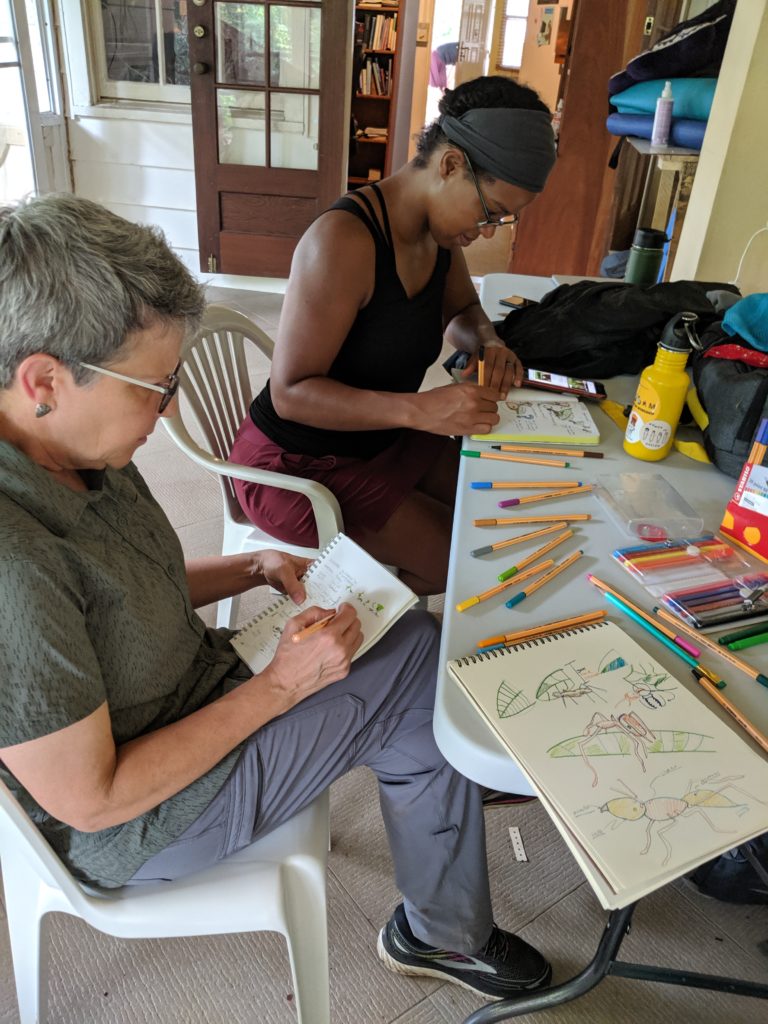
Our team dove into observational research, expert knowledge, internet findings, and one amazing book found at the field research station to find out more about these mesmerizing creatures.
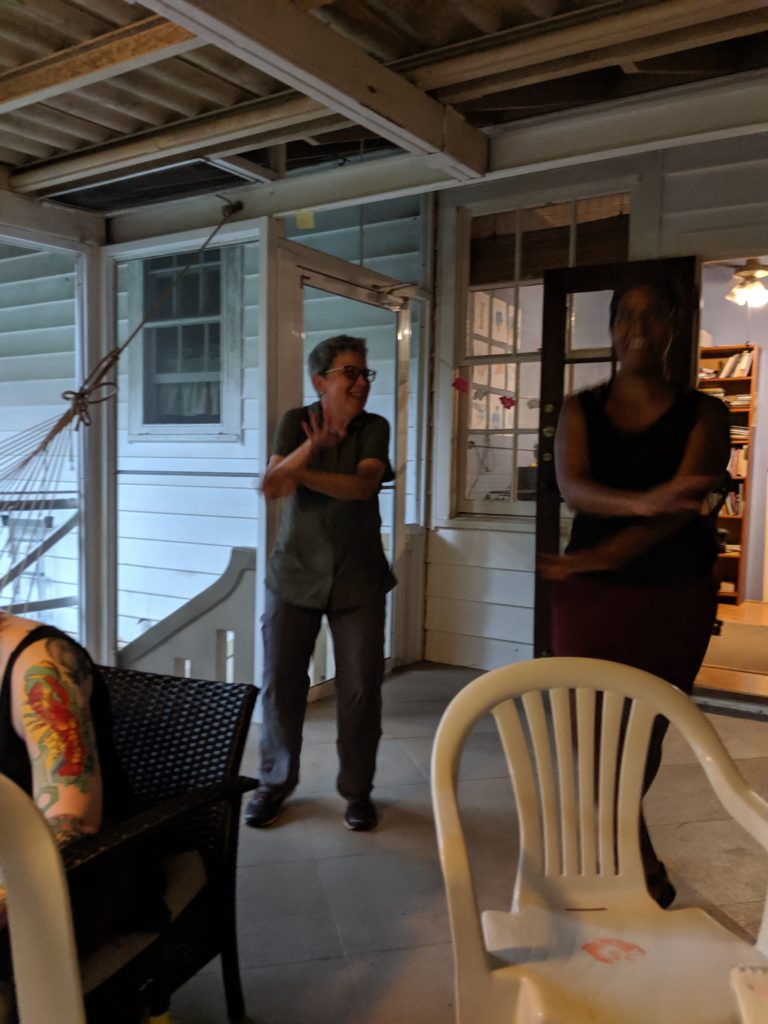
Getting swole like an ant?
A fitness app for digital naturalists and folks who think Leaf Cutter Ants are superfit superorganisms.
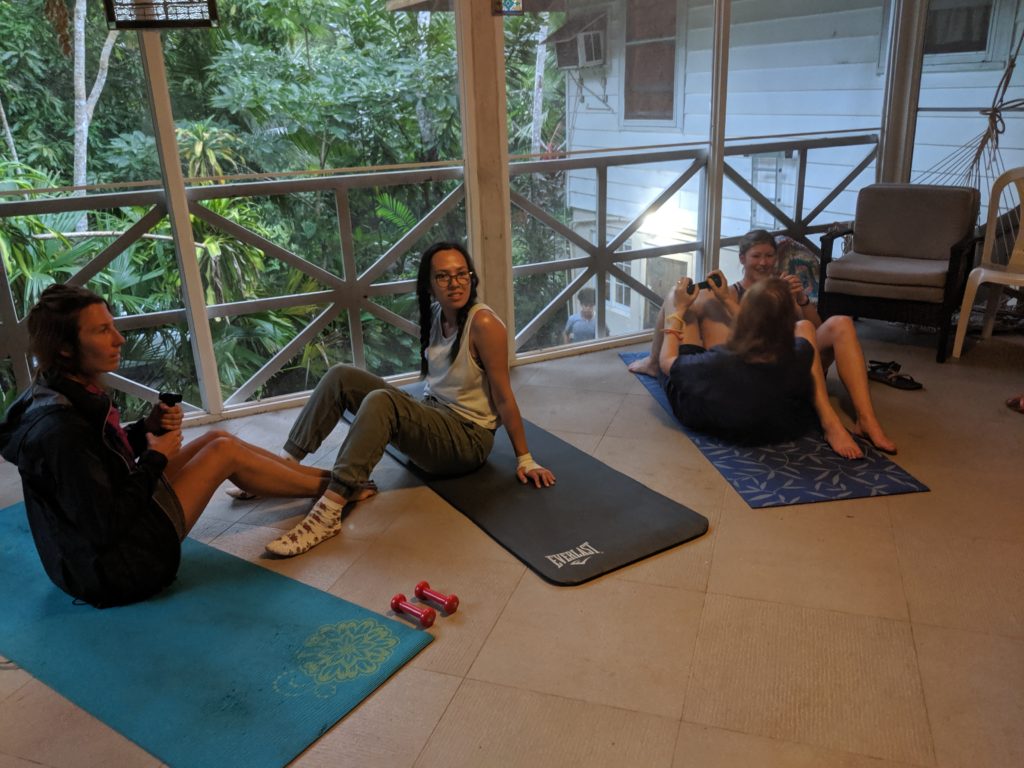
This short workout invites you to be the ant, strengthen your body, and learn about ants’ intimate relationship with mother earth.
Process
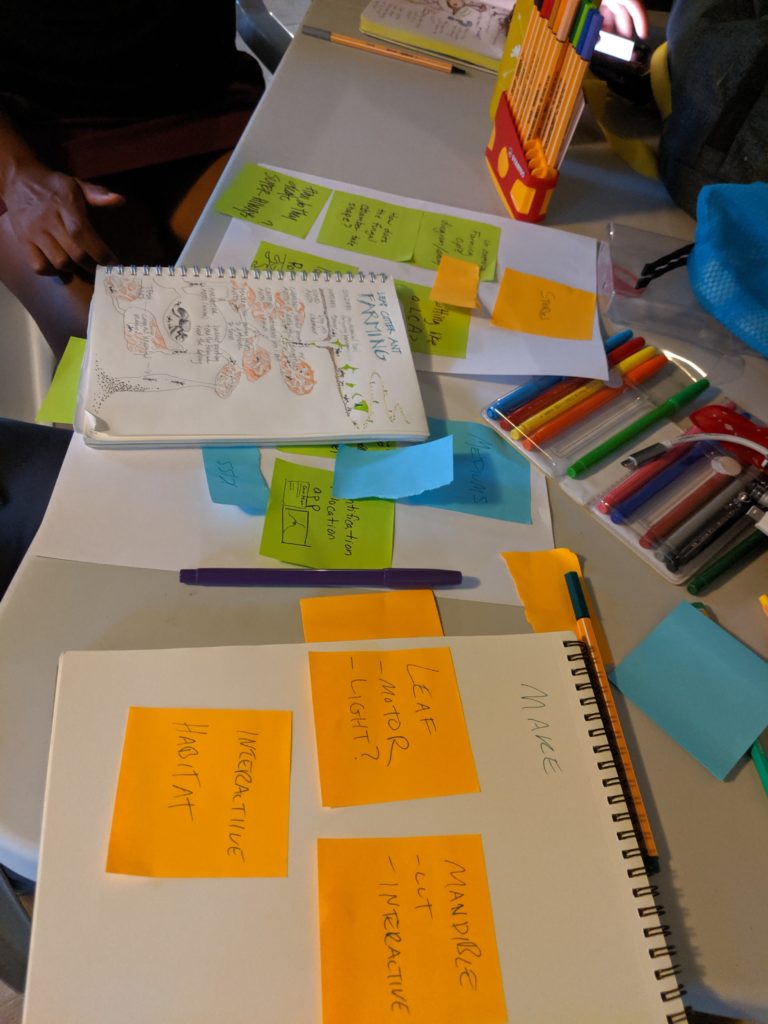
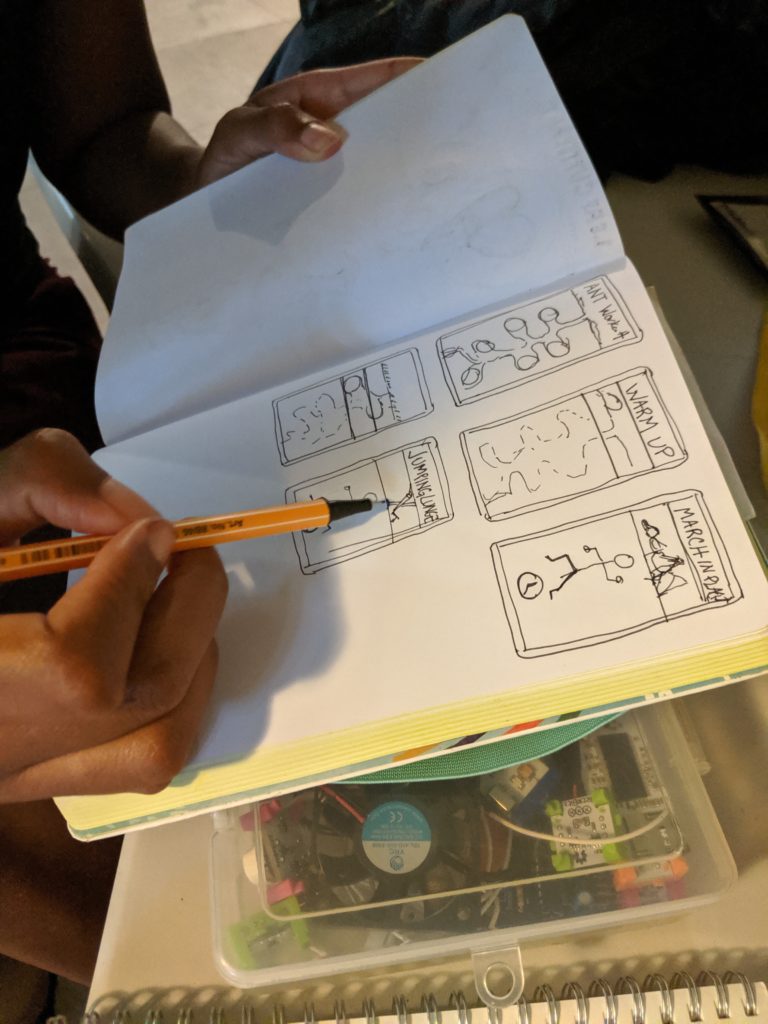
Over a four-day period, we designed, tested, and prototyped our app with fellow conference attendees (surrounded by the rainforest no less). The content was key in delivering an experience that mimics the fascinating farming of fungus and other leafcutter ant behaviors.
Prototype
We hope this gives you a glimpse into the above and below the ground world of the leafcutter ant. Thanks to all the Dinacon attendees, Henrietta Mango the sloth, and Smithsonian scientists who inspired us during our time at Gamboa!
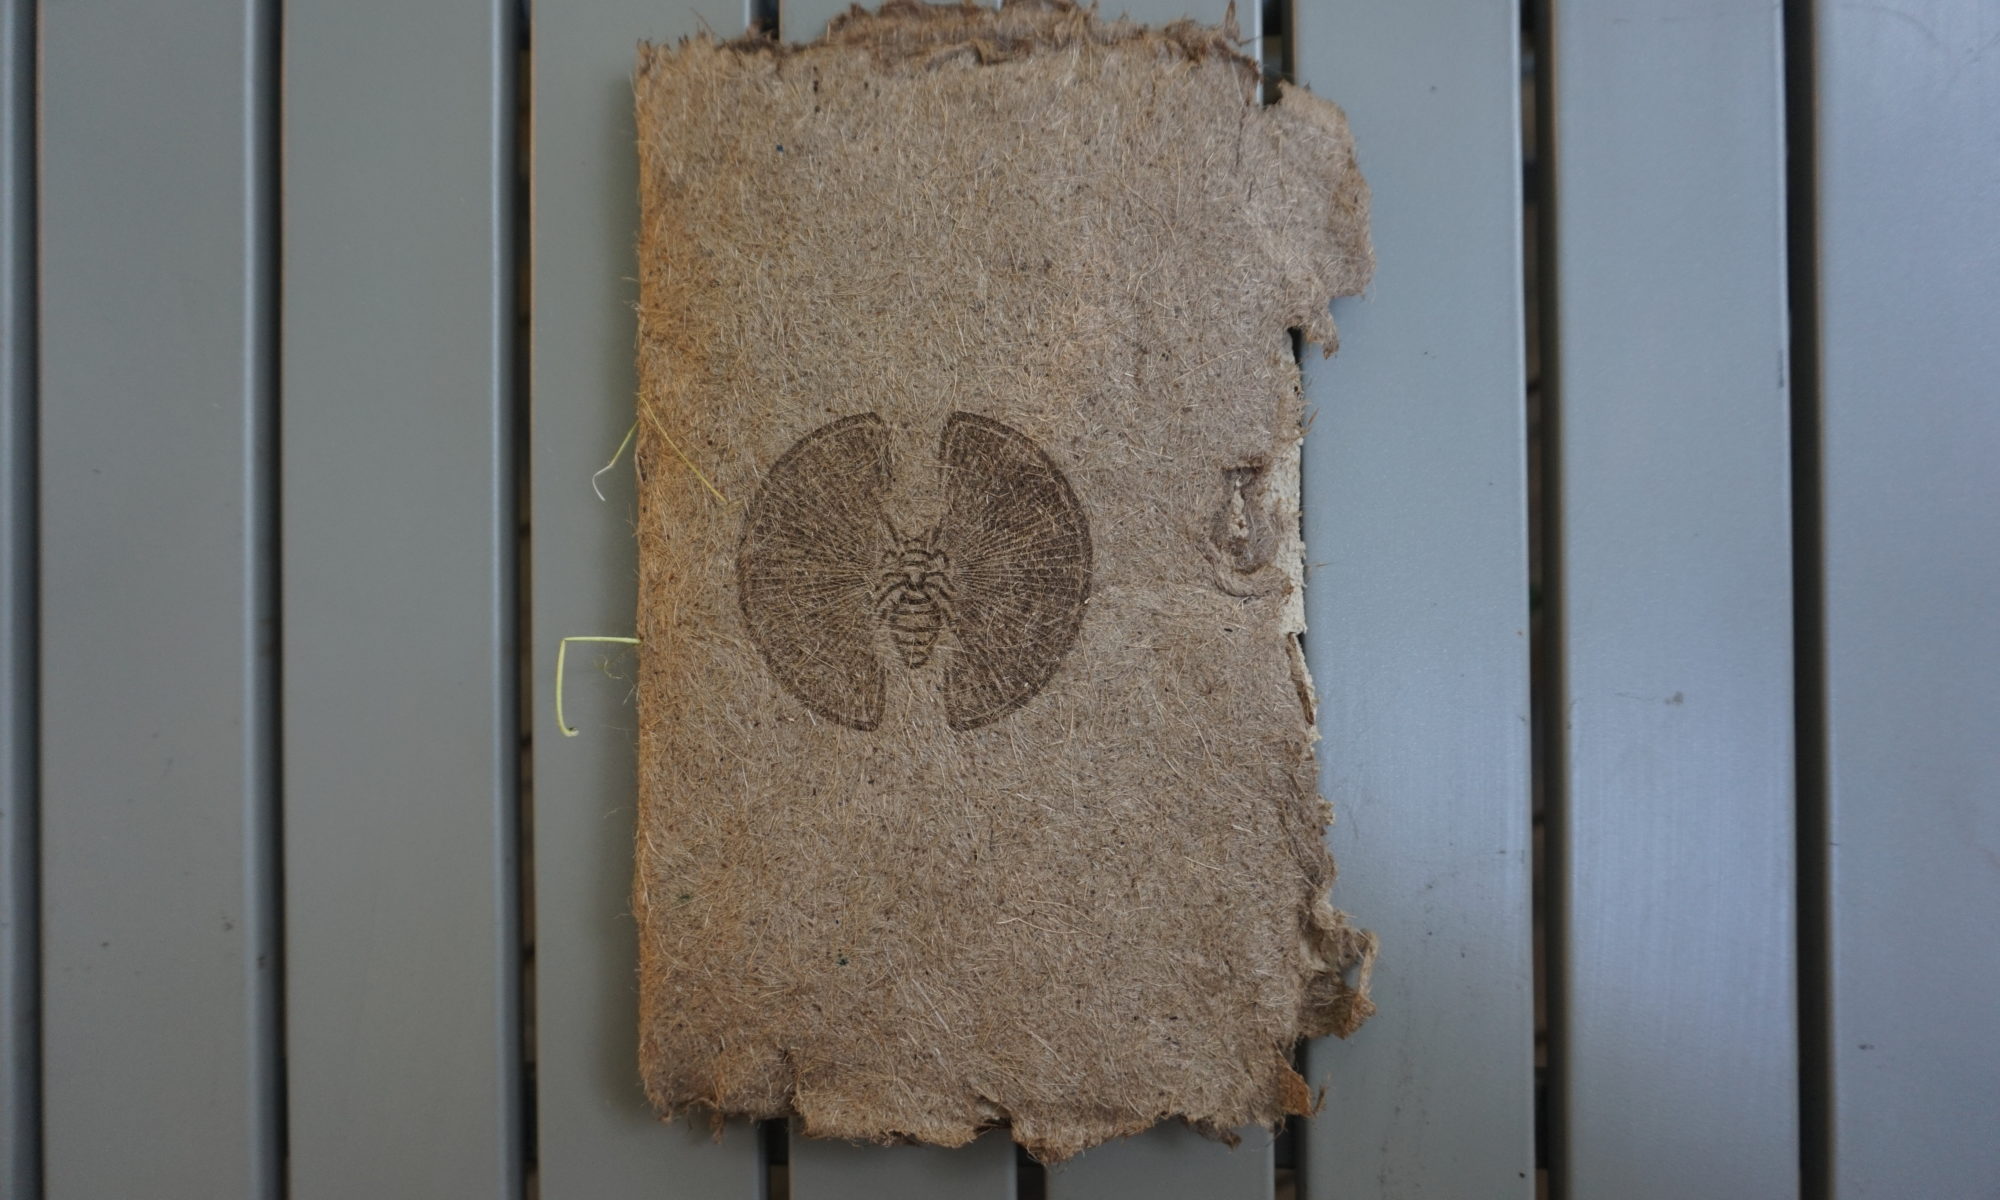
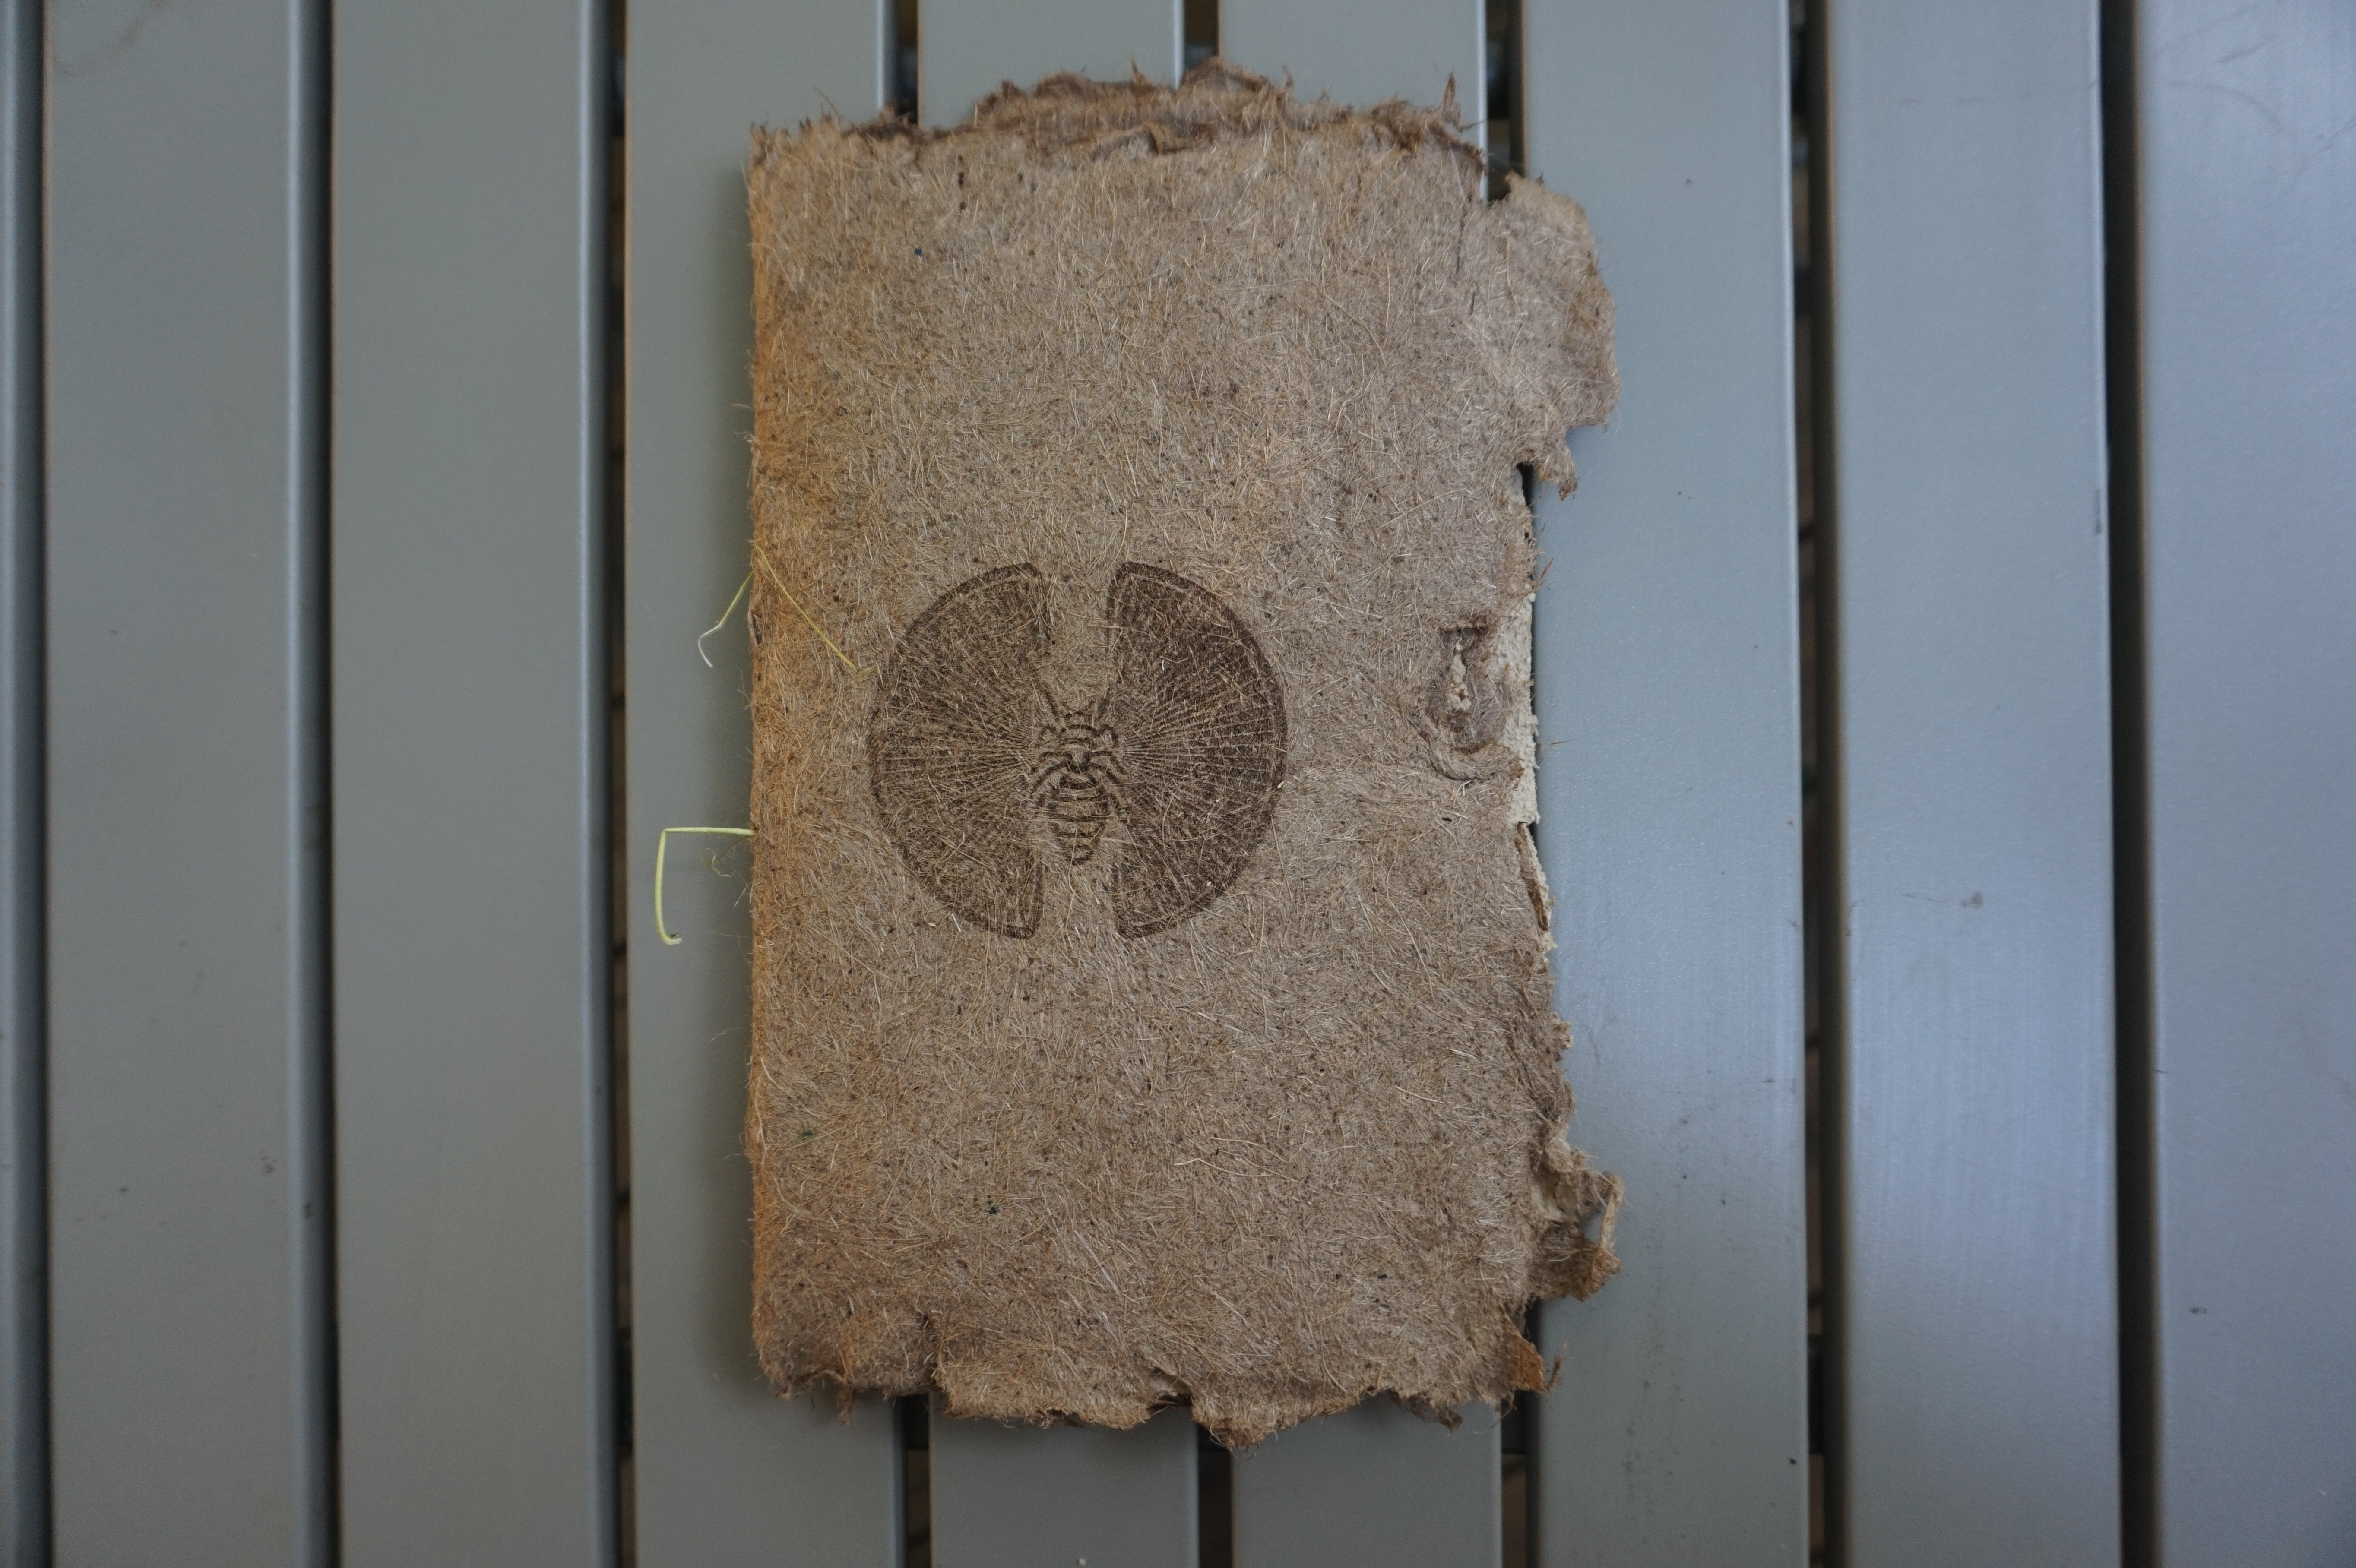
The Sustainable Zine featuring the DinaCon logo lasercut by Andy Quitmeyer
Zines have been around for a longtime with the goal being to make something cheap and easy to reproduce. This means there’s a big reliance on printer paper and classic photocopier inks. Though this can make production easy it also means that it’s not the most environmentally friendly situation. Bleached printer paper takes a long time to break down, inks and toners are can be fairly toxic and create environmental issues.
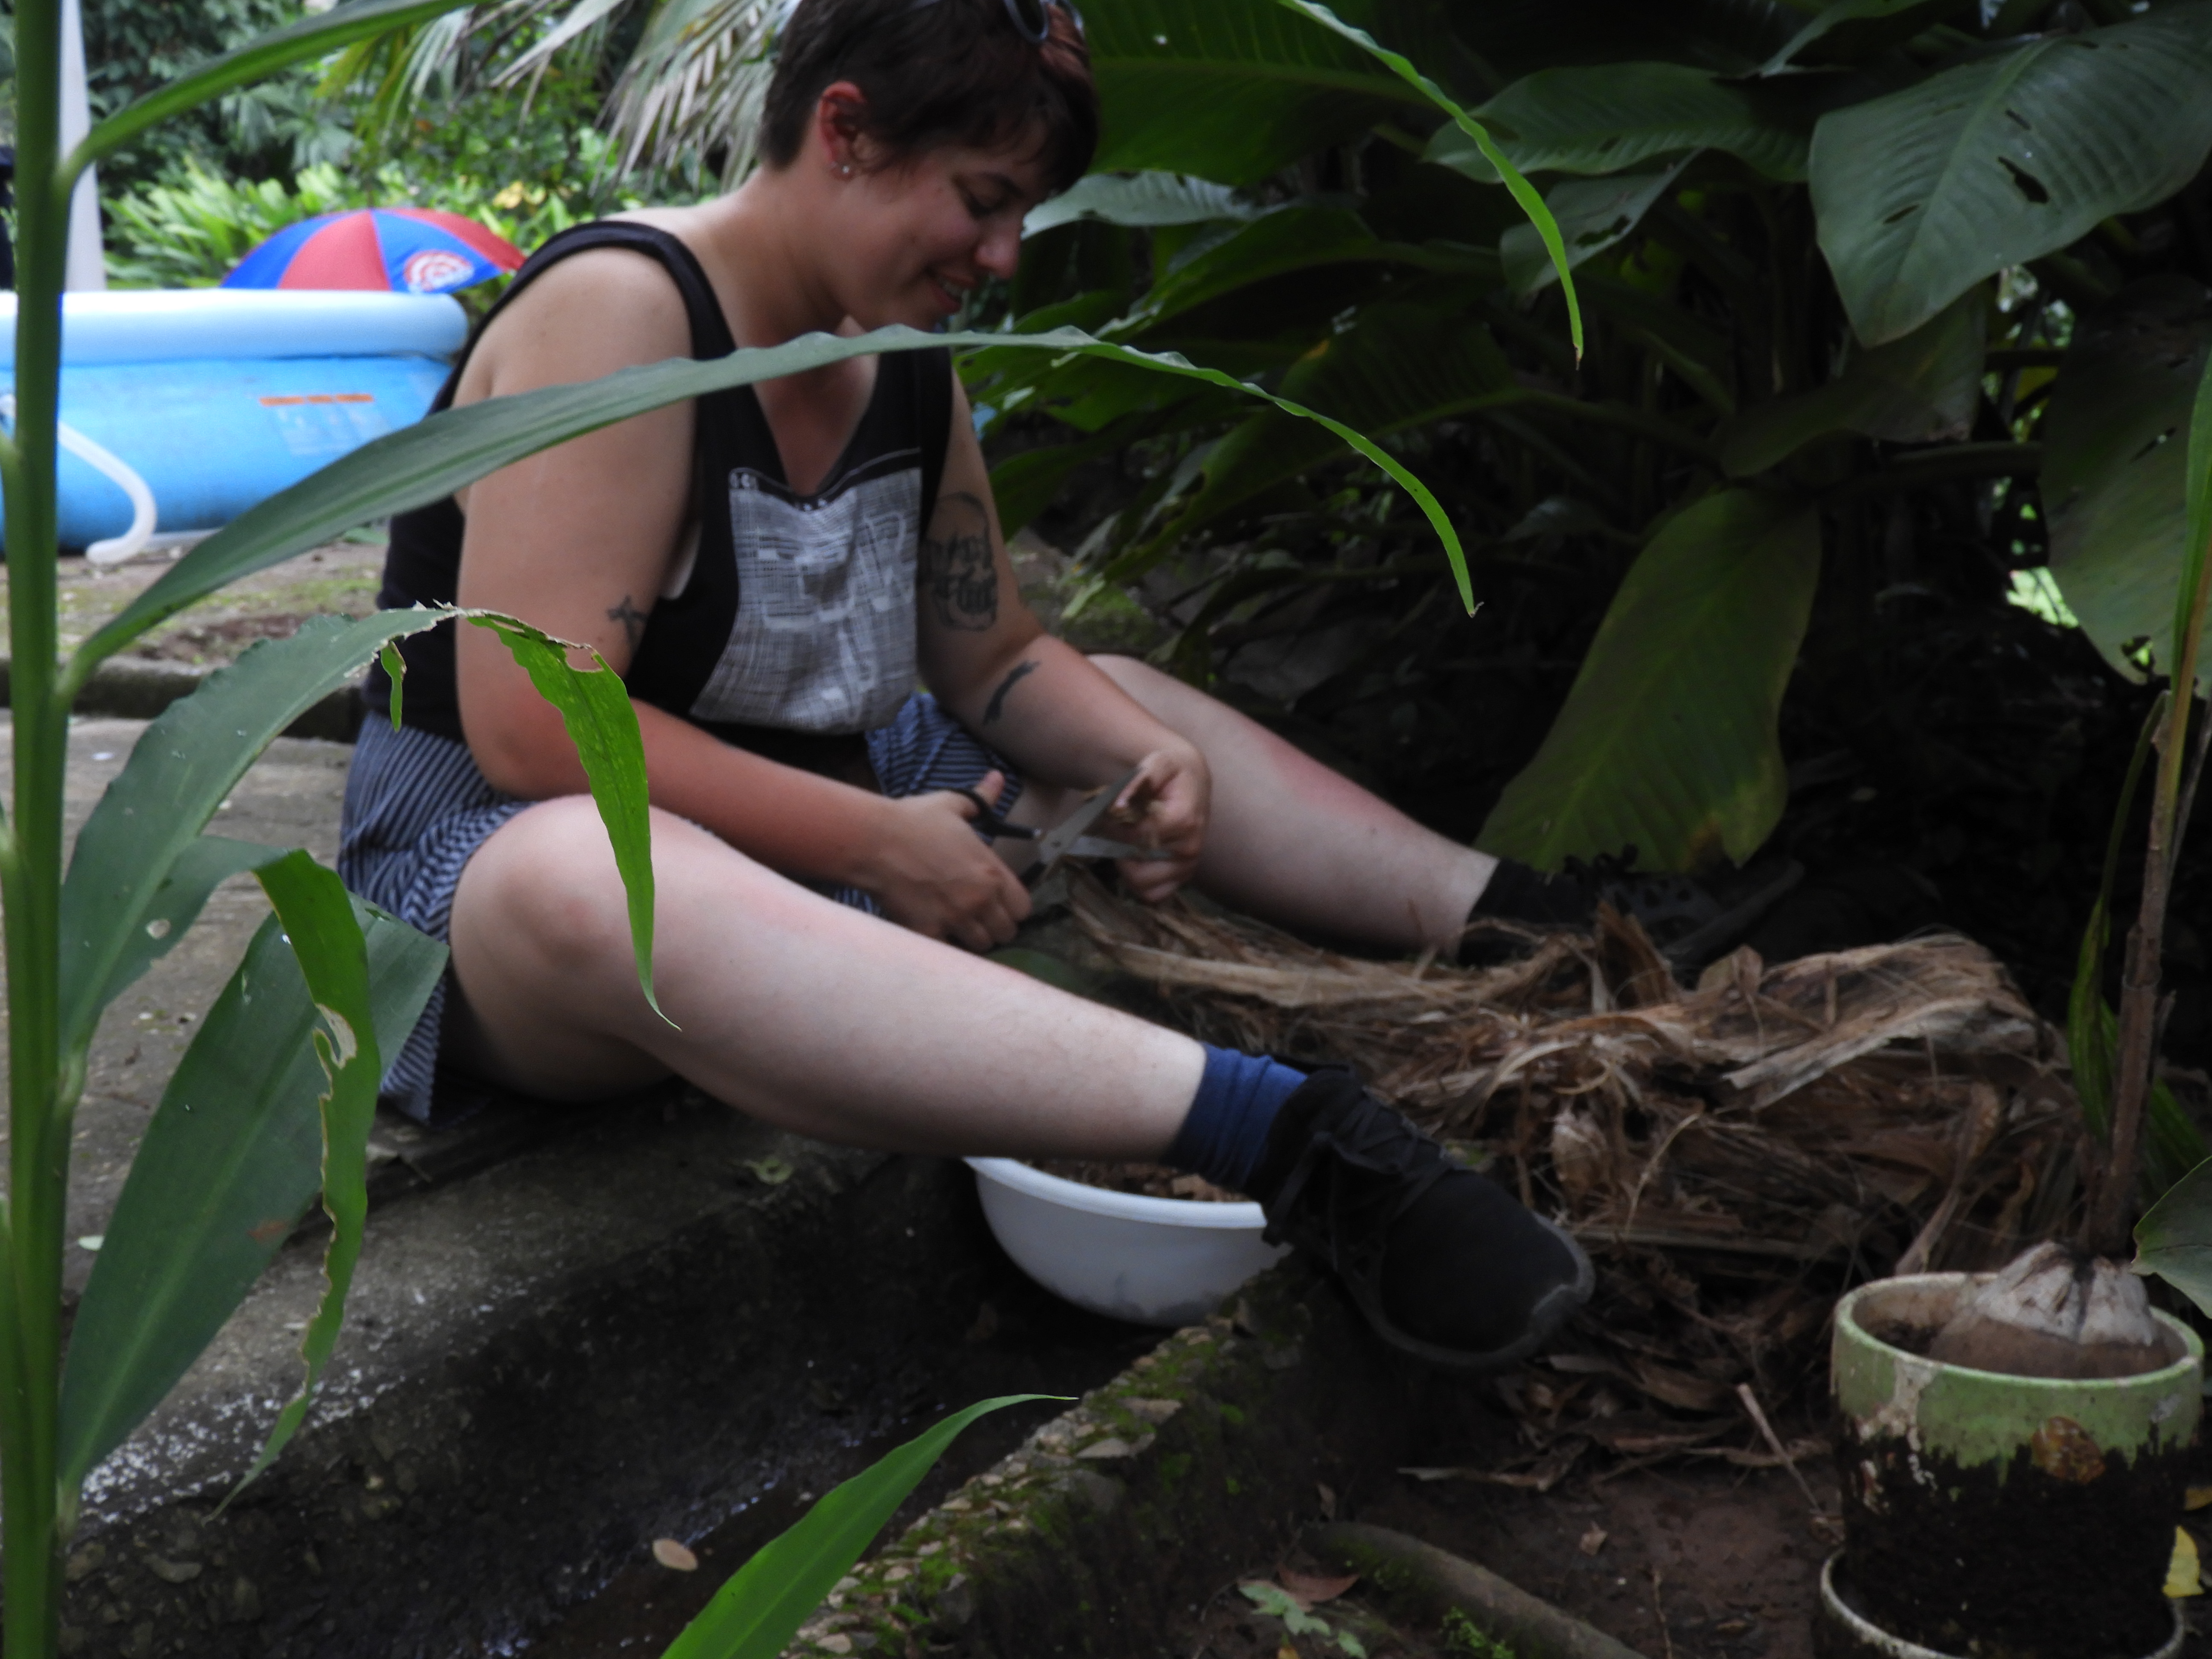
Sid Drmay cutting down banana tree bark to one inch pieces for boiling
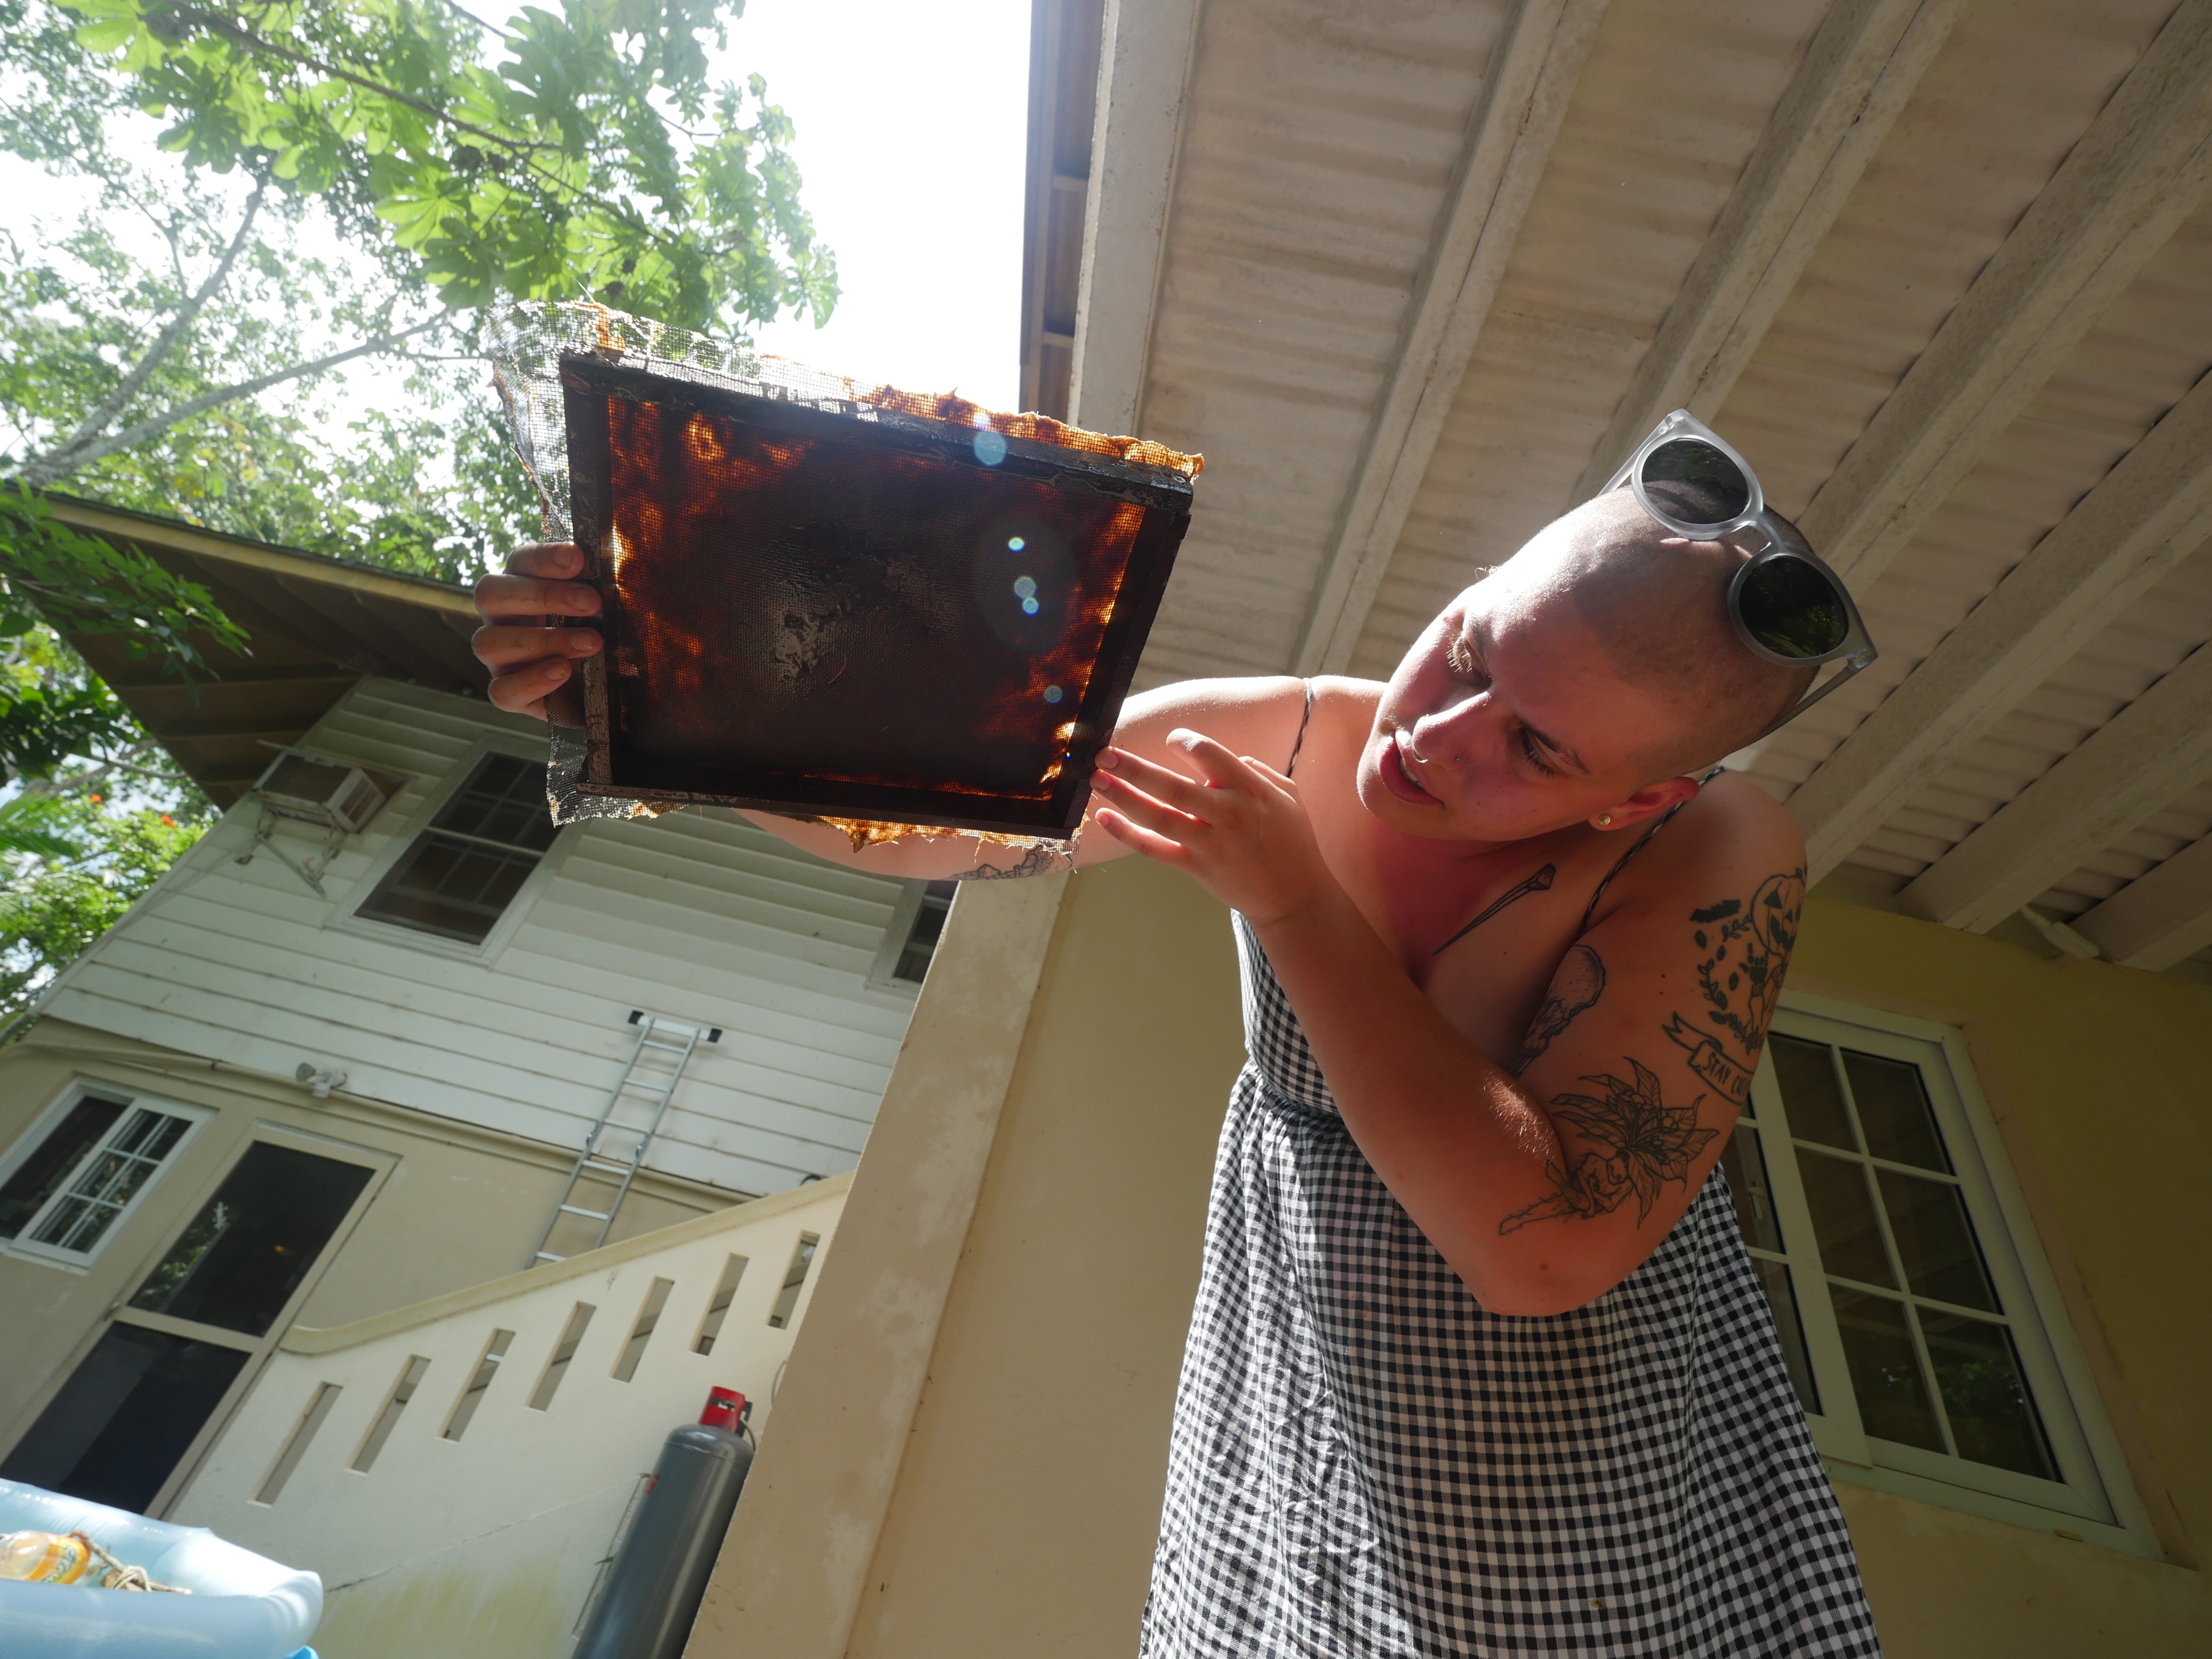
During DinaCon my goal was create a fully sustainable zine. My concept of sustainability was making something that would have little environmental impact and have the ability to break down easily as time goes by. This meant that I committed to foraging for materials to make paper, inks and binding for a zine.
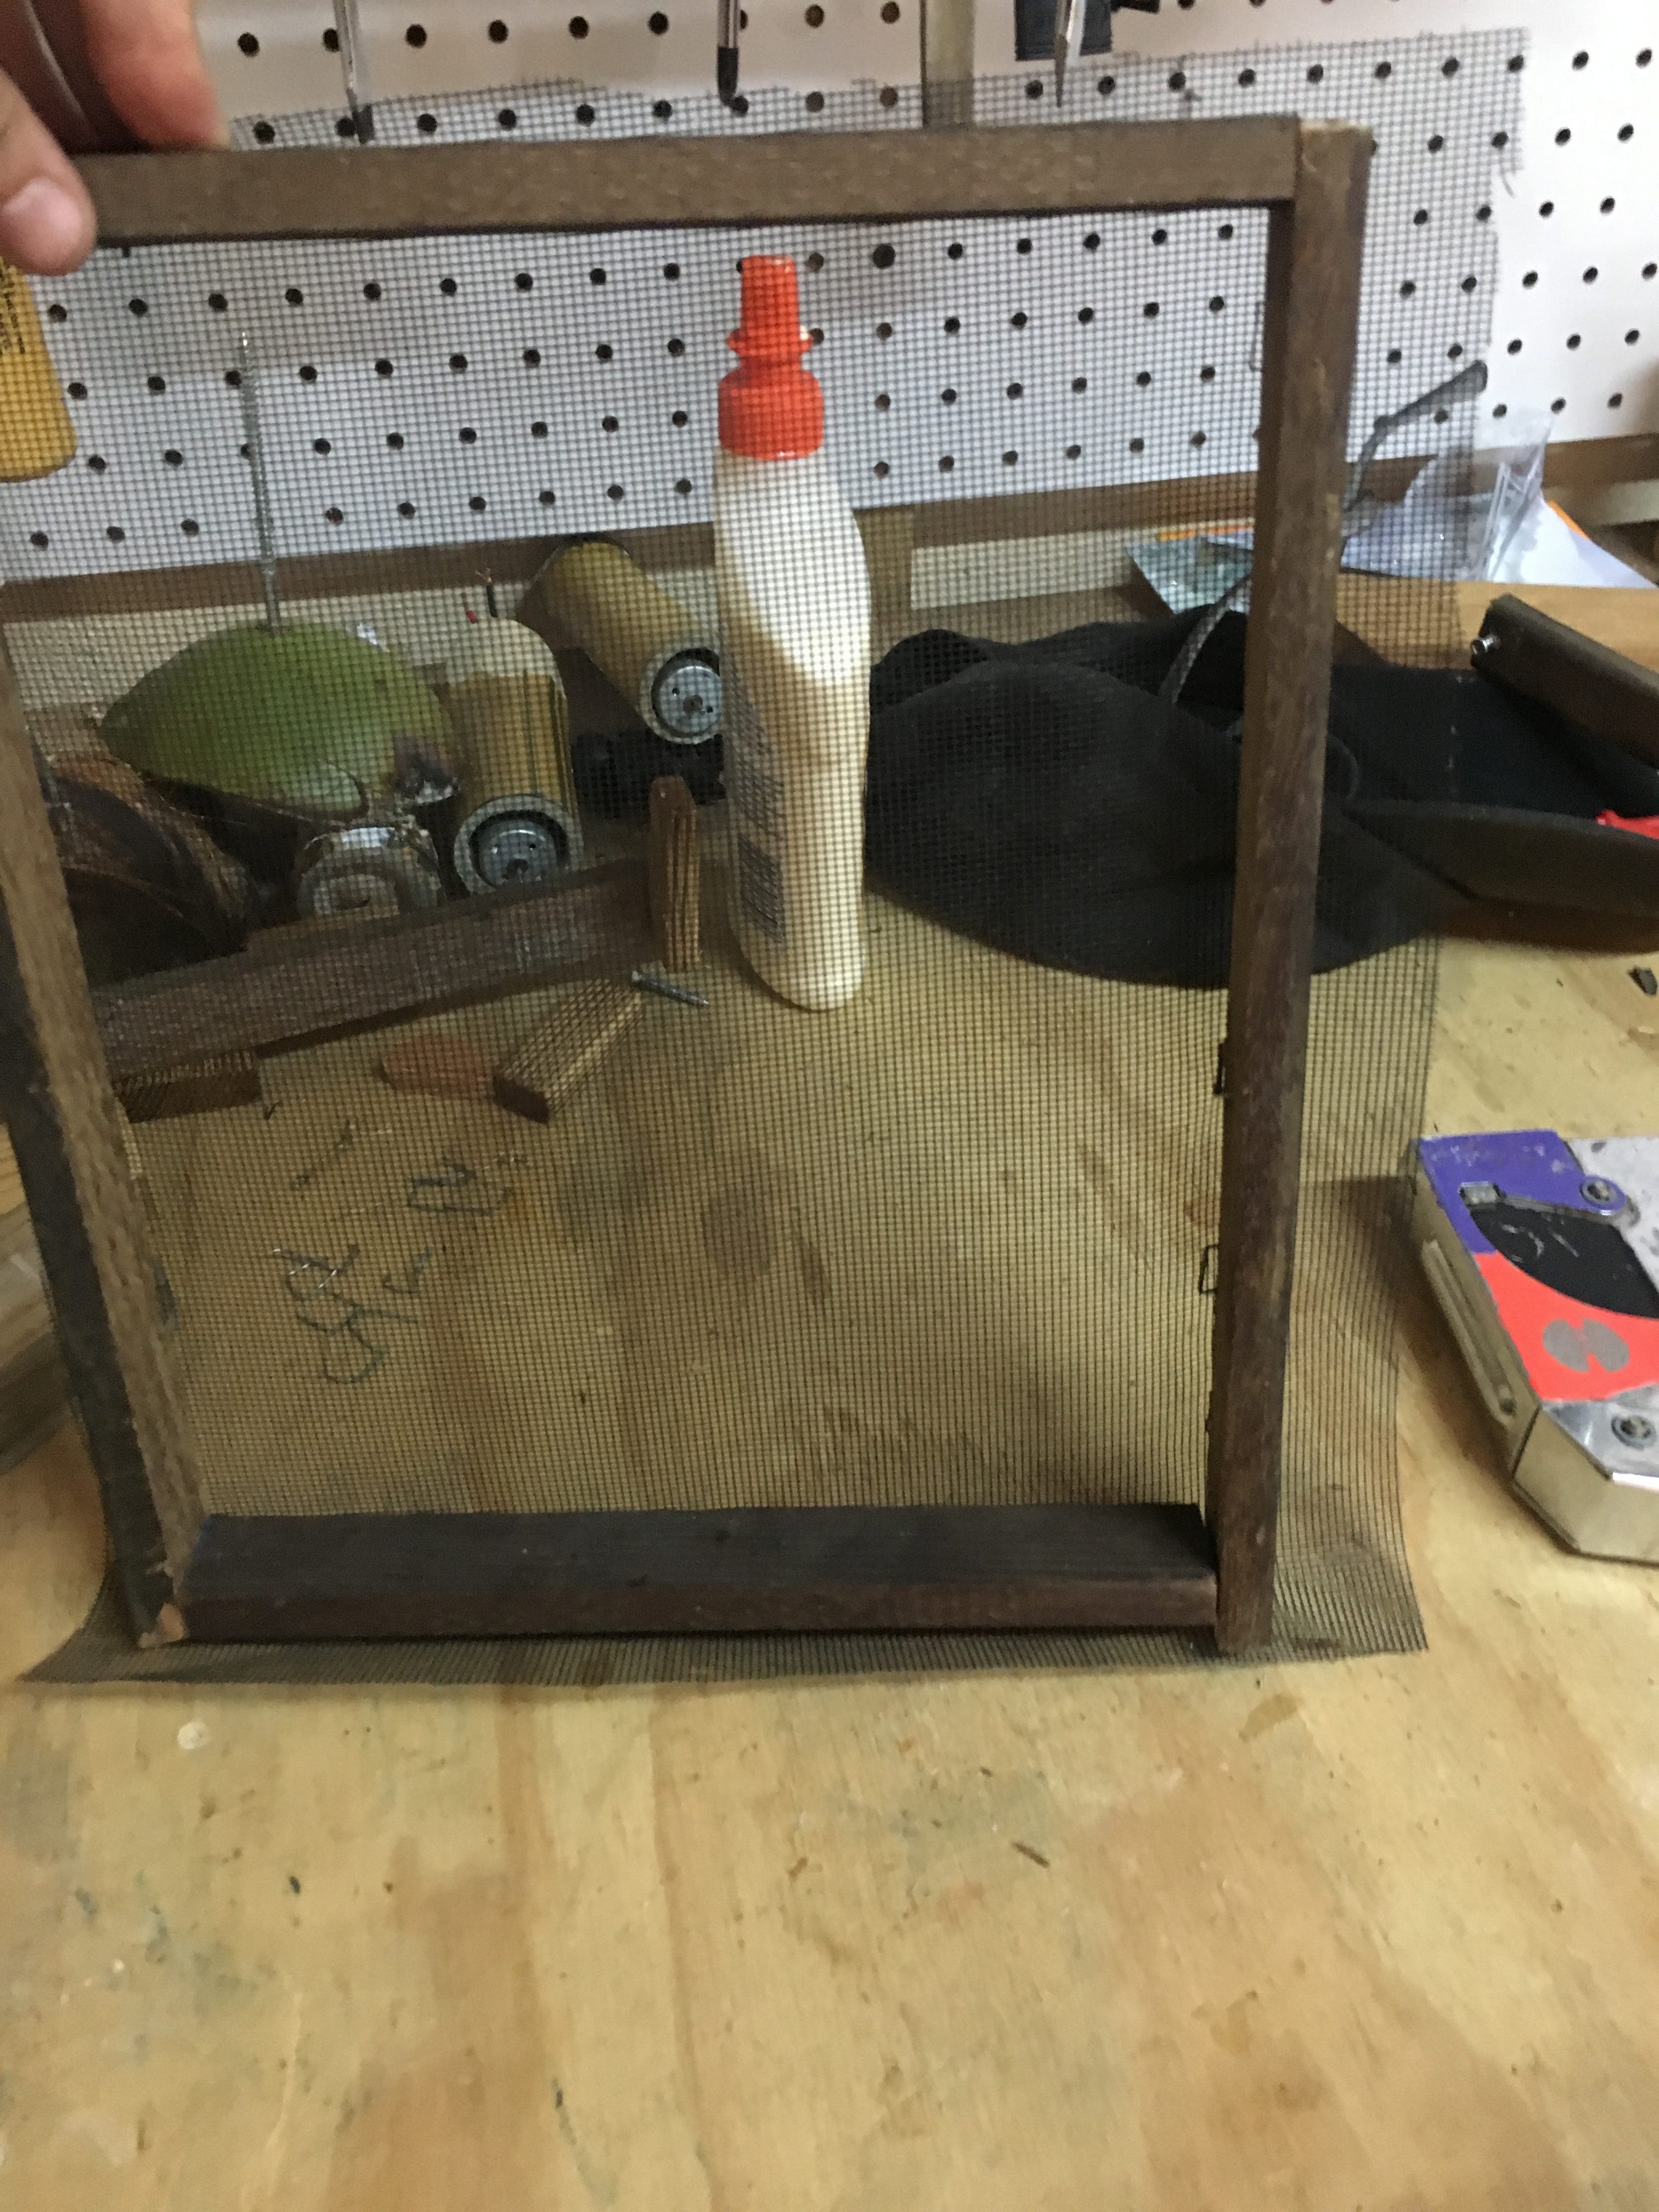
The paper mould made with guidance from Rob Faludi
Here’s a breakdown the components and the processes involved with each part:
Mould – I made my paper mould on-site using scrap wood provided by Andrew Coates’ building team and screen that was DinaLab. This took two days.
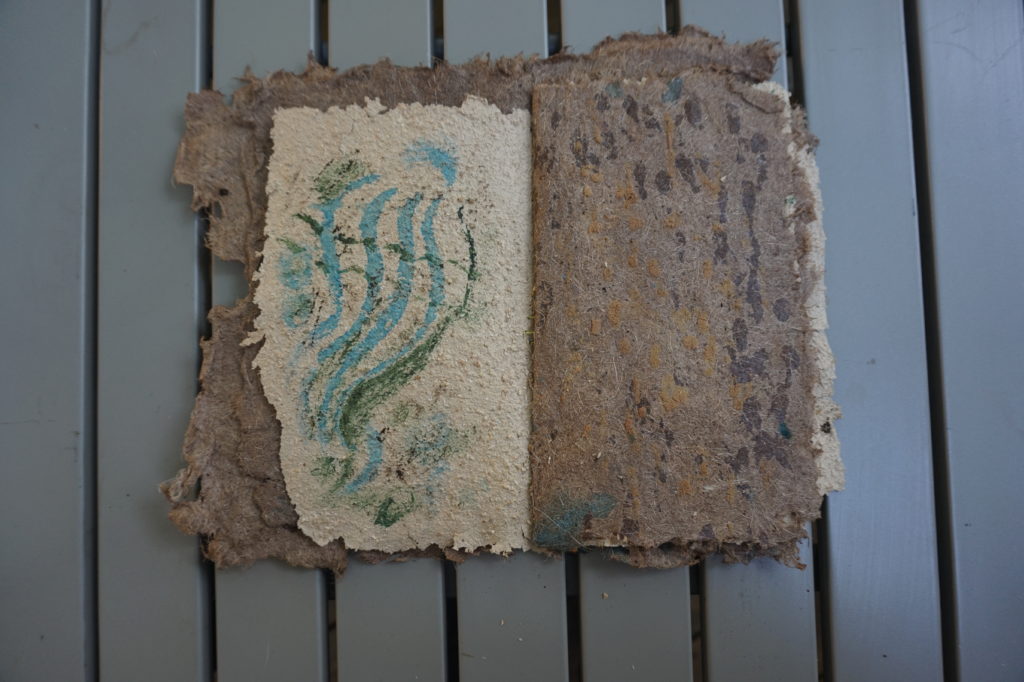
Brown Paper – Foraged banana tree bark, boiled for two hours and then blended to get pulpy. This was then put in a large plastic packing container with a 2:1 water to pulp ratio called a slurry. It took about 4 days of pulling and drying to make 12 sheets of paper.
White Paper – Foraged turkey tail mushrooms from a local trail thanks to Blackii’s suggestion, blended with water to get pulpy. This was then put in the large plastic container with the 2:1 water to pulp ratio slurry. It took 5 days of pulling and drying with a dehumidifier’s help due to the natural moistness of mushrooms to get 7 sheets of paper.
Black Ink – Foraged charcoal from a small fire, ground down and mixed with gum arabic to thicken. Gum arabic was the one item I brought with me from home, I wasn’t sure how much access I would have to a similar product. This took about 15 minutes
Blue/Green Ink – Algae pigment provided by the wonderful Elliot mixed with water/agar agar and gum arabic to try different textures and thicknesses. Each ink option took a few minutes to mix.
Brown Ink – This was made by boiling down rumbutan skins for one hour to get a gorgeous deep red burgundy and then mixing it with agar agar. This took one hour and 10 minutes to make.
Clear Ink – Mix of honey and coffee which made a transparent reflective ink which took the same amount of time as making a pot of coffee.
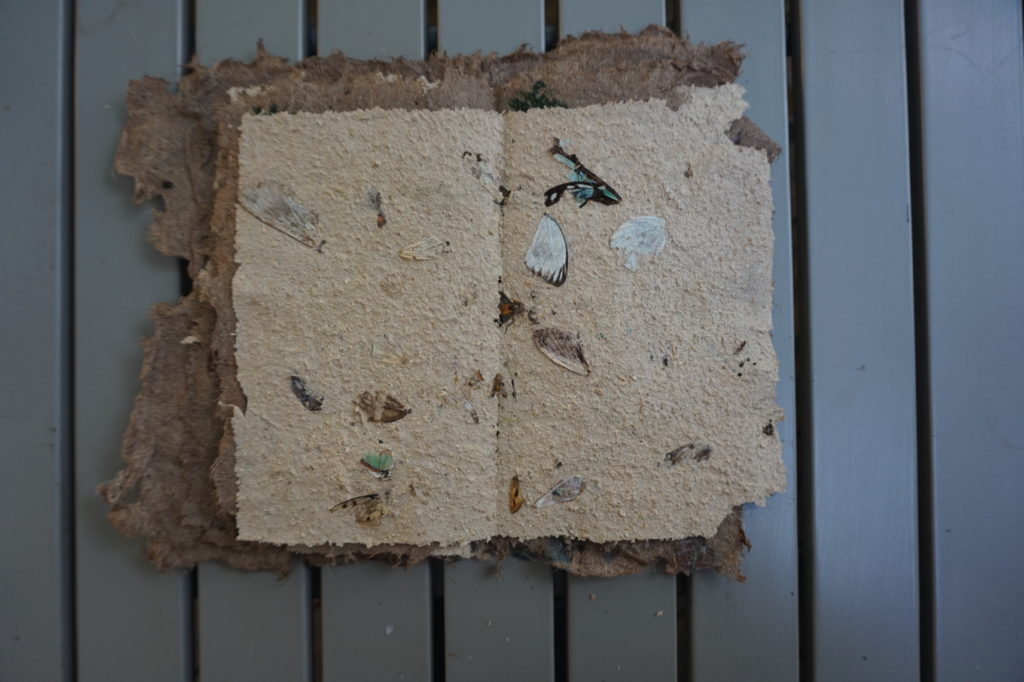
Wing Page – All the wings on the centrefold pages were foraged from different dead insects other dinasaurs used for their own experiments and projects. Once they were no longer being used I removed the wings and put them in the slurry and pulled the sheet with the wings embedded.
Bindings – The bindings are foraged vines from a plant in the backyard of DinaLab that I sewed through the pages for an easy bind. This took about ten minutes.
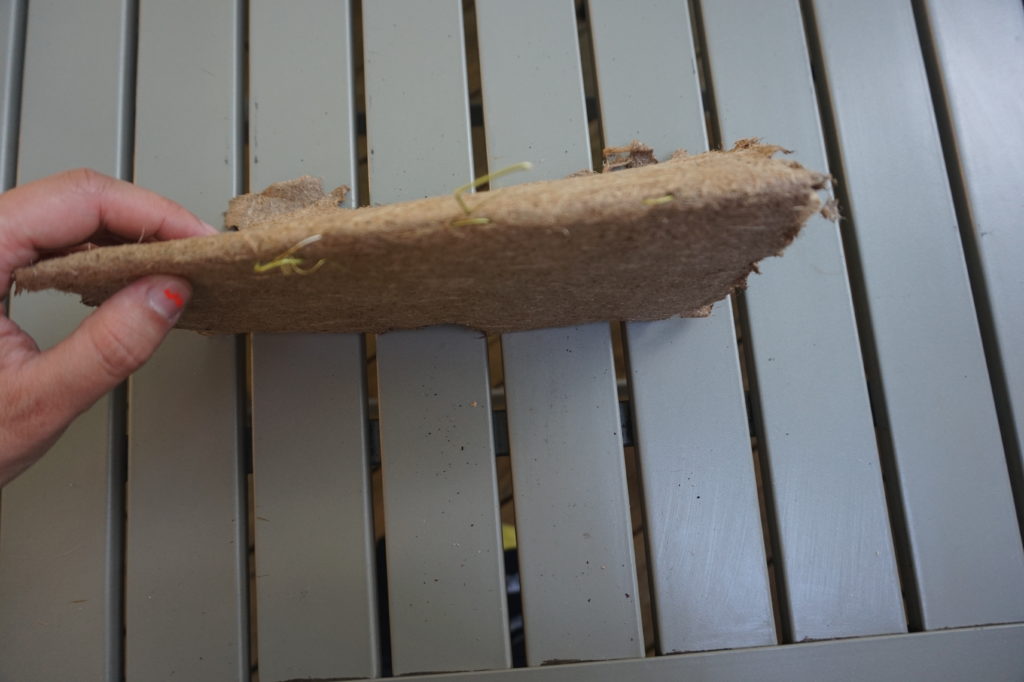
Sid Drmay and their handmade mould with a freshly pulled sheet of banana tree bark paper
The final zine was quite successful. It will be left to slowly degraded on its own to see how well the handmade zine lasts and breaks down. The content is entirely inspired by DinaCon, it’s attendees, the connections I made, experiences I had and has become a love letter to my time in Gamboa this summer. A special thank you to Andy Quitmeyer, Rob Faludi, Blackii Migliozzi, Elliot Roth, Ramy Kim, Ananda Gabo, Joetta Gobell, Lee Wilkins, Ashlin Aronin, Amanda Savage, Stephanie Rothenberg, Seamus Kildall, Andrew Coates and every other dinasaur that I had the absolute pleasure of sharing space with for all the inspiration and help.
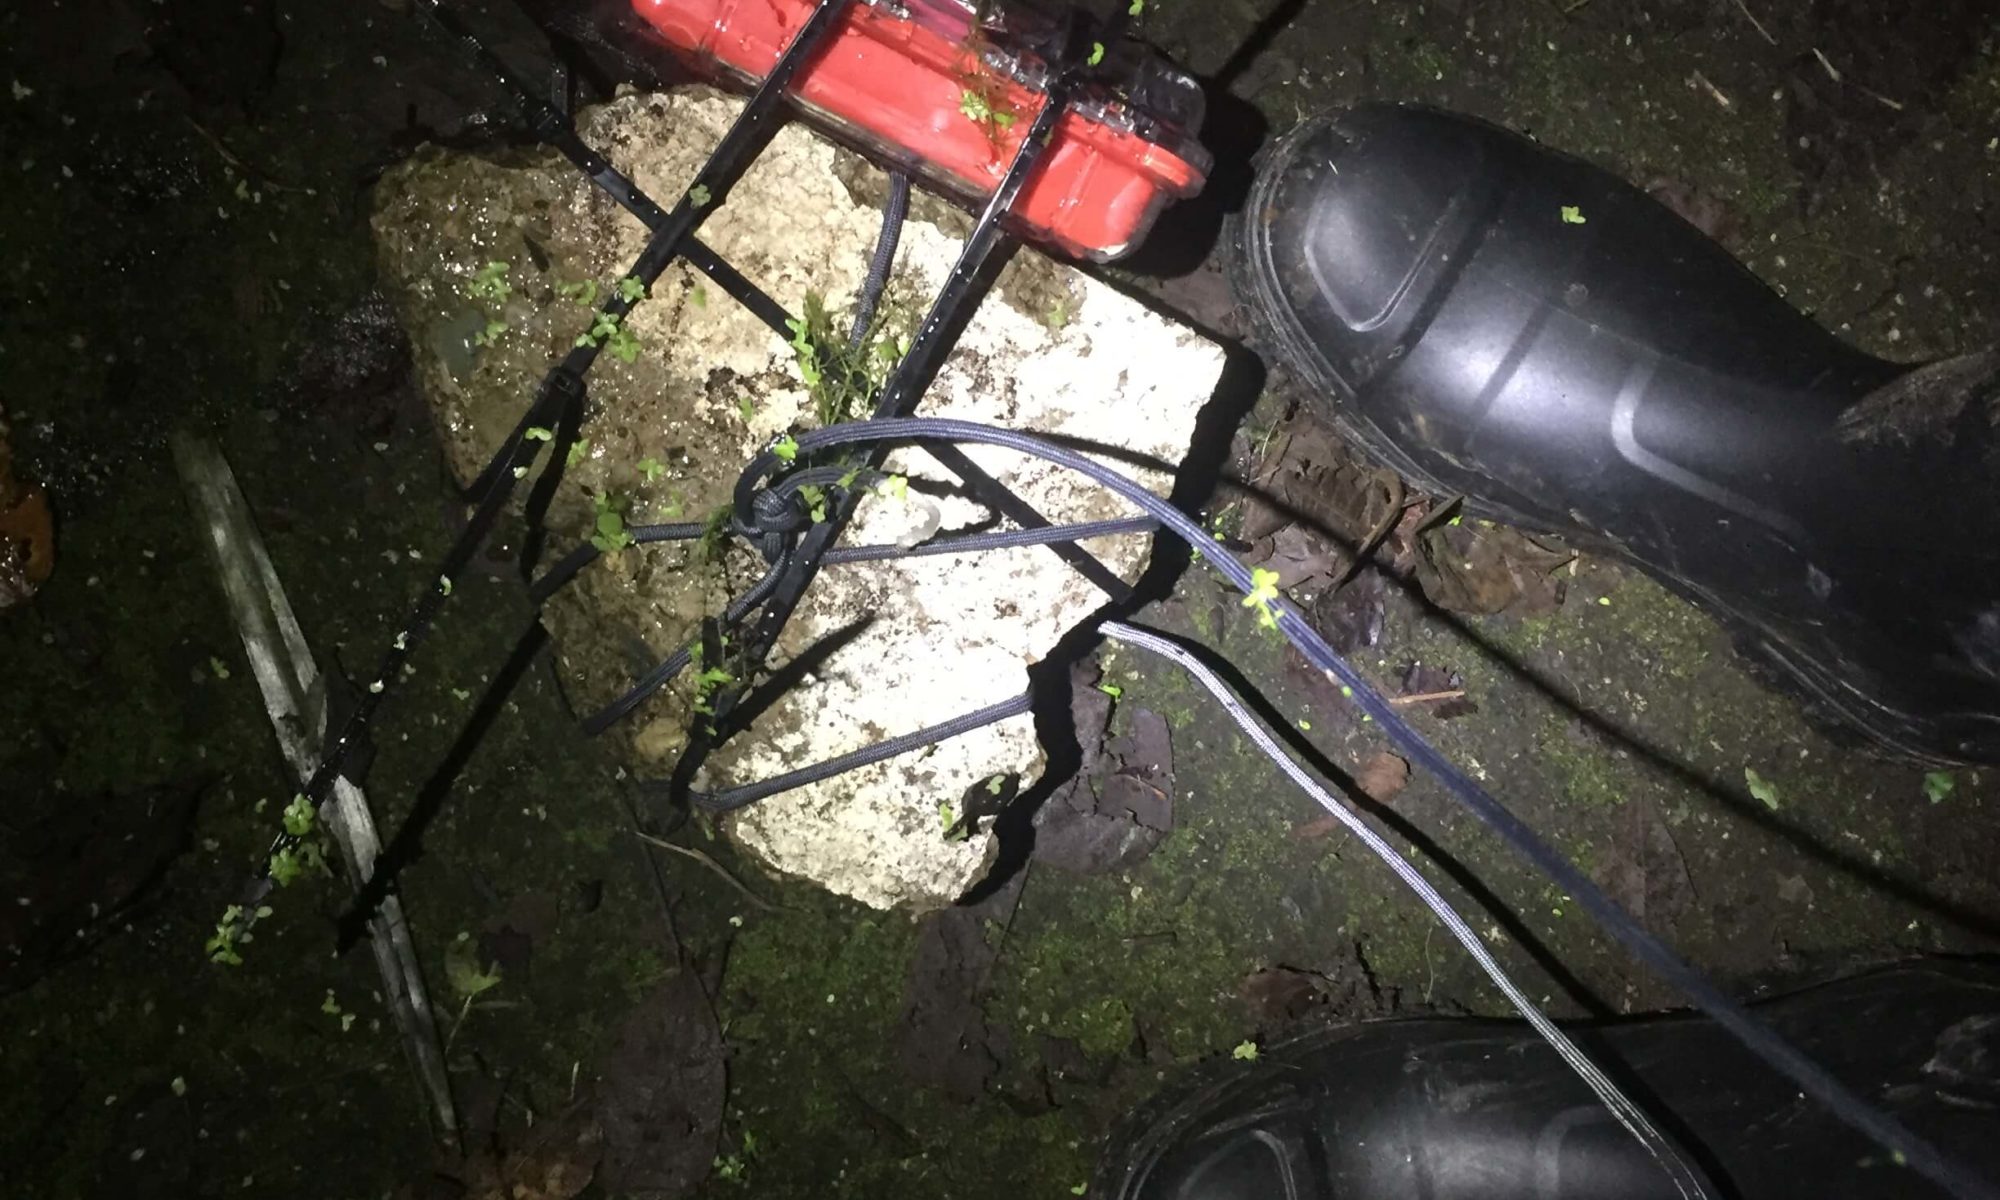
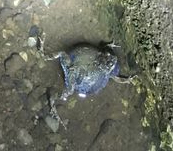
Night falls in Gamboa, Panama — site of the 2019 Digital Naturalism Conference. The Tungara frogs come to life, filling the air with their uncanny mating calls resonating from murky ponds and puddles. As day breaks, they retreat. I created a submersible infrared timelapse camera to capture the experience of dawn from beneath the surface of a muddy puddle, the end of a long night of singing and mating.
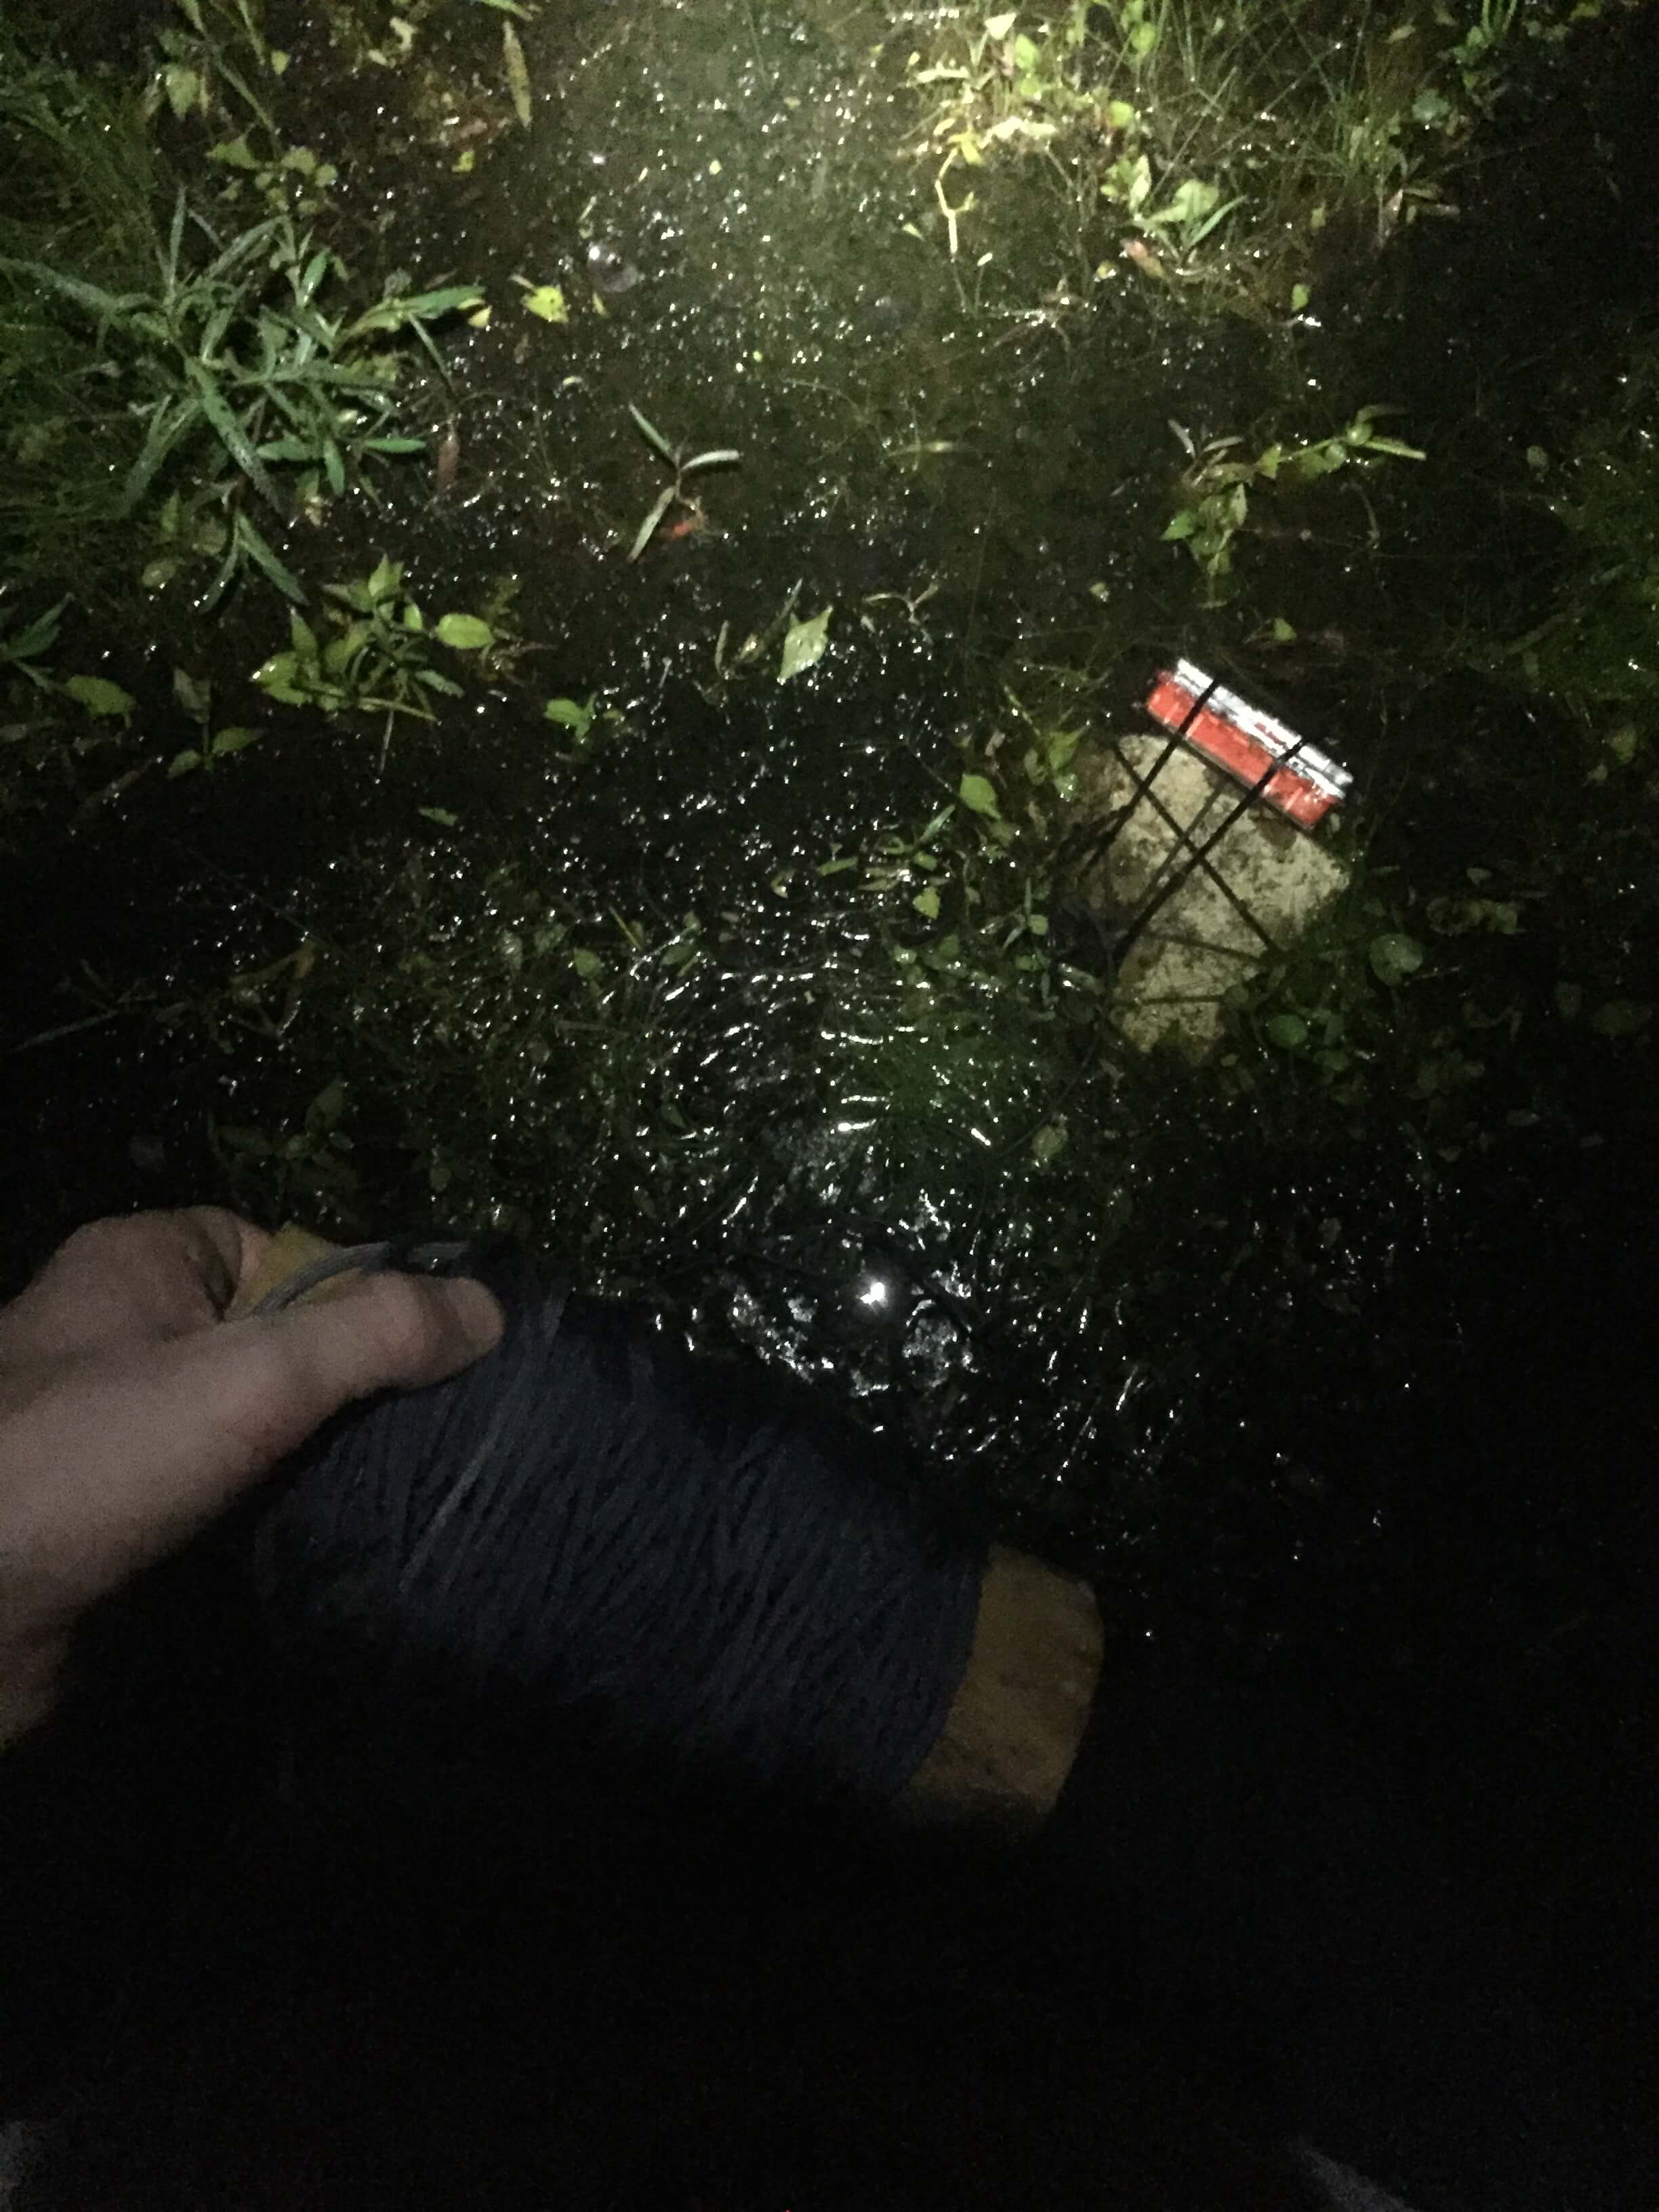
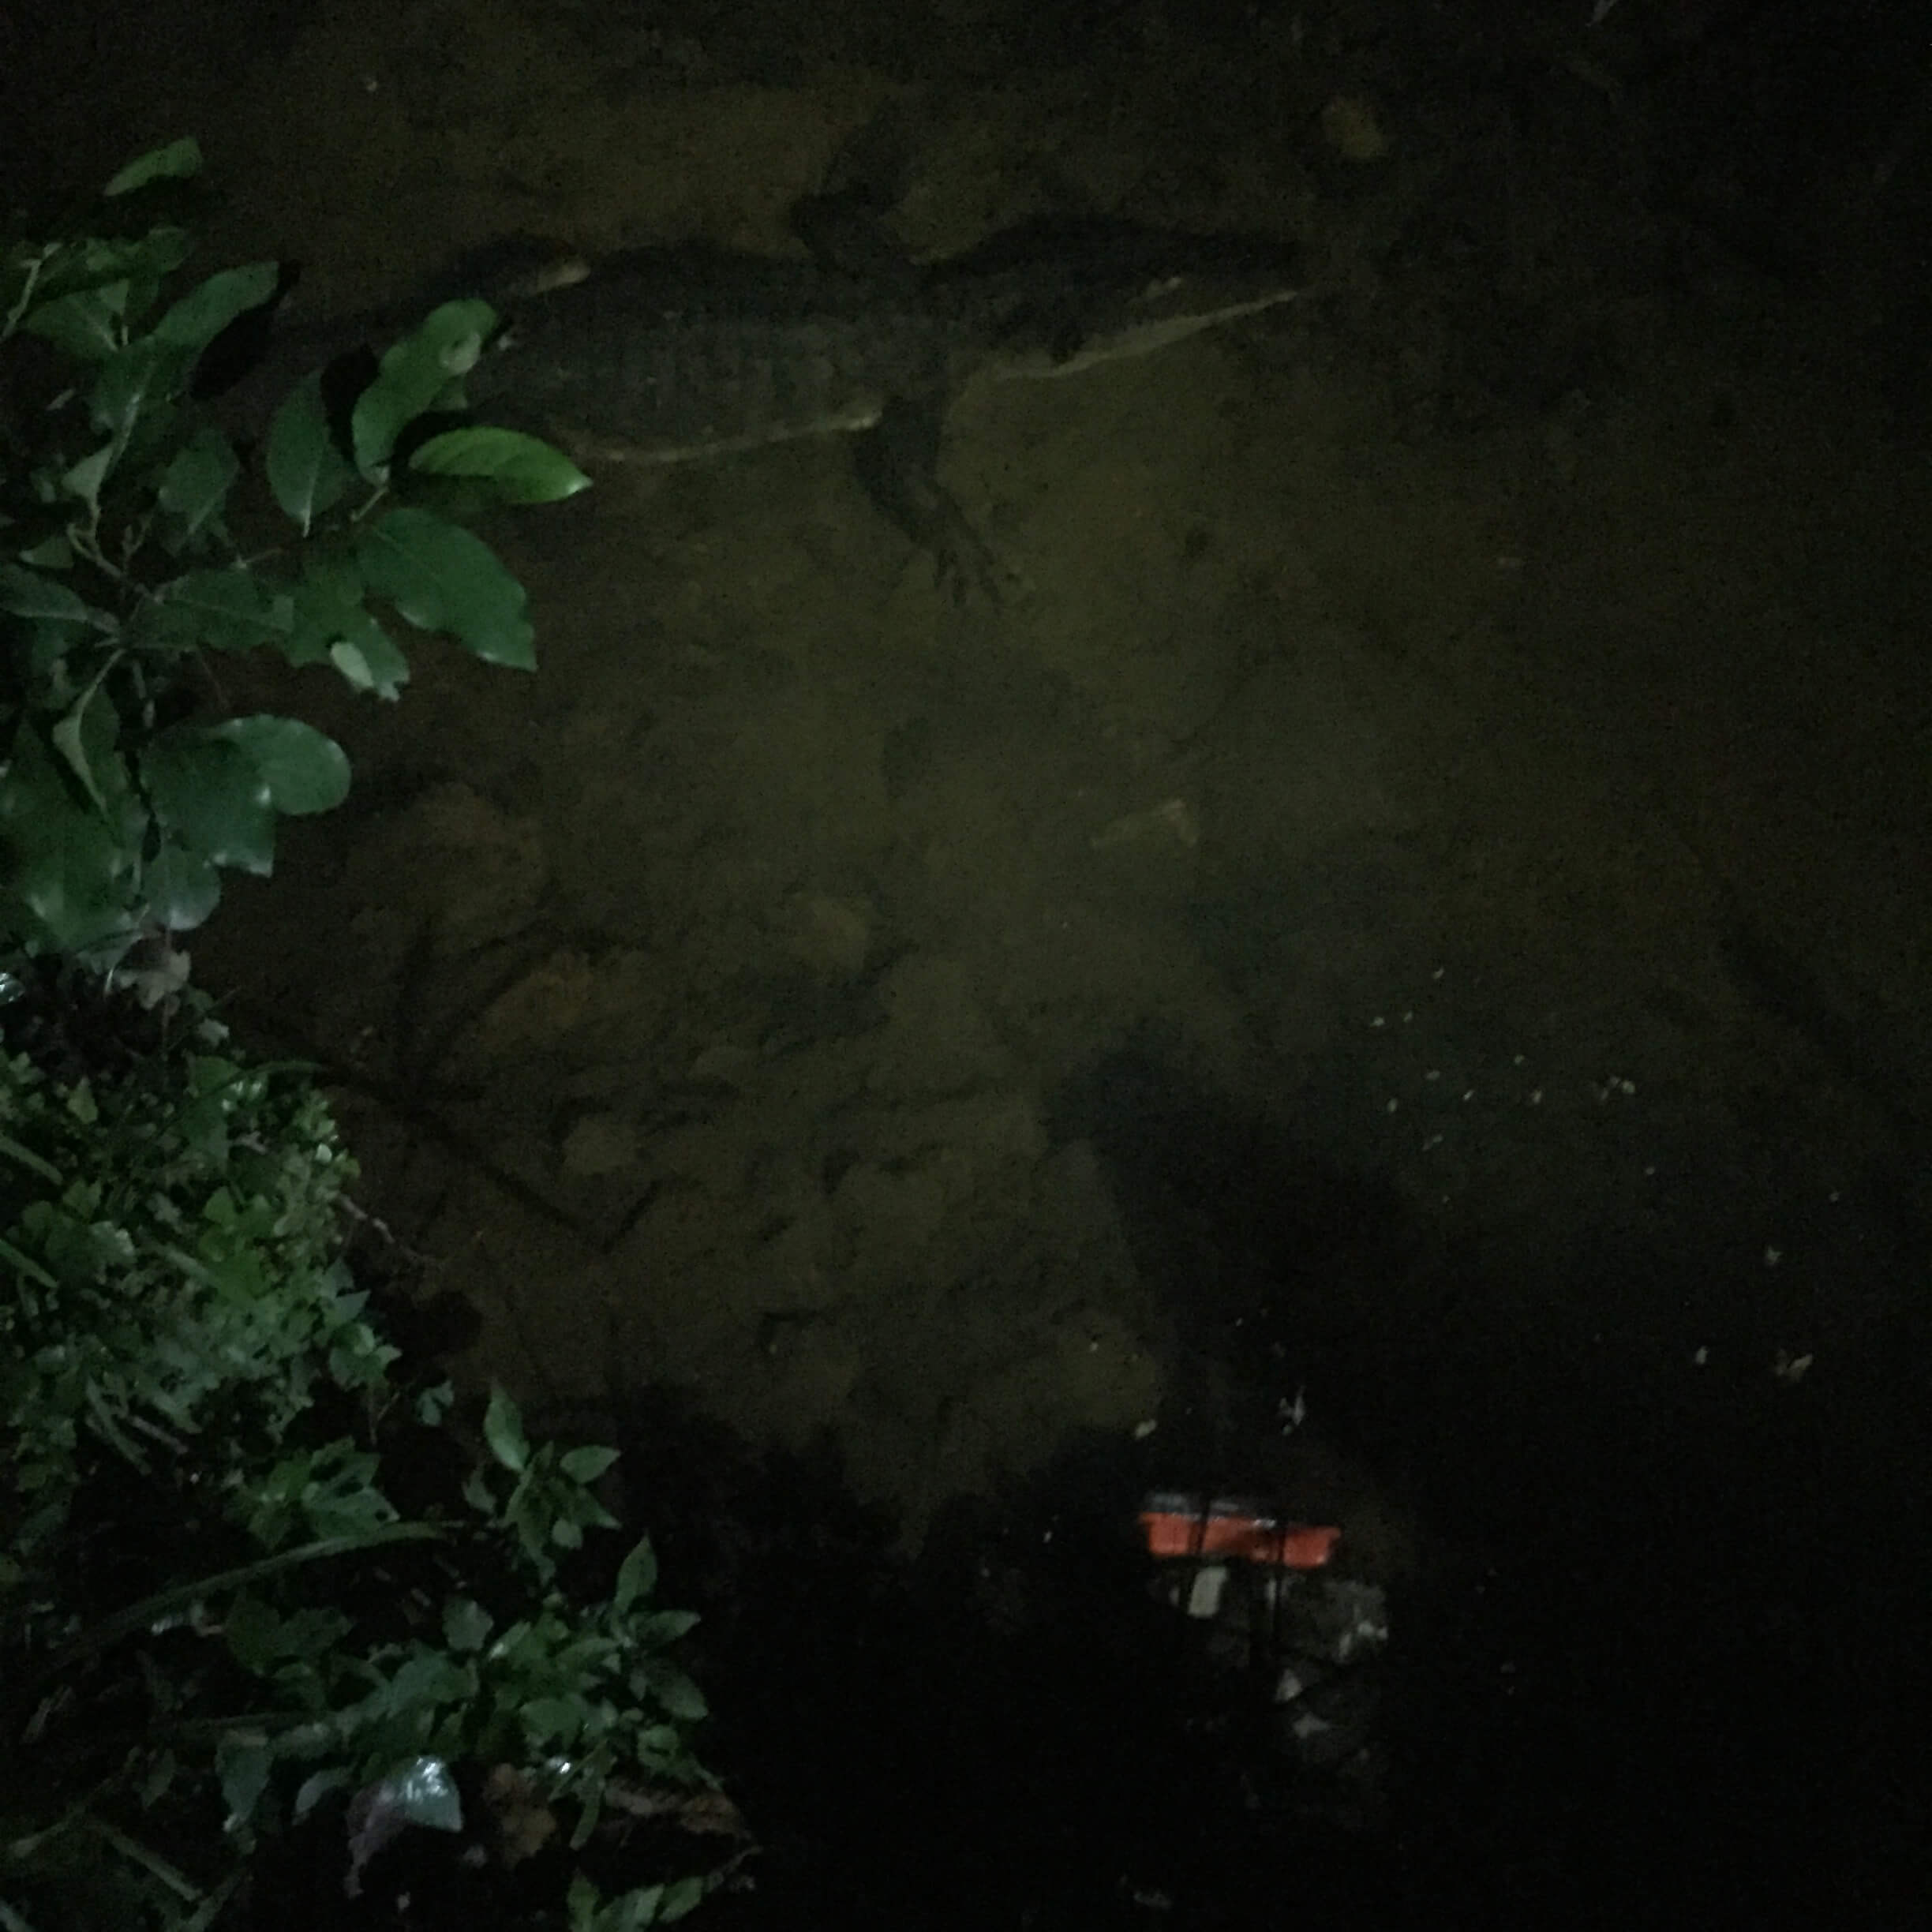
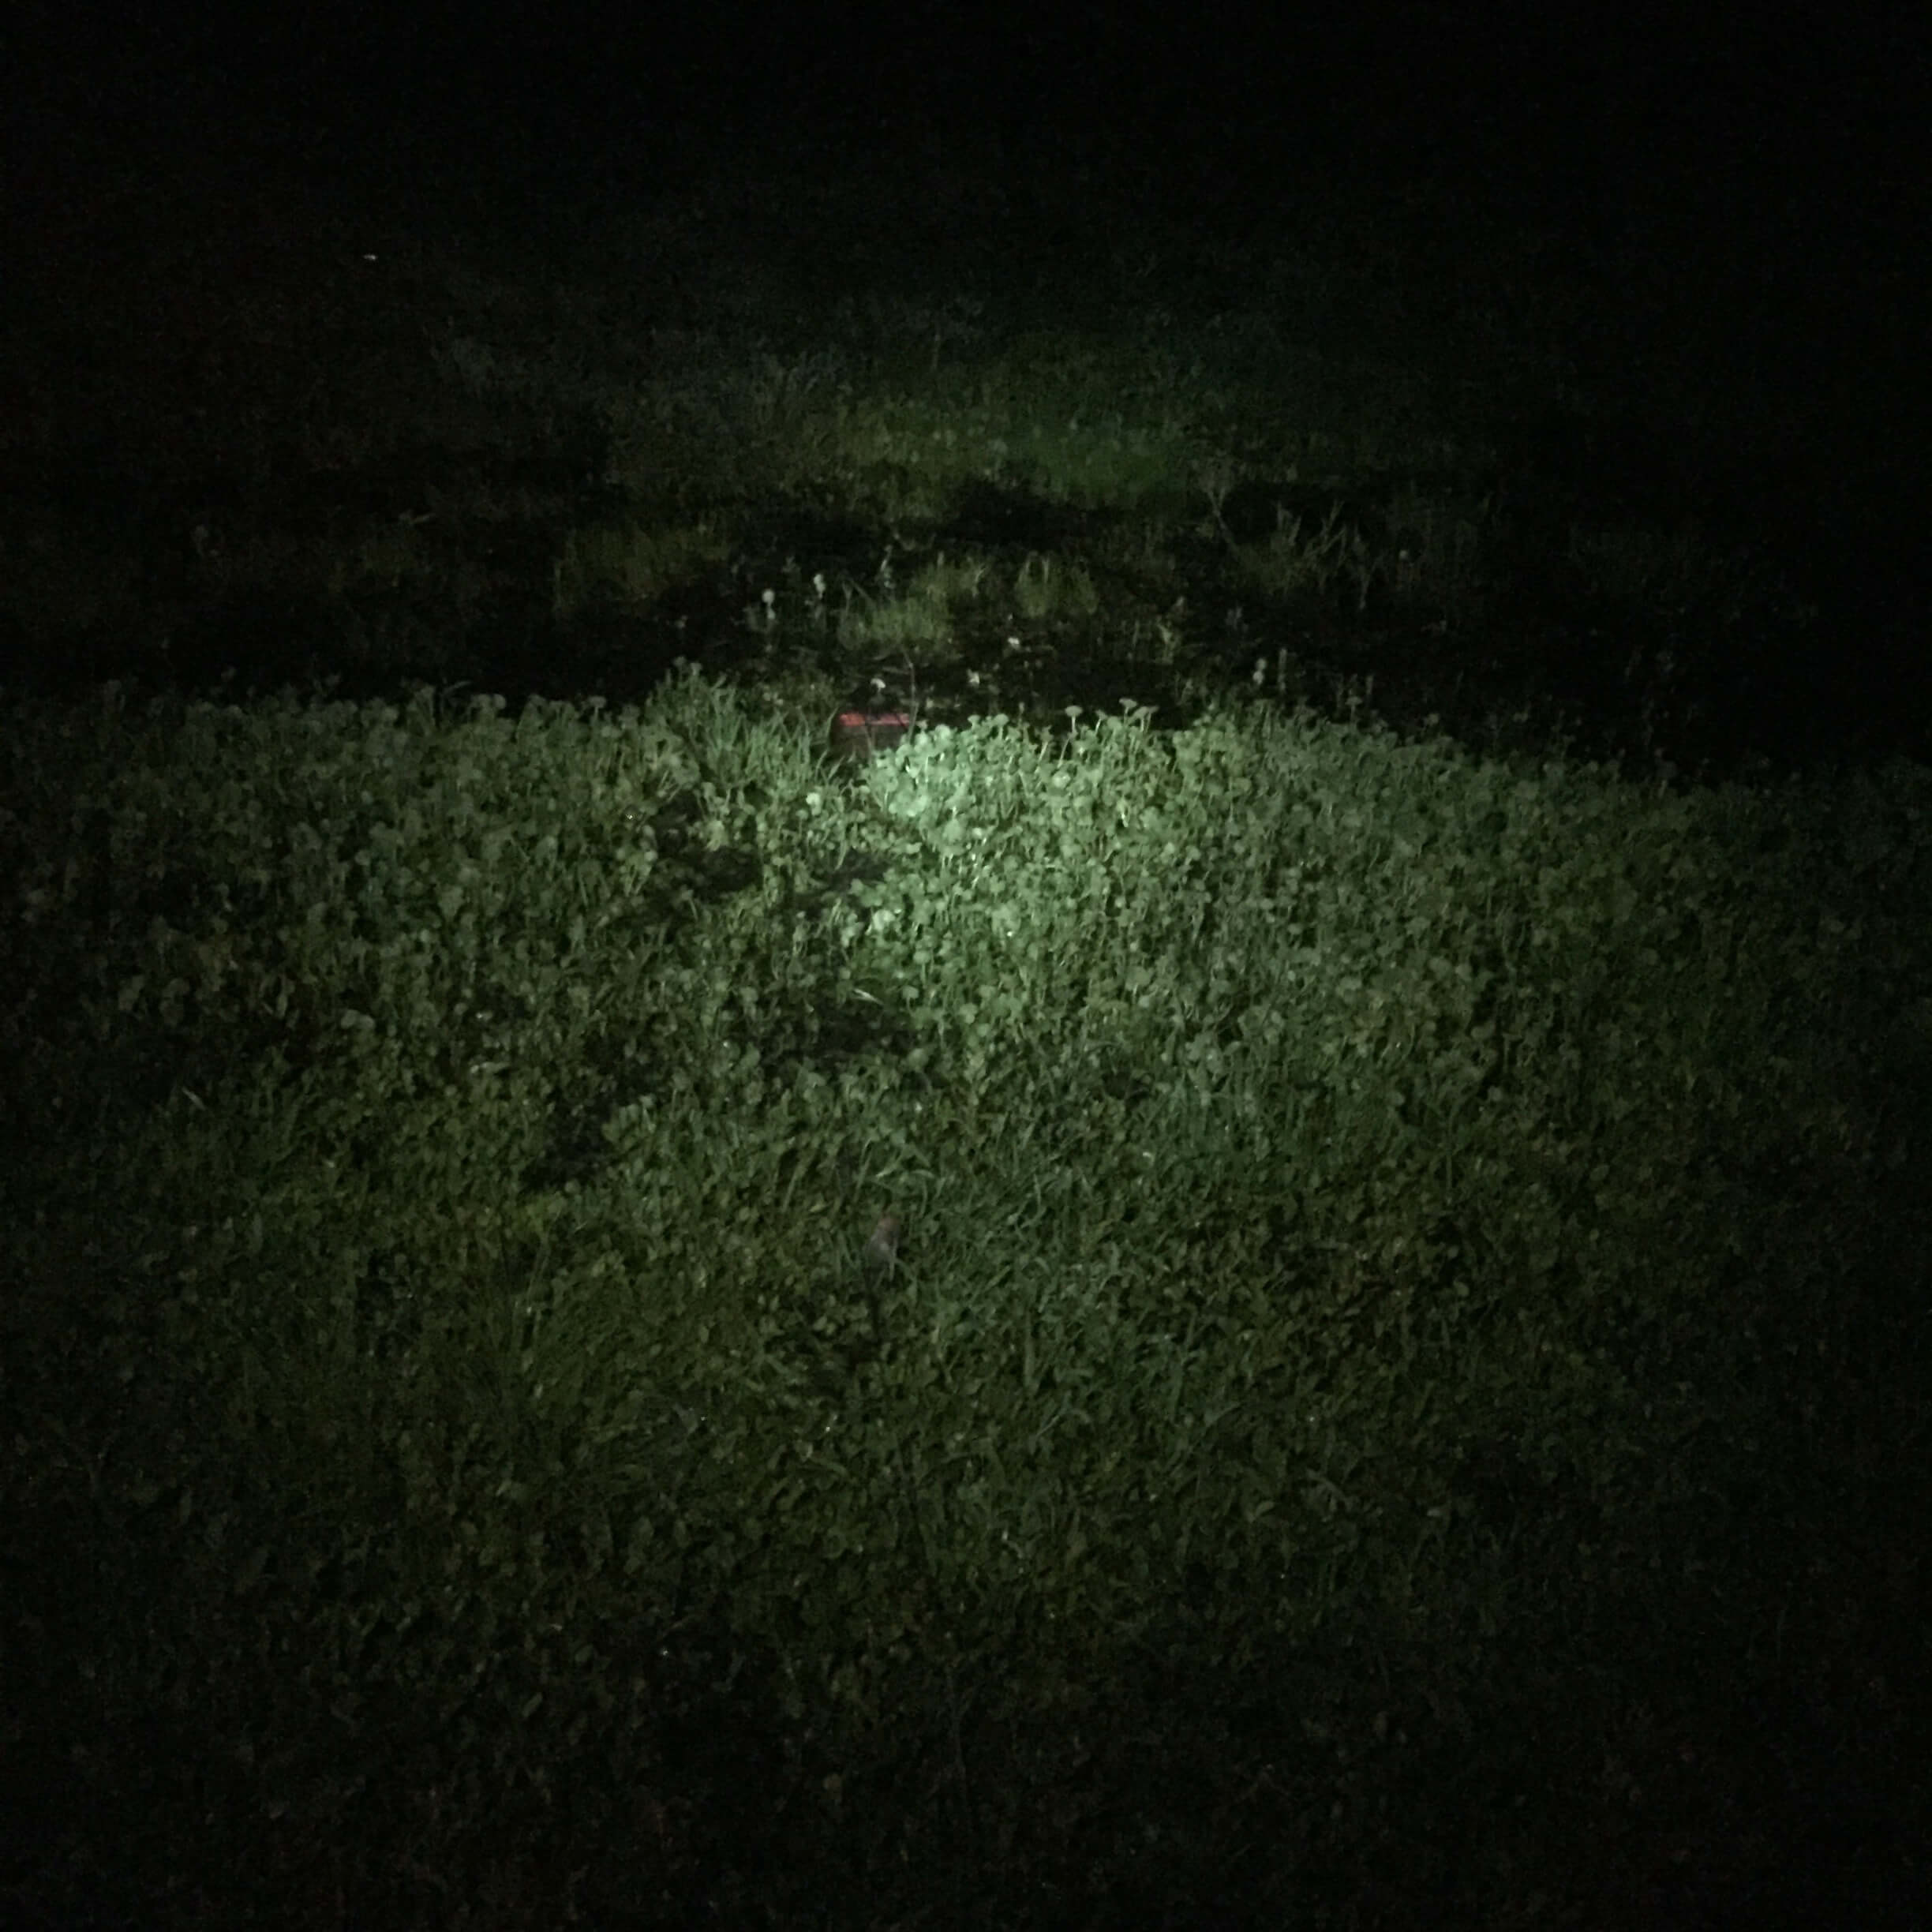
Here are a few of the locations where the camera was deployed overnight:
spooling camera cord into frog pondcamera rig near a caimancamera in frog puddle at night
crepuscle rig
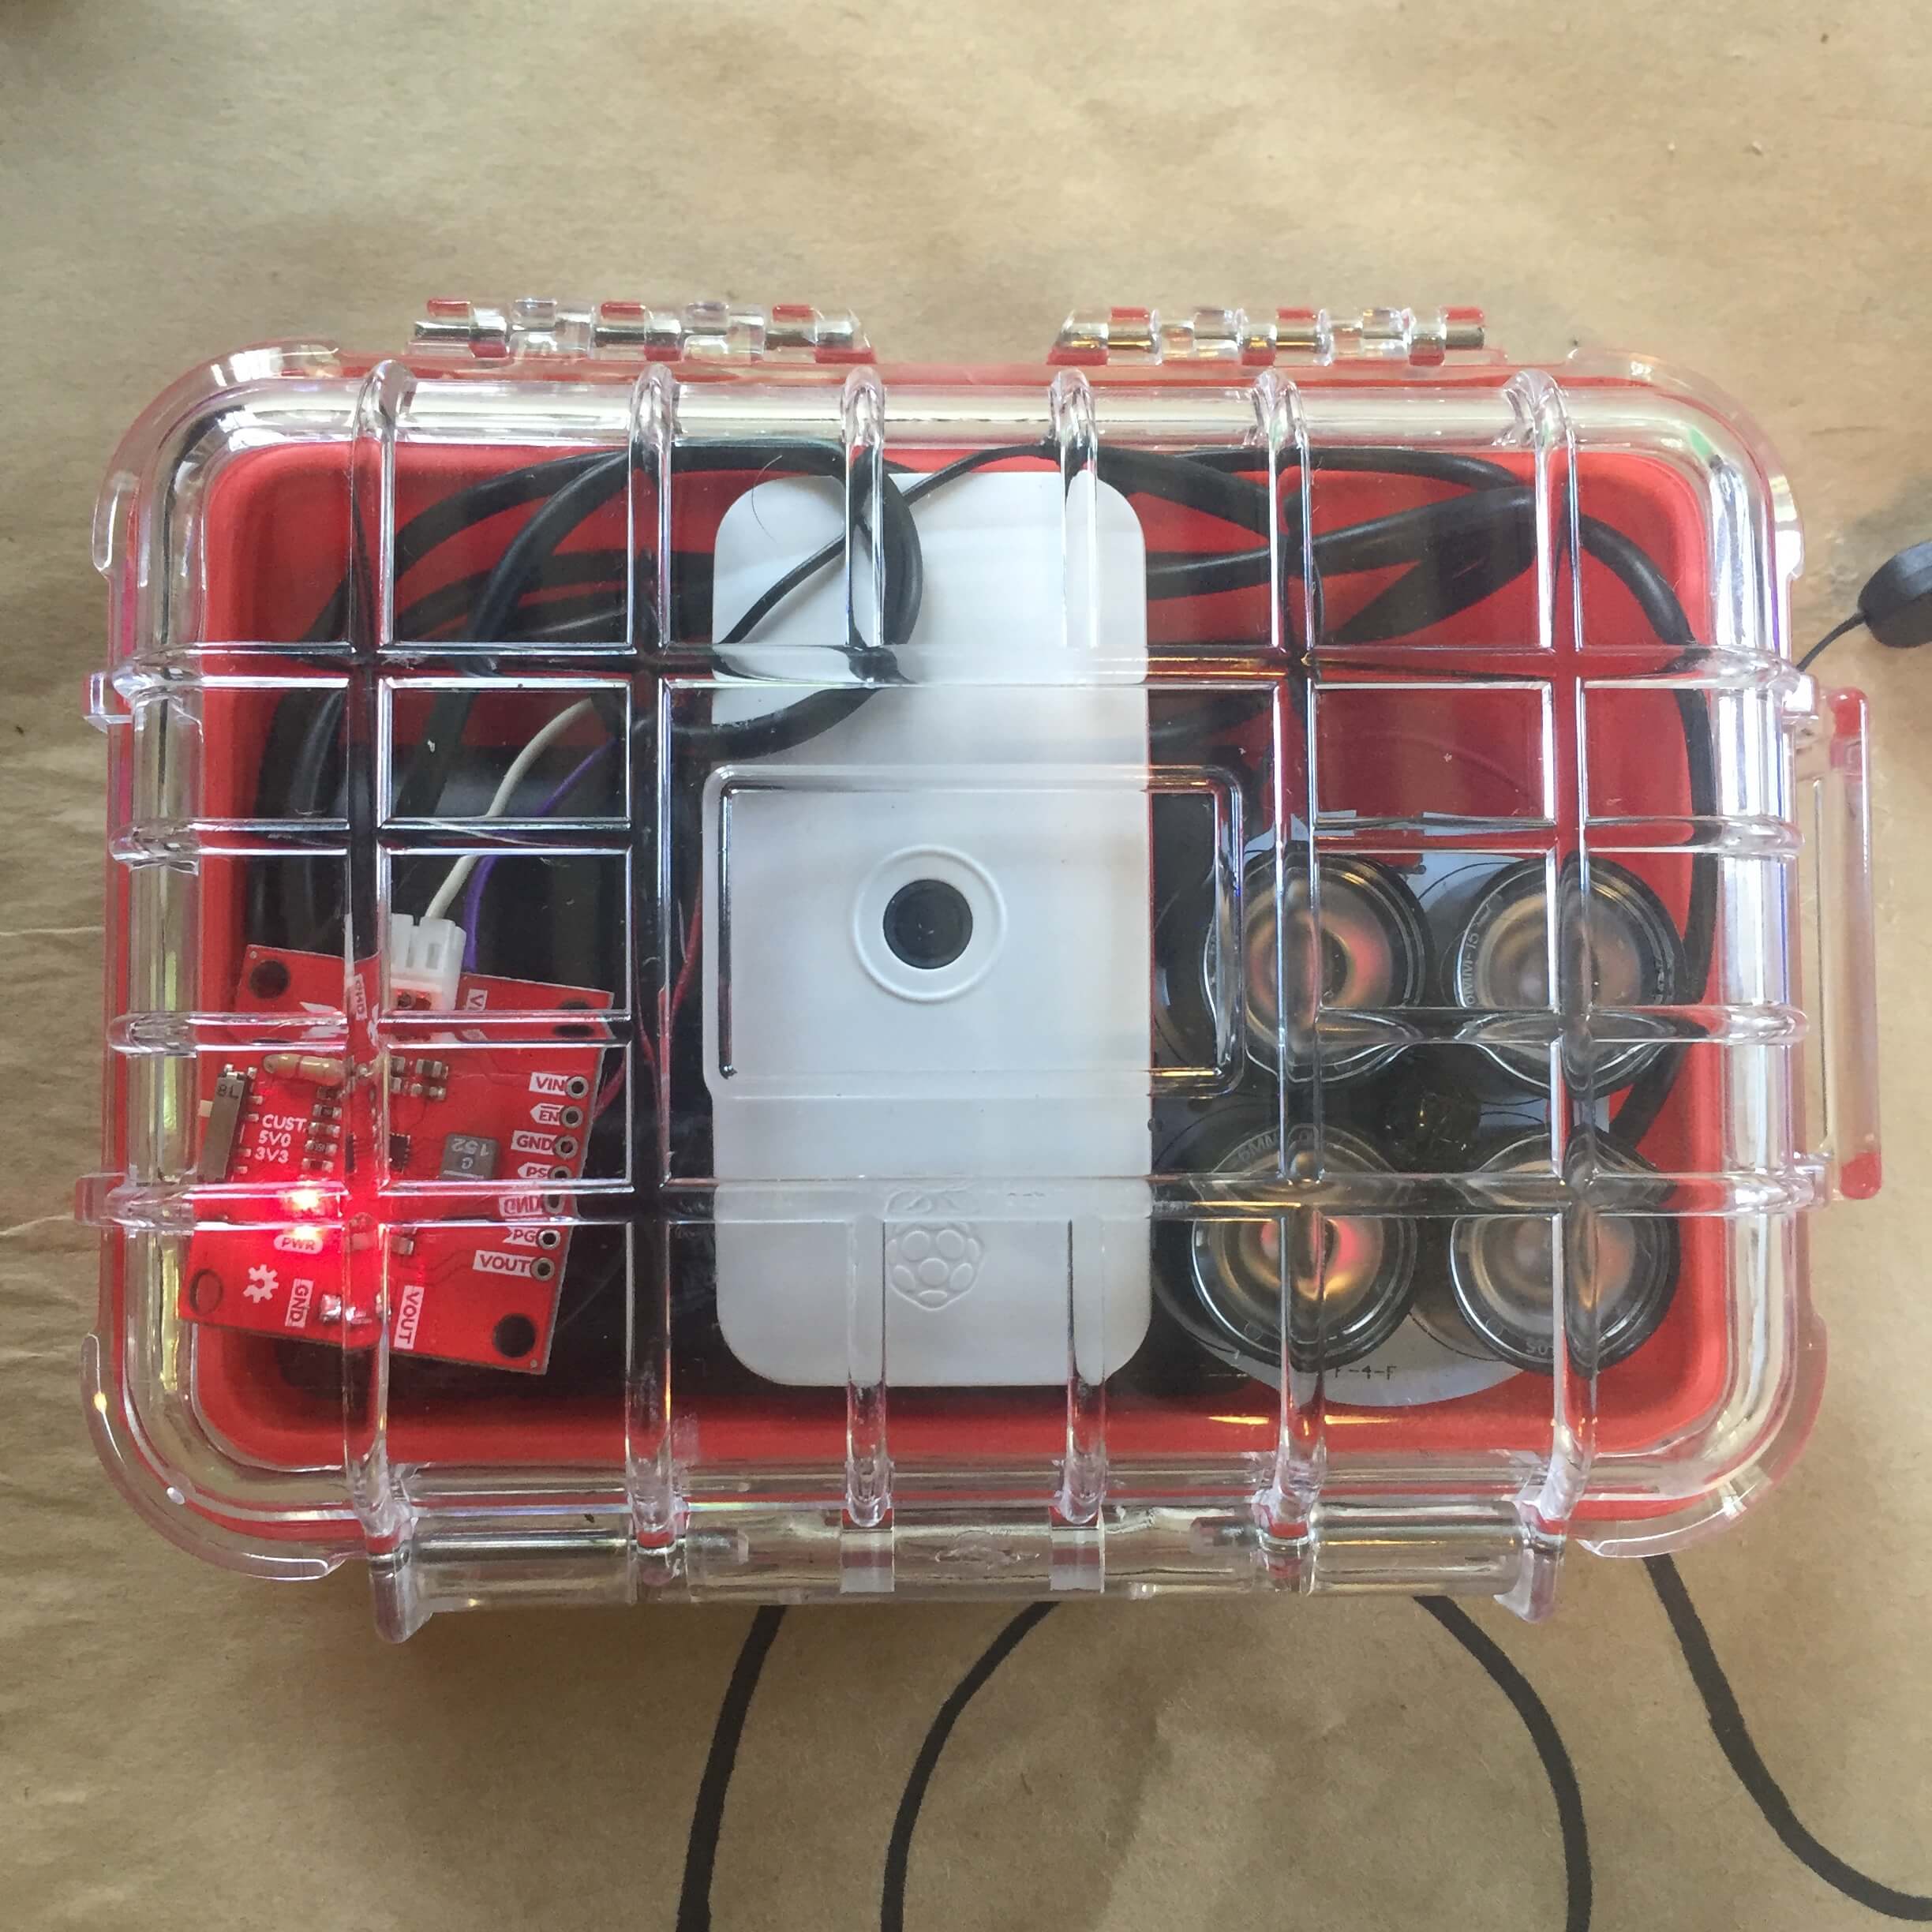
crepuscle 3d scan
This is the device I ultimately produced (photo left, 3D scan right by Grace Grothaus). The transparent plastic on the box confused the scanner, but I find the aesthetic fitting, as if the capsule were rescued from the bottom of the ocean after years of decay.
I arrived at Dinacon with a loose idea of what I would need to make this project happen and what the results would look like. I brought an infrared camera, a Raspberry Pi, a waterproof case and 100 feet of paracord.
I took an iterative approach, repeatedly testing versions of the prototype. The first thing I realized was that for an infrared camera to work properly in low-light environments, it needs an infrared light source. I tried using one, then three small infrared LEDs in series, powered by the Raspberry Pi. It quickly became clear that this was not enough light to penetrate the murky underwater depths.
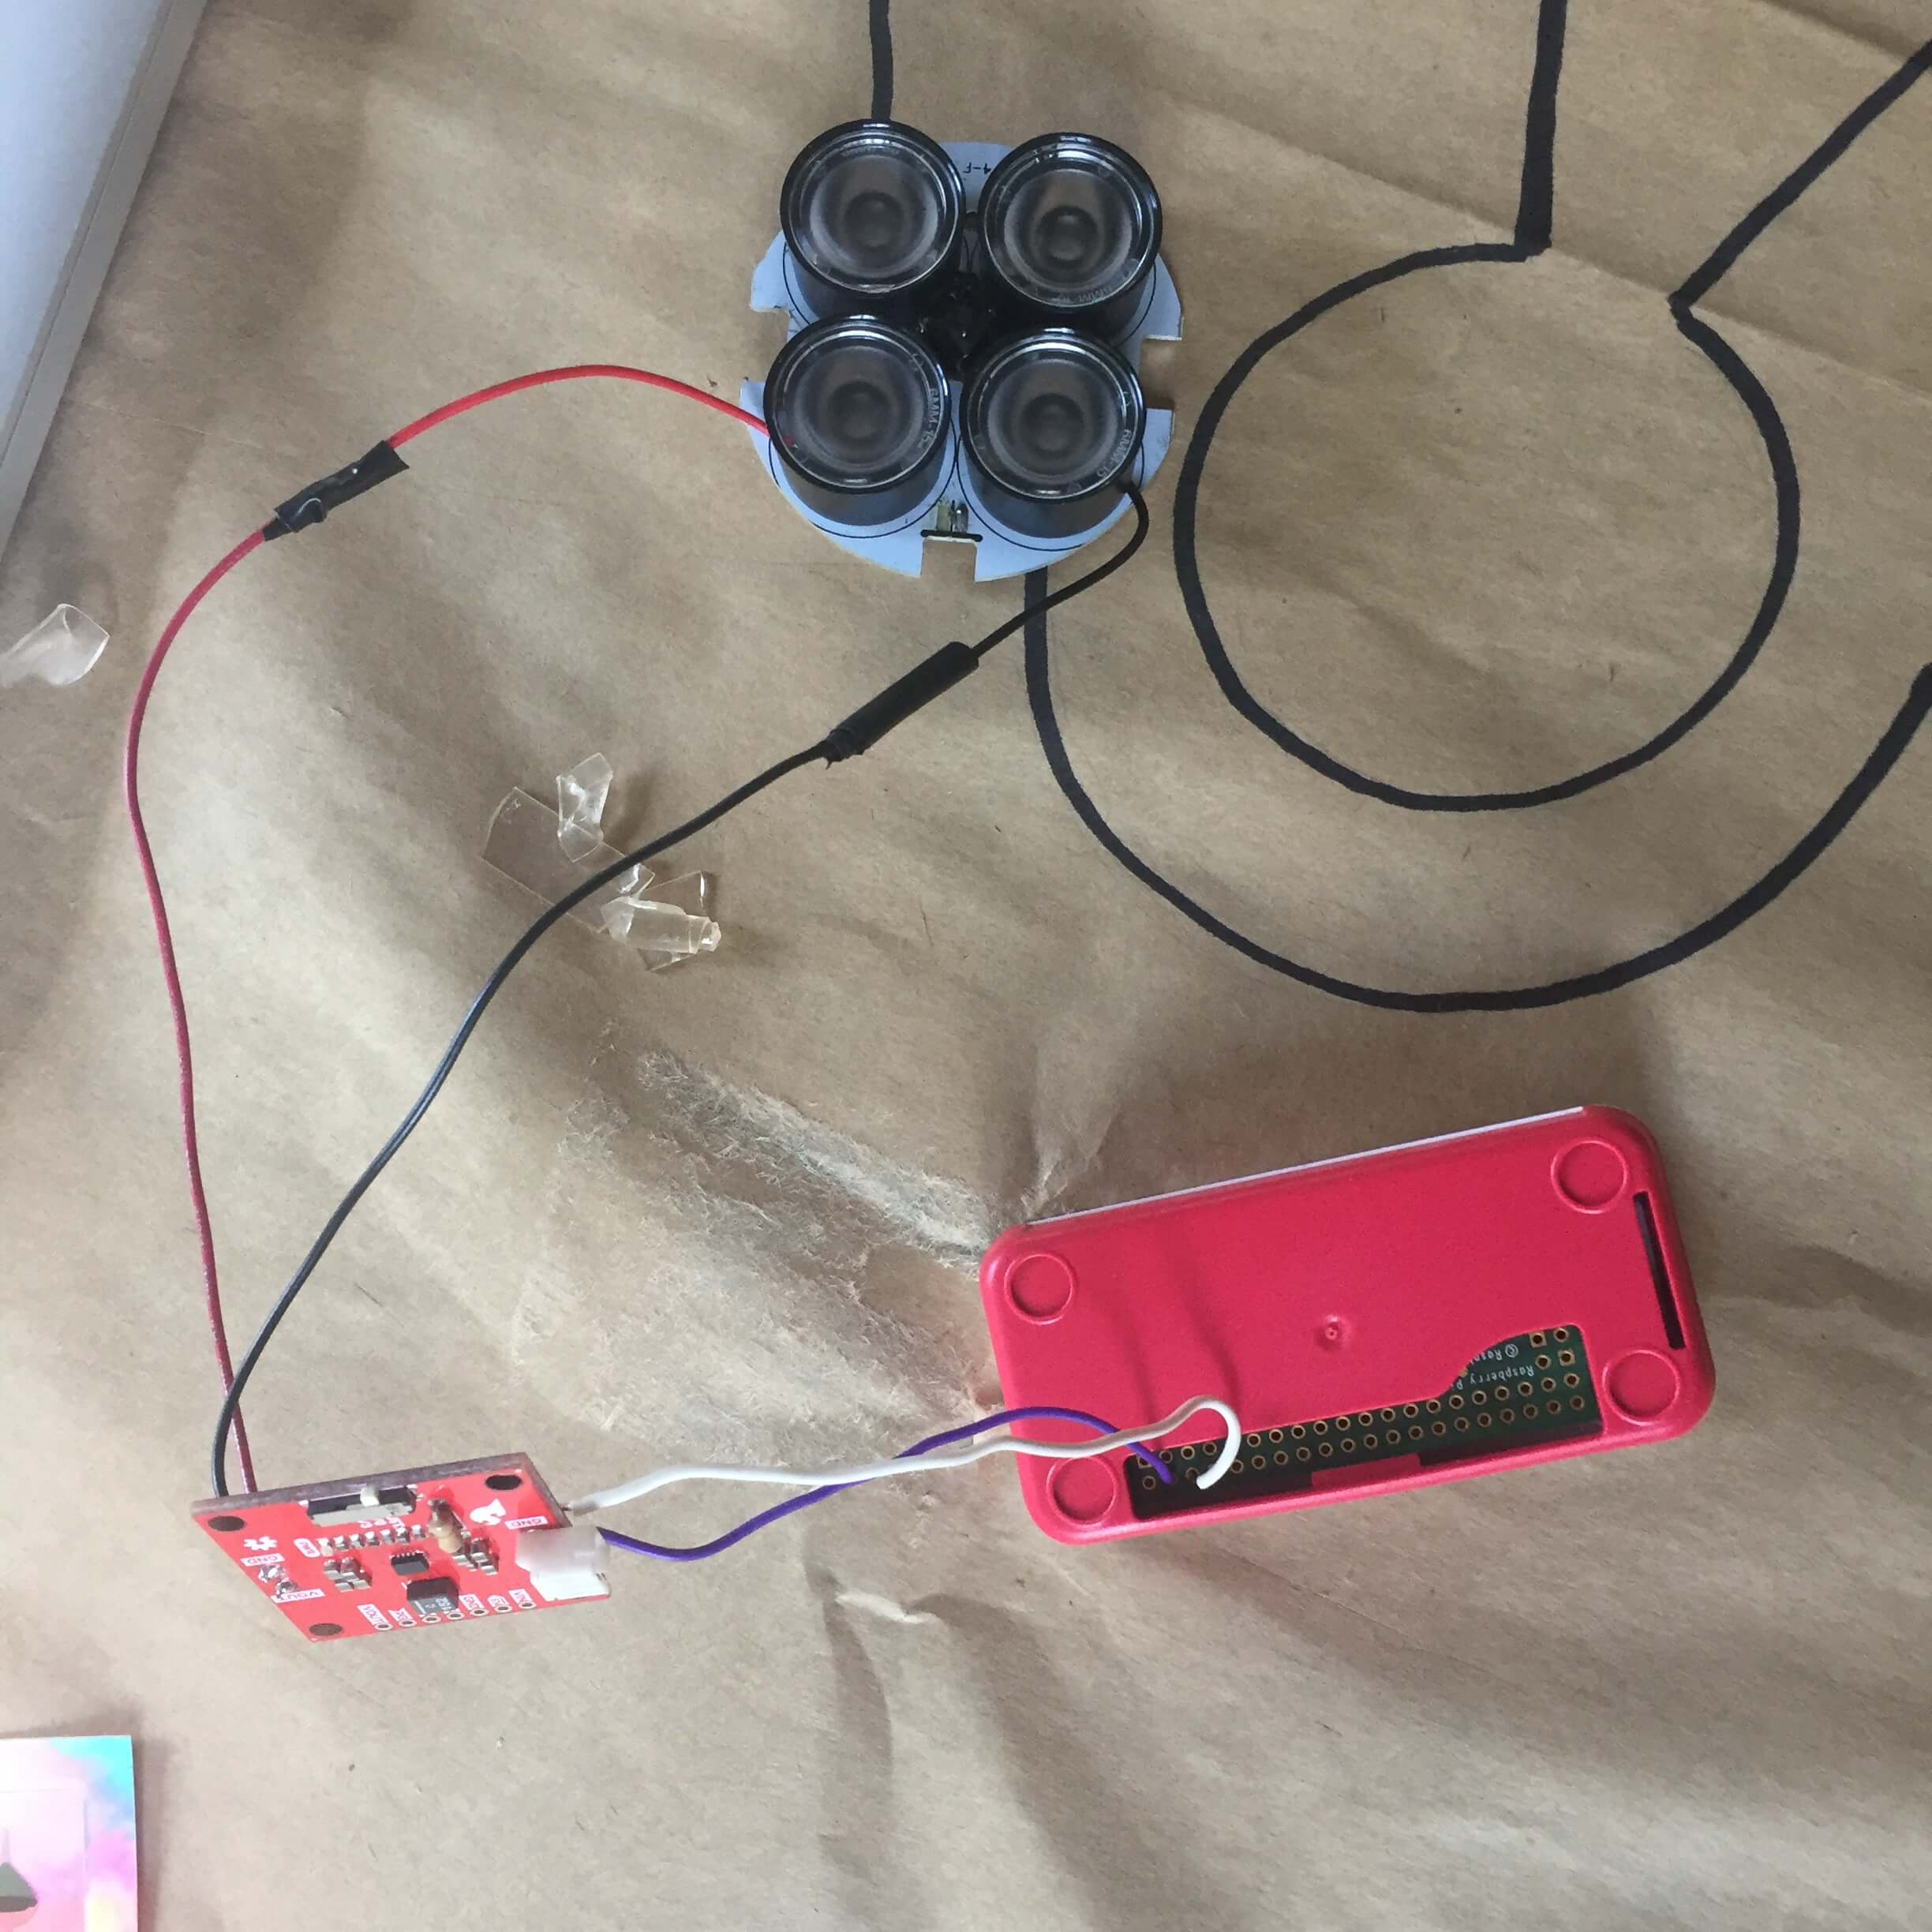
The next step was to take apart a heavy-duty infrared floodlight used by local bat researchers for nocturnal imaging. I extracted the circuit board and LEDs from the internals of this light, disabled the ambient light sensor and rewired the power supply to run off the Pi power supply using a SparkFun Buck Boost.
deconstructed infrared light
With this arrangement, I would experience seemingly random issues where the Pi would stop taking images and lose network connectivity once running on battery power out in the field. After some investigation and discussion with other knowledgeable folks, I measured the current drawn by the infrared light and determined it was drawing 1.8 amps. The battery pack I was using to power the Pi provides around 2.1 amps at peak capacity, so this arrangement only worked when it was fully charged. As soon as the battery was drawn down a bit, the Pi was not getting enough current to operate (around 80-100mA), so the camera ceased to work. The solution was to use a separate battery pack for the light.
Even after solving this and other technical problems, like running out of space on the Pi’s SD card, and figuring out the right cron / shell script configuration for timelapse images, a fundamental problem remained: infrared light doesn’t travel well underwater, perhaps because it is at the low end of the light spectrum, meaning it has low energy. Therefore, there wasn’t much to see in the middle of the night in the images that crepuscle produced. I schemed about how to make the most of these initially disappointing results.
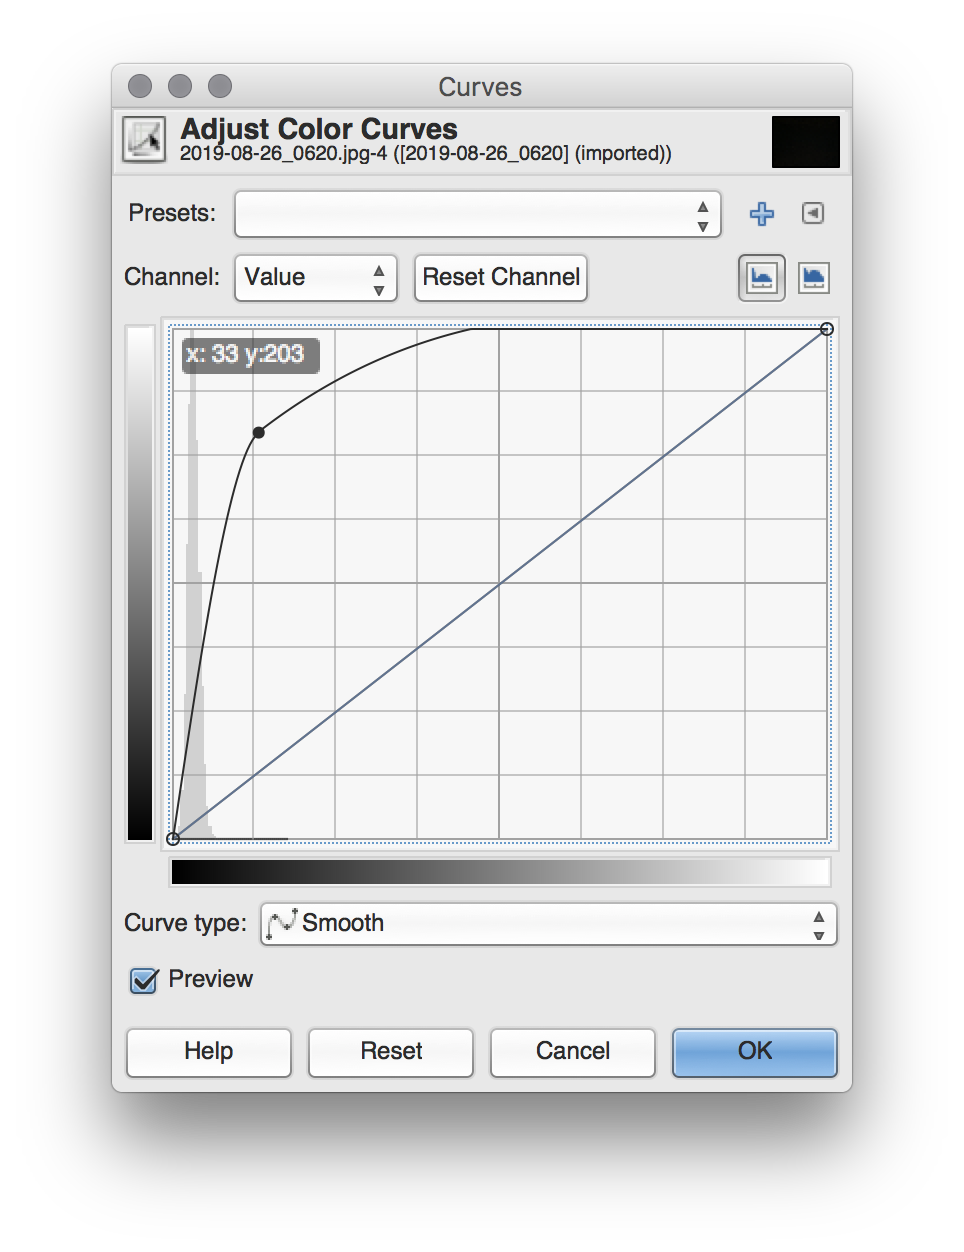
At first, all the images seemed completely black. However, when I took a look at the histogram for a random image in the free image editing software GIMP, I noticed that there was some image data in the very low wavelengths. I experimented with bumping up the color curves so this information was more visible, and was pleased with the somewhat psychedelic effect.
histogram of underwater night image
I then applied this curve to each image with a command line batch process using ImageMagick, then compiled the images into videos using ffmpeg.
Overall, this project was a great learning experience. I learned about the physics of light and water, efficient and appropriate use of batteries in electronics, batch image processing using open source software, and how to use local found materials like bamboo and cement blocks.
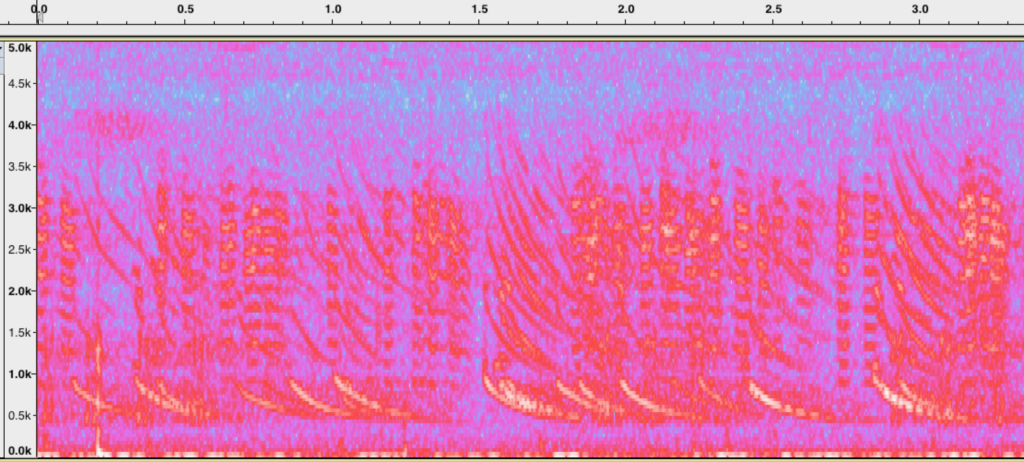
Before the sun had even set on my first day in Gamboa I had already heard excited chattering about the sound of the “Laser Frogs”. Once it got dark there was a seemingly ubiquitous chorus of these laser sounds, an asynchronous melange of descending glissandi. One might mistake this biophony for a retro video-game arcade, but it is in fact the revelry of an amphibious Bacchanalia.
Túngara Frog in a puddle, photo courtesy of MangtronixChorus of Tungara frogs at night in GamboaSpectrogram of the frog chorus
First Attempt
I had other plans and project ideas before arriving at DINACON, but I found myself continuously drawn to the sound of these frogs. I was completely ignorant of them at first, having no idea what their actual name was or anything about their behavior or even what they looked like. I just really liked the way they sounded and kept listening. Indeed these frogs sound like a laser beam from a video game, and since I have worked as a sound designer and synthesized laser beam sounds for video games, I thought “I bet I can synthesize these frogs!”.
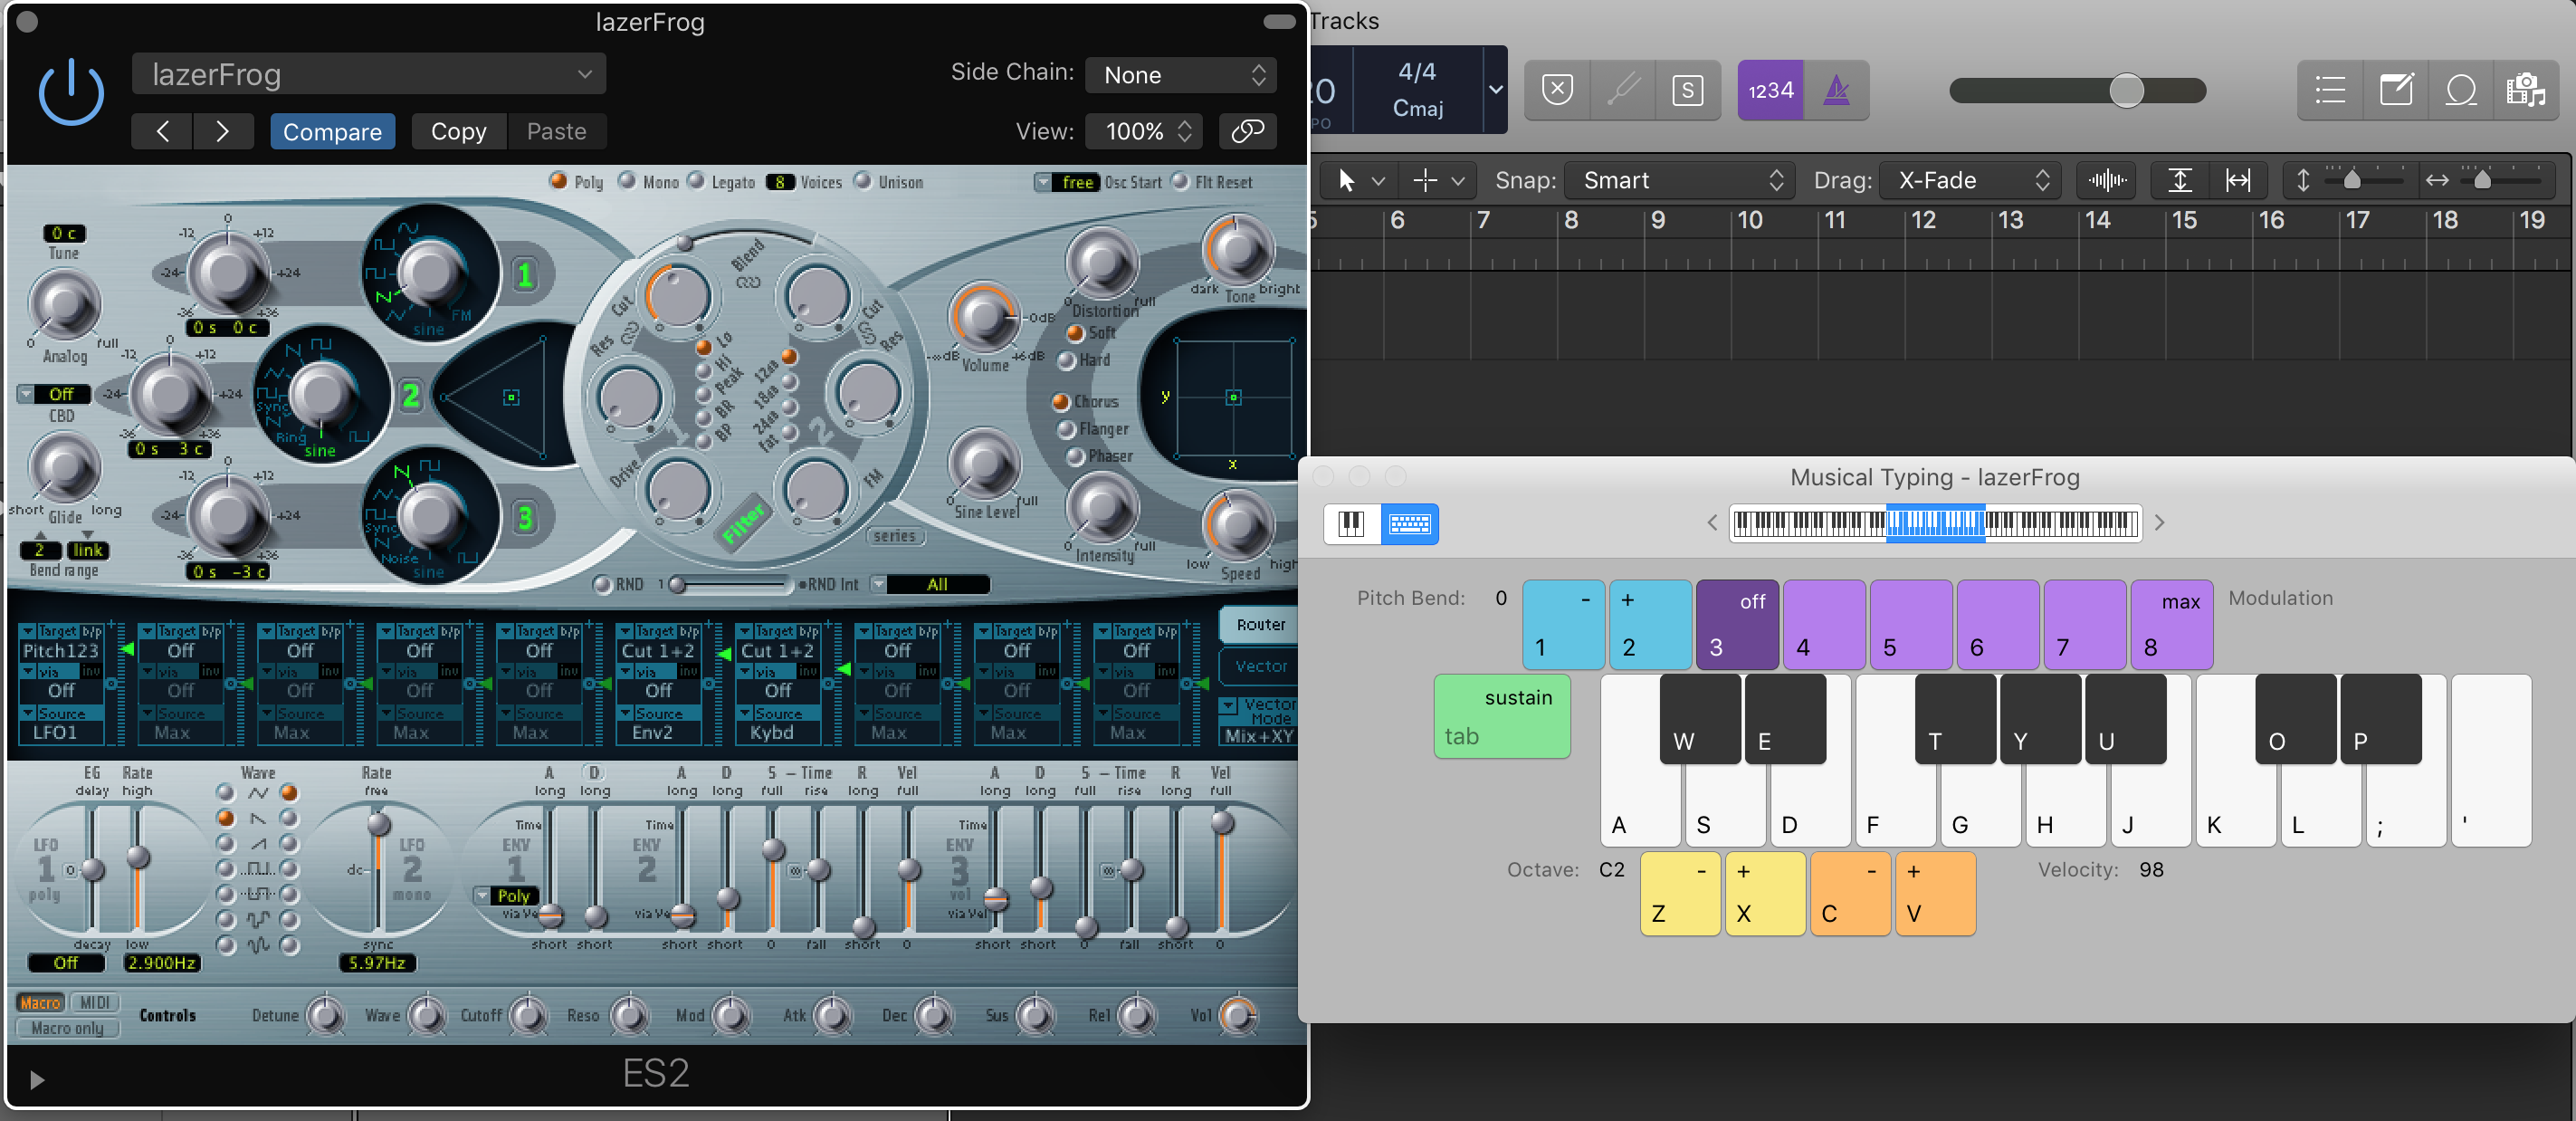
My first attempt was a very quick patch using the ES2 synthesizer in Logic Pro. I did this based entirely on listening to the frogs before analyzing the spectrogram in detail. It captured the general gesture of the descending tone, but didn’t capture the timbre or slope of the glissando very well.
ES2 Logic Pro Patch for Laser Frog SynthesisLazer Frog Synth attempt #1
Making the Whine
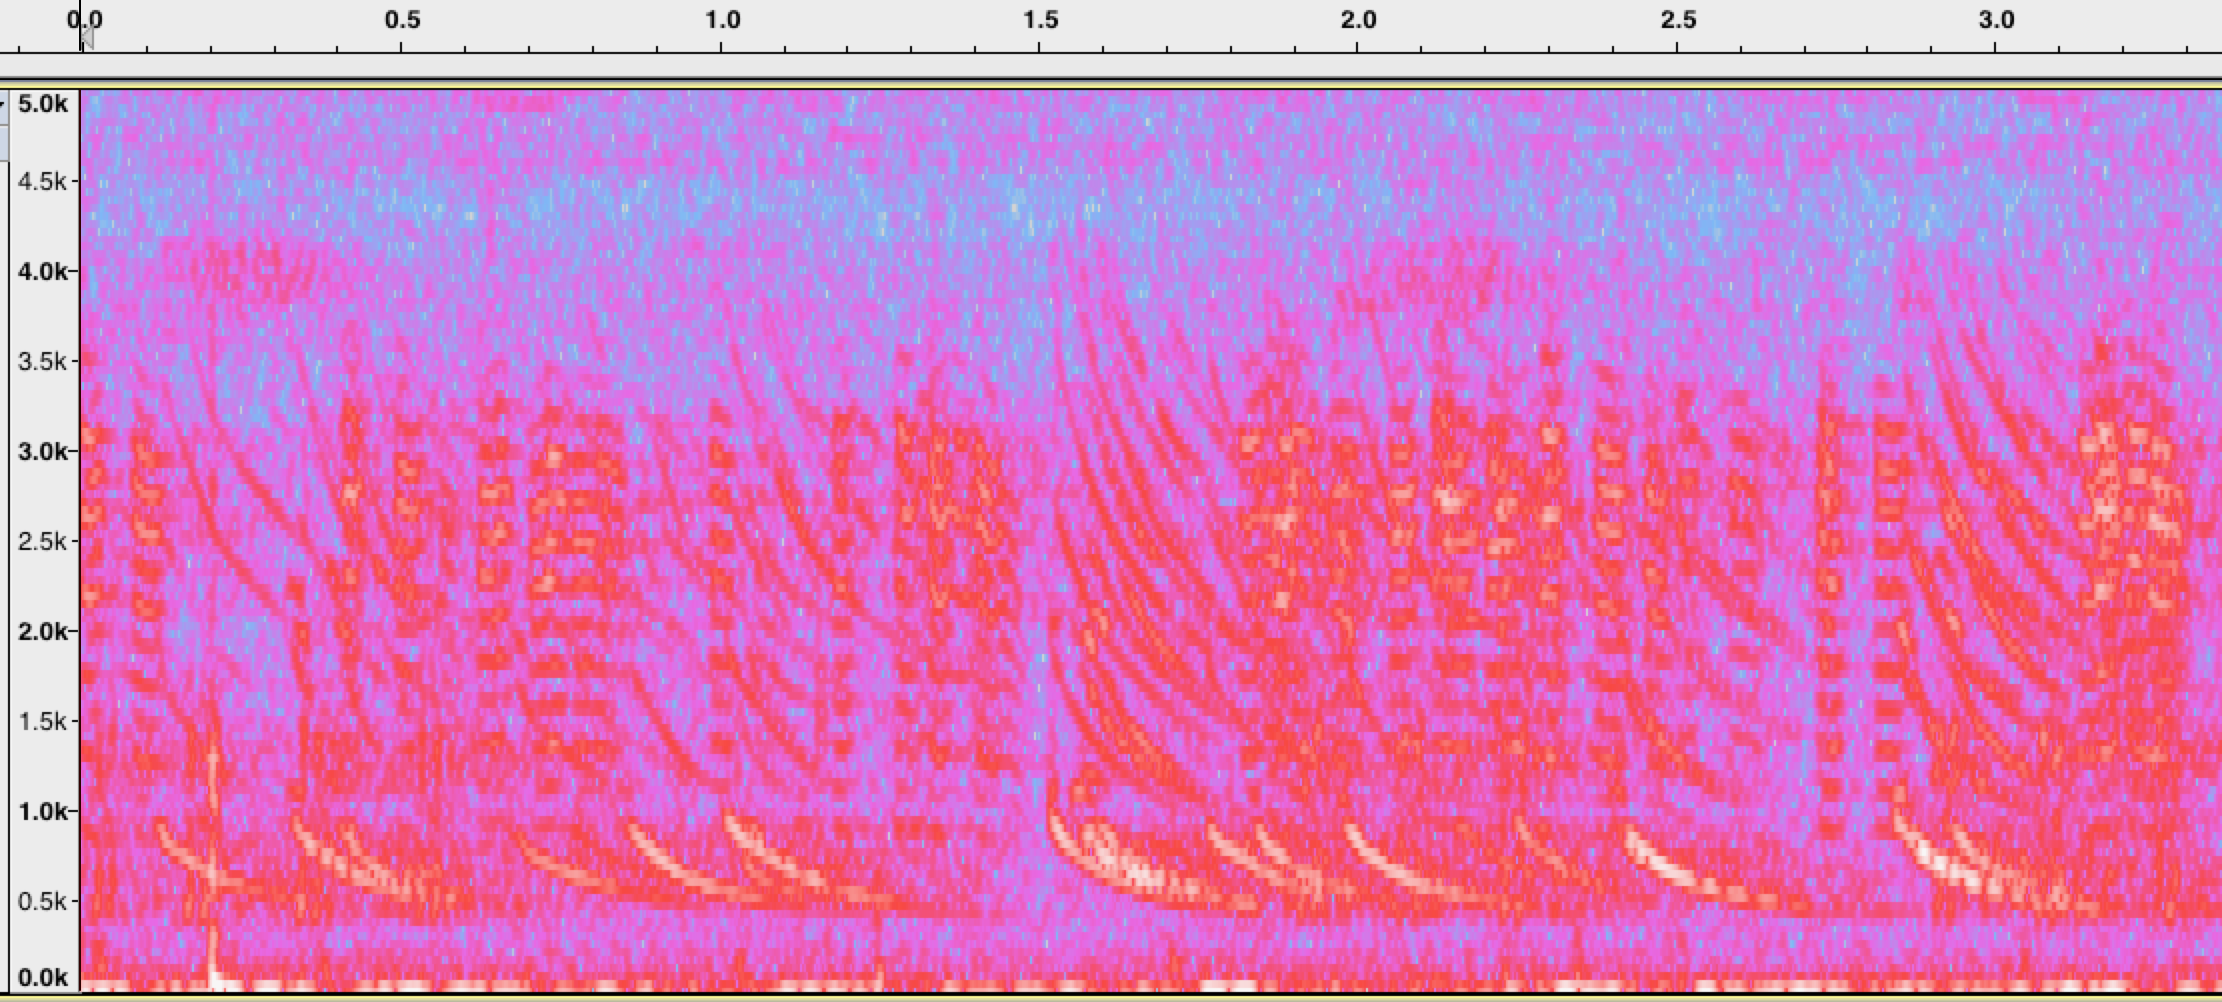
Although the first attempt was not convincing enough, it was close enough to encourage me to continue on my quest to synthesize the frogs call. I began by inspecting an isolated call from one frog via the spectrogram in Audacity.
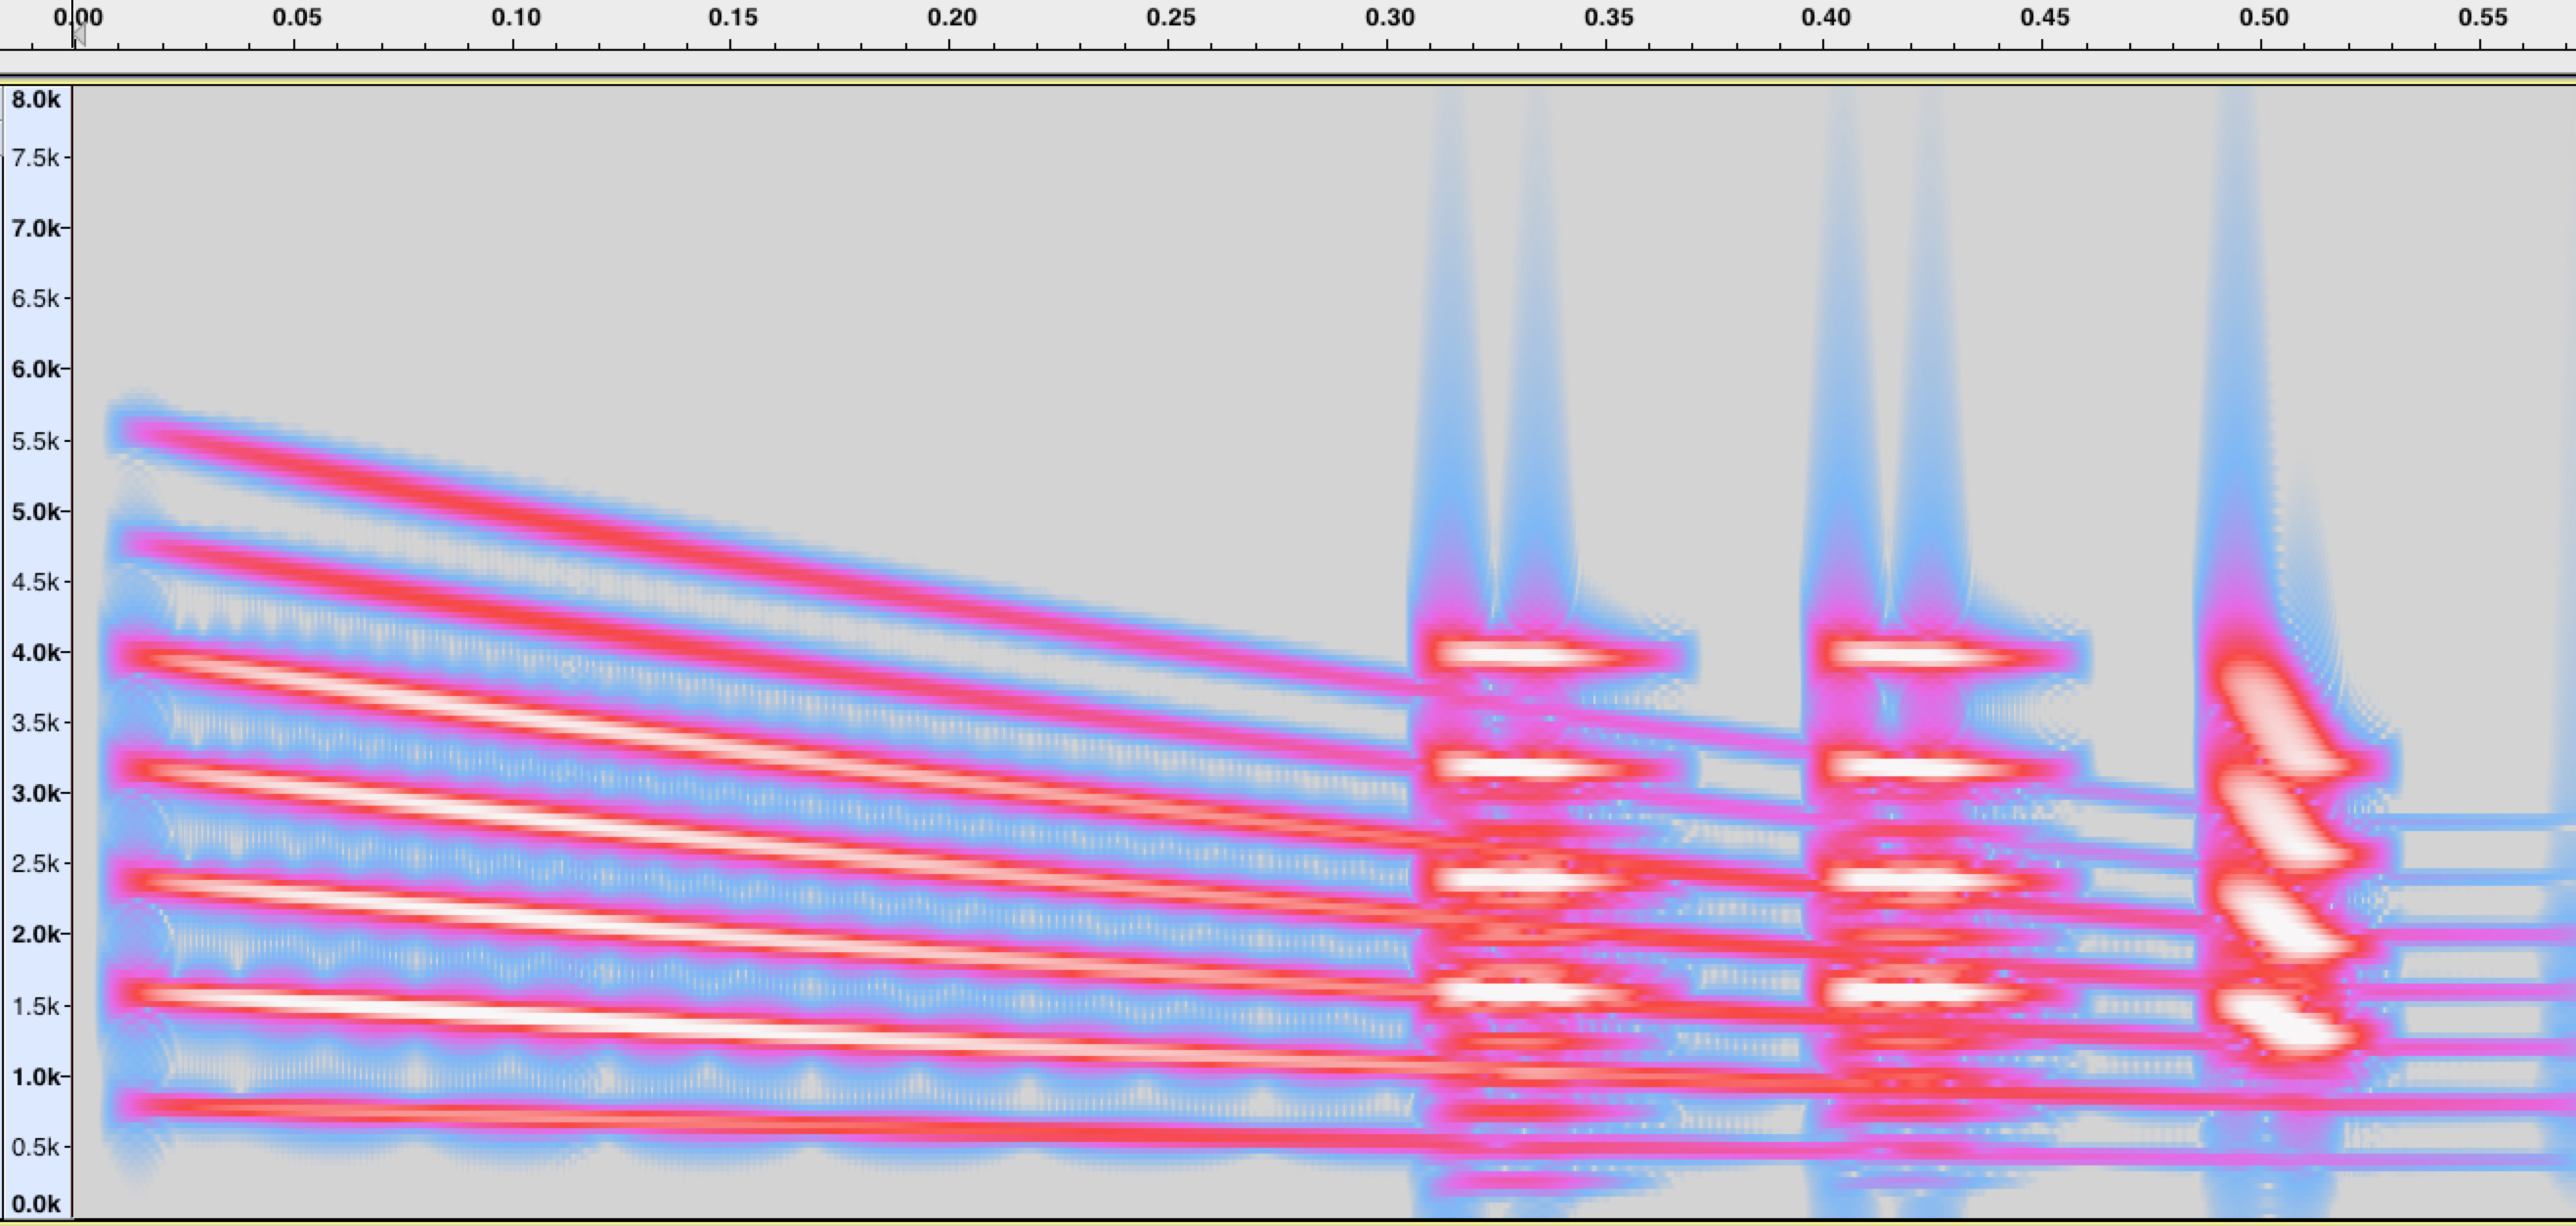
Túngara frog recording with whine and three chucksSpectrogram of Túngara frog recording with whine and three chucks
There are many noticeable things from this spectrogram that further inform what we hear. The first being that the frogs make not only this “laser” sound, but also have a percussive sound that follows it. At first I referred to these components as the “chirp” and “beep”, but after being clued in by some STRI researchers (thanks Amanda Savage!) I learned to use the terms “whine” and “chuck”. These are much better descriptions in my opinion.
I decided to use the SuperCollider programming language so that I had absolute control over the synthesis of this sound. The first area of focus was on creating a convincing “whine” using a bank of sine wave oscillators.
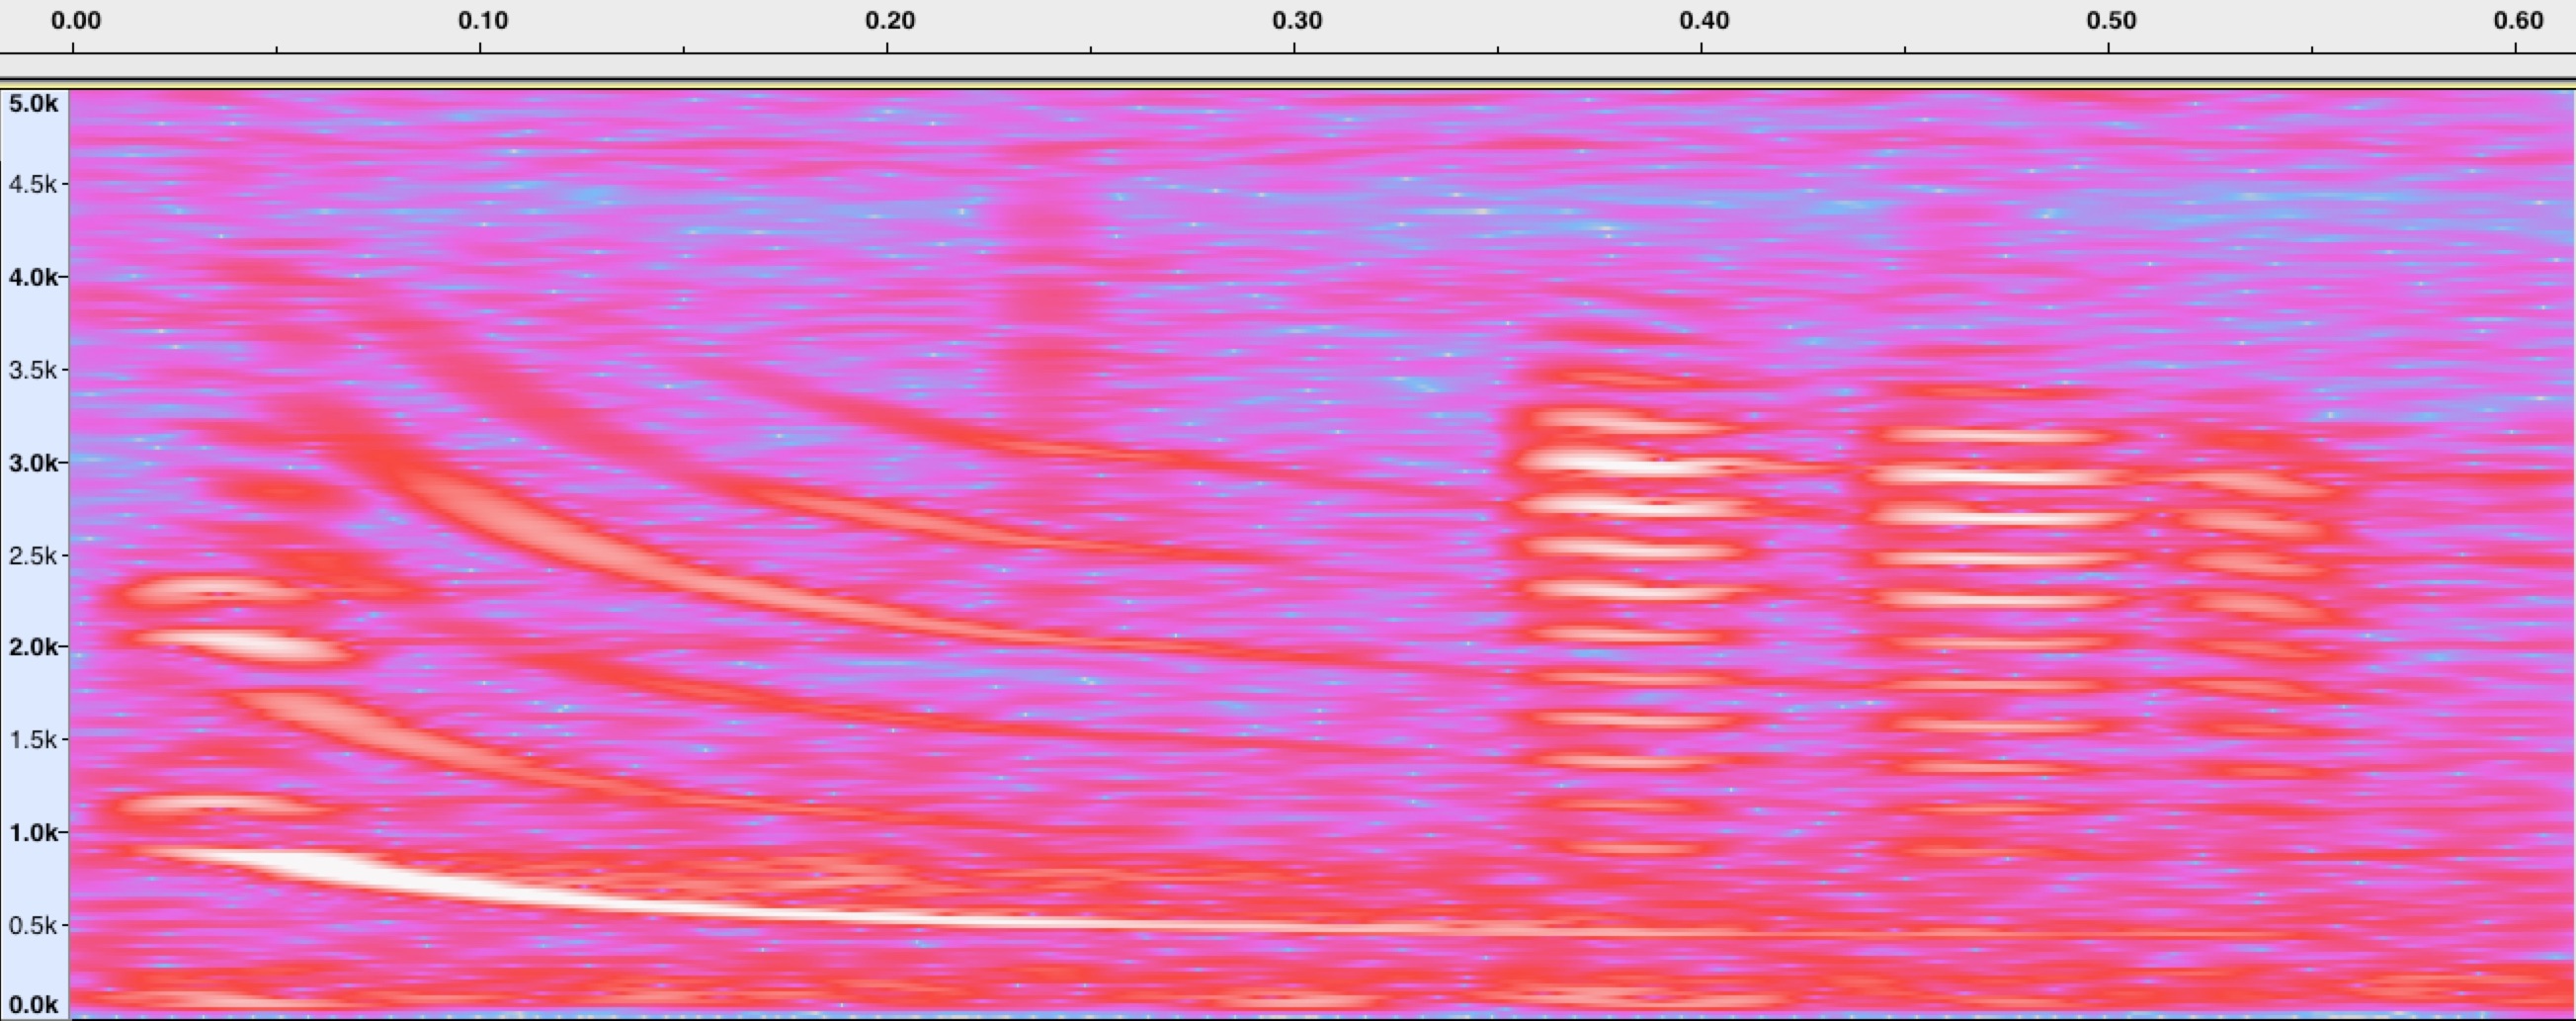
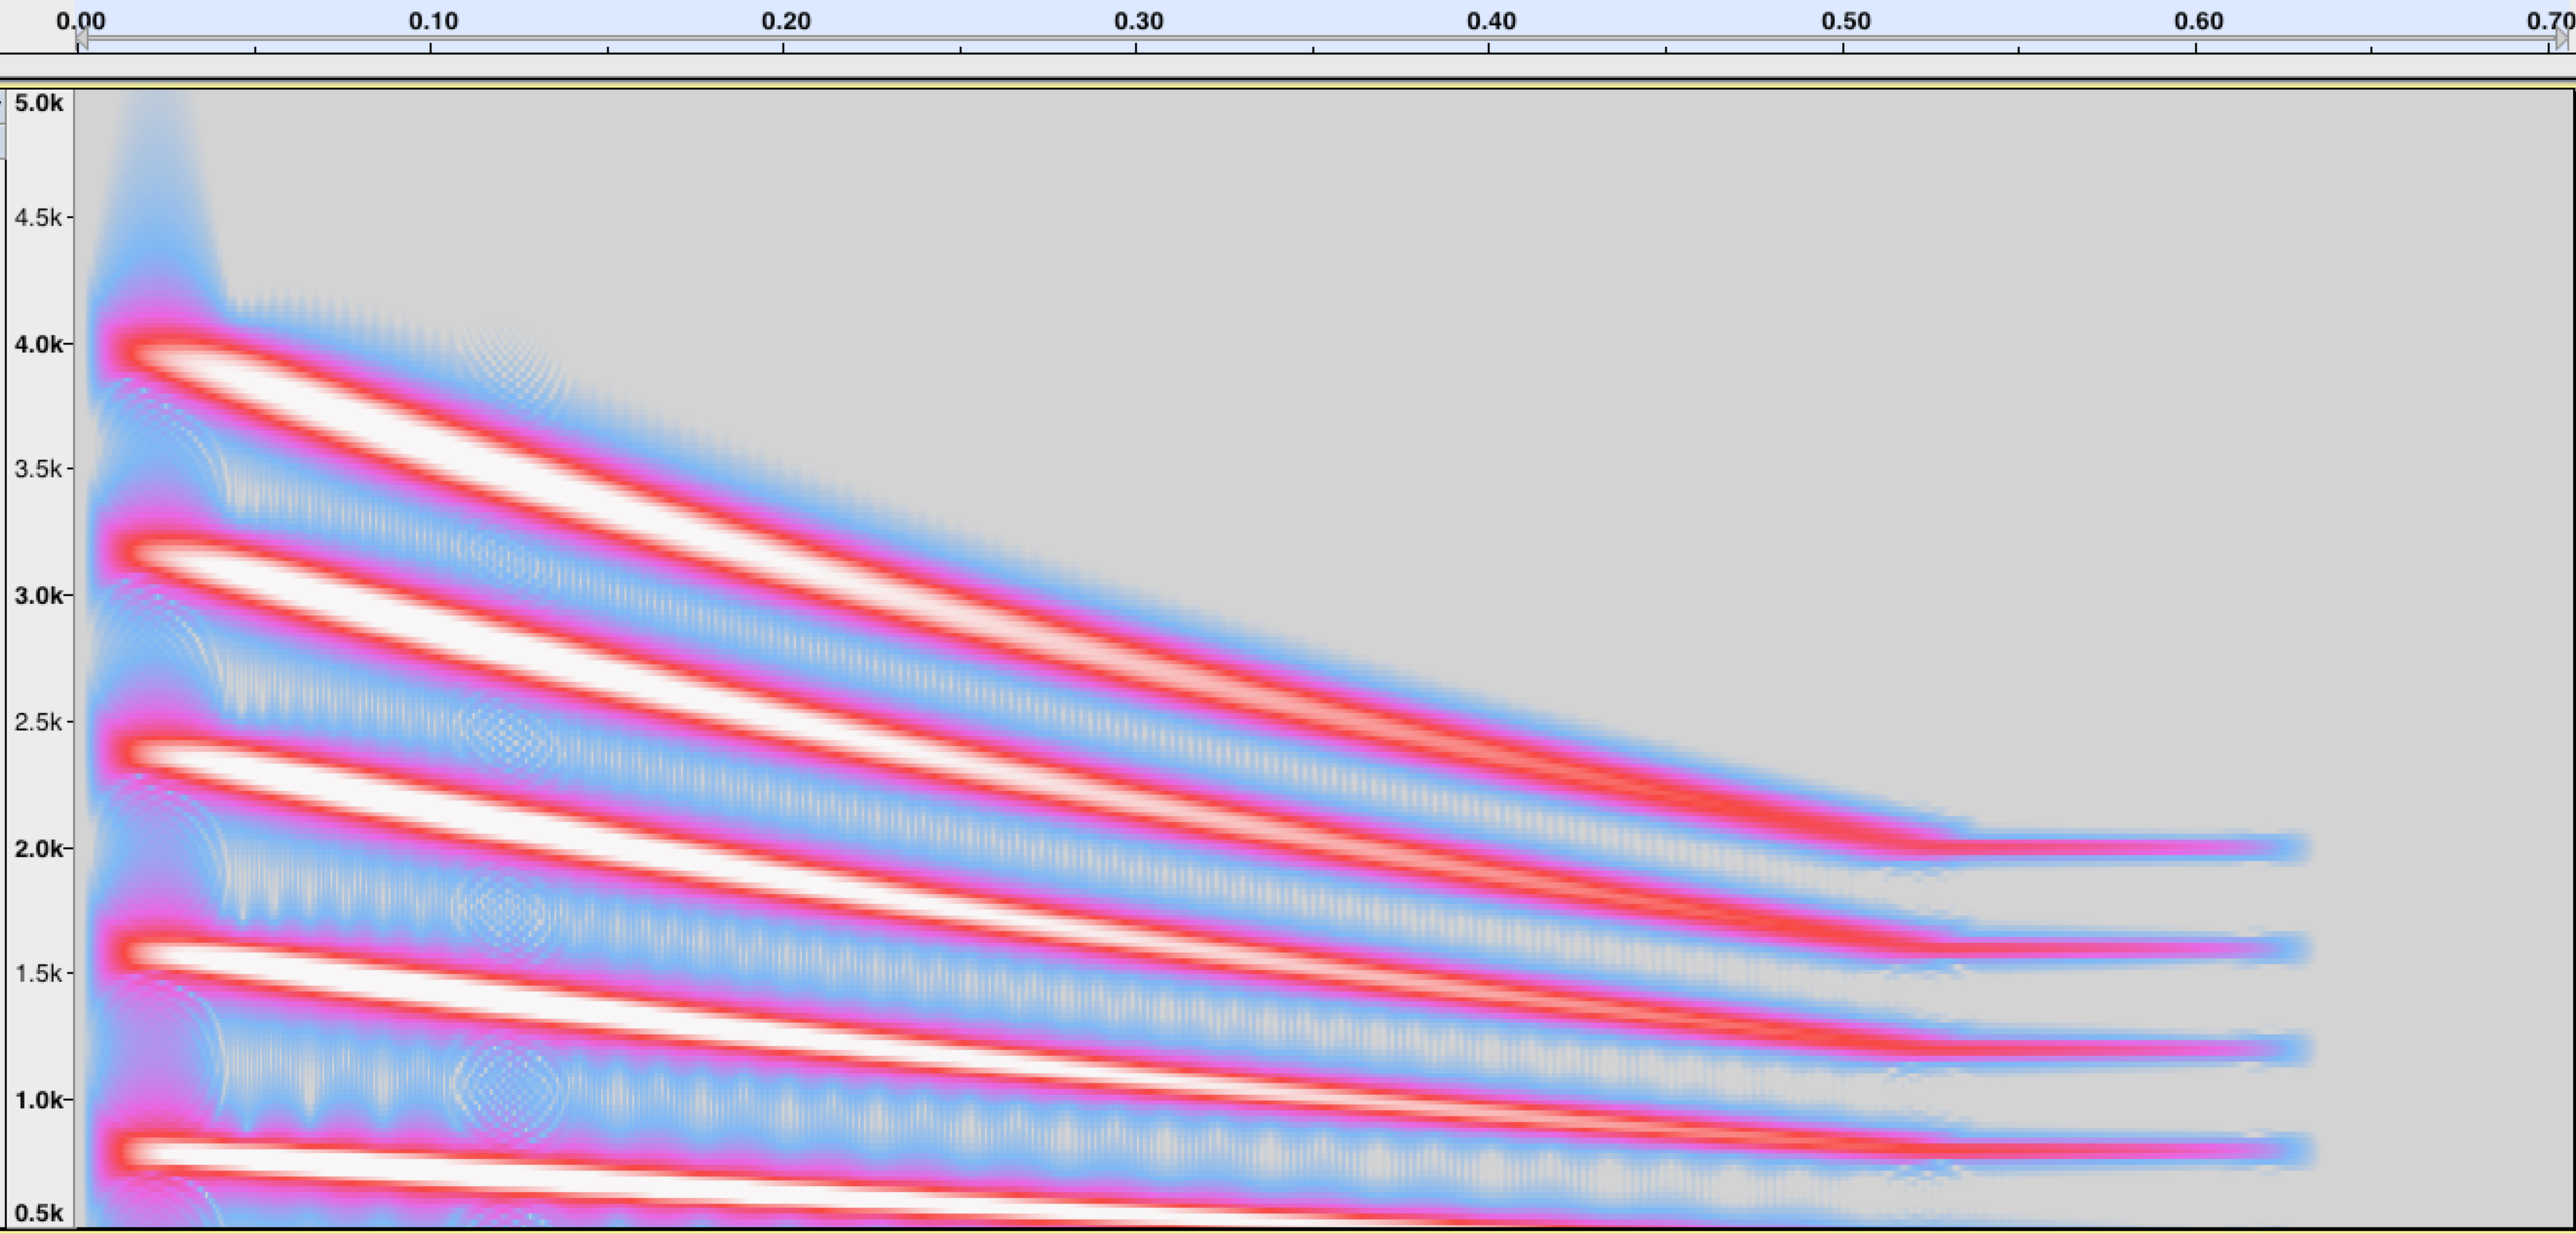
Looking at the spectrogram above we can see the “whine” portion of the call is a descending tone, starting around 1kHz and ending about an octave below. It also appears to have some harmonic overtones that decrease in intensity (up to about the 5th harmonic) Here is a recording and spectrogram of the first attempt in SuperCollider.
Túngara “whine” synthesized, first attempt in SuperColliderSpectrogram of synthesized Túngara whine in SuperCollider
This was already sounding better, but by looking at the spectrogram of the synthetic whine some things are obviously still lacking. First, the slope of the glissando is still too linear, it needs to have more on a exponential (perhaps cubic?) curve to it. Additionally the upper harmonics are too strong and need to be attenuated relative to their ordinality. (The higher the harmonic, the less loud it is)
Making the Chuck
After a few more iterations of refining the whine, I moved onto the chuck.
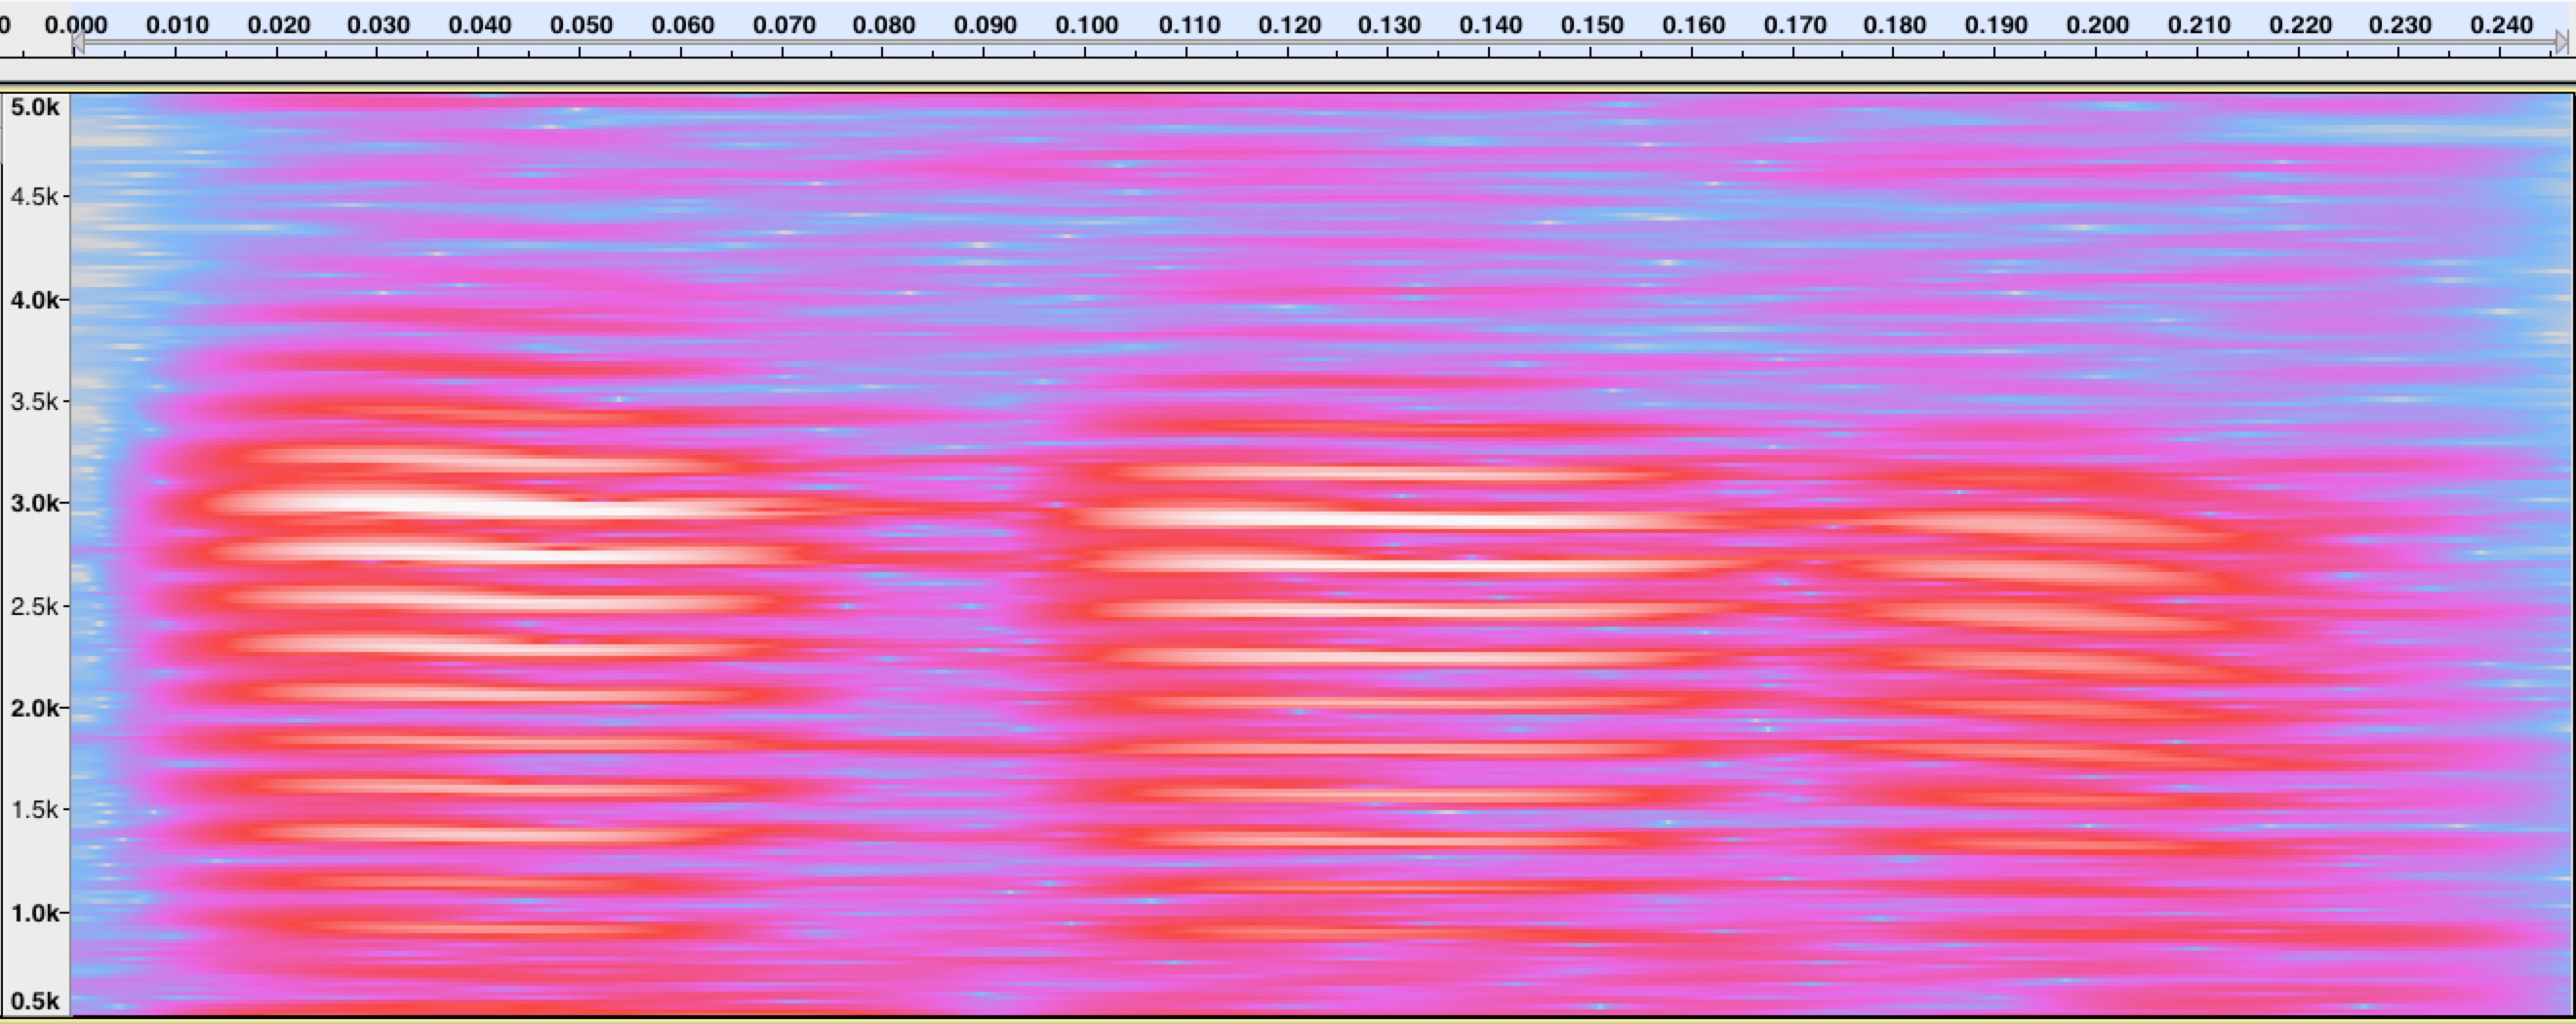
Spectrogram of Túngara frog chucks.
Looking at the chucks in the above spectrogram we can see partials at relatively even spacing. We could perhaps model this by using a harmonic tone with a fundamental frequency of ~200 Hz or ~250 Hz, with the fundamental and first few overtones missing. The chucks seem to have their highest peak around 2.75 kHz. Is this sound produced via some sort of formant resonance? What mechanism makes it seemingly harmonic but with a missing fundamental? This is unclear to me, but I can recreate the sound nonetheless!
This group of three chucks have different durations, and the last one seems to have a downward pitch contour but not nearly as pronounced as the whine. The first two beeps are approximately 50 milliseconds long, and the third is 40ms.
Using the same approach as the whine, I used a bank of sine wave oscillators to recreate the chuck. Below is a recording and spectrogram along with the synthetic whine.
Synthetic whine and chuck of Túngara frogRecording of synthetic whine and chuck of Túngara frog
While the timing of the chucks is accurate, the tone is not convincing. I continued to iterate on the implementation until settling on the one below.
SuperCollider GUI Application
For presentation at Dinalab I put together a simple GUI application which allows the user to playback a recording of an isolated Túngara call and compare it to the synthetic whine and chuck. Additionally there are knobs to alter the pitch of both the whine and chuck to hear what GIANT or tiny Túngara frog might sound like.
Video of Tungara Frog Synth SuperCollider GUI Application
Here is the audio of the final form the synthesizer took, there is still room for improvement of course.
Version 6 of Túngara frog synthesizer
Playback in the Field
In order to see if my synthesizer was effective at blending in with Túngara frogs in the field, I did some simple, not very well controlled tests on the streets of Gamboa.
Basically, I walked up to a pond where I heard Túngara frogs calling and they would usually stop calling as I approached. Then with my field recorder running I would play the synthesized call from my cell phone and wait to hear a response.
Here is the first trial (that loud percussive sound in the background is a Gladiator frog, I think) The synth is mostly in the left channel while the other frogs are mostly in the right.
Field test 1 of Túngara frog synthesizer
After shuffling around a bit, the frogs got quiet and I tried again.
Field test 2 of Túngara frog synthesizer
Now, can I conclusively say that the frogs responded to my call? I do not know, I am not a field biologist or experienced with phonotaxis studies, but the results of these simple tests seem promising. I think the frogs are buying my synthetic call.
Future Work
I really enjoyed working on this project and am very interested in improving the audio synthesis and application interface so that it is useful to researchers both in the field and the laboratory. If you study frogs, bioacoustics, phonotaxis or have interest in this project please get in touch with me, I would love more feedback.
From my perspective, the synthesis could still use some refinement. First, it could use better filtering of the whine, perhaps via a resonant filter based on accurate resonances of the frogs vocal apparatus? Additionally, more variability in chuck production would be useful. With more analysis of recordings and a bit more reading on the physiology of the chuck production I think I could better refine the synthesis.
Some final questions:
Perhaps I should port this synthesizer for use in a web/mobile app?
Maybe I could synthesize Gladiator (or other) frog calls?
What additional features would be useful?
Do you have comments, criticisms or any feedback?
Acknowledgments
First I would like to thank all the participants I met at Dinacon, and Dr. Andrew Quitmeyer for organizing the event.
Amanda Savage was very generous in talking with me about my project and in introducing me to the vast literature and research available on Túngara frogs.
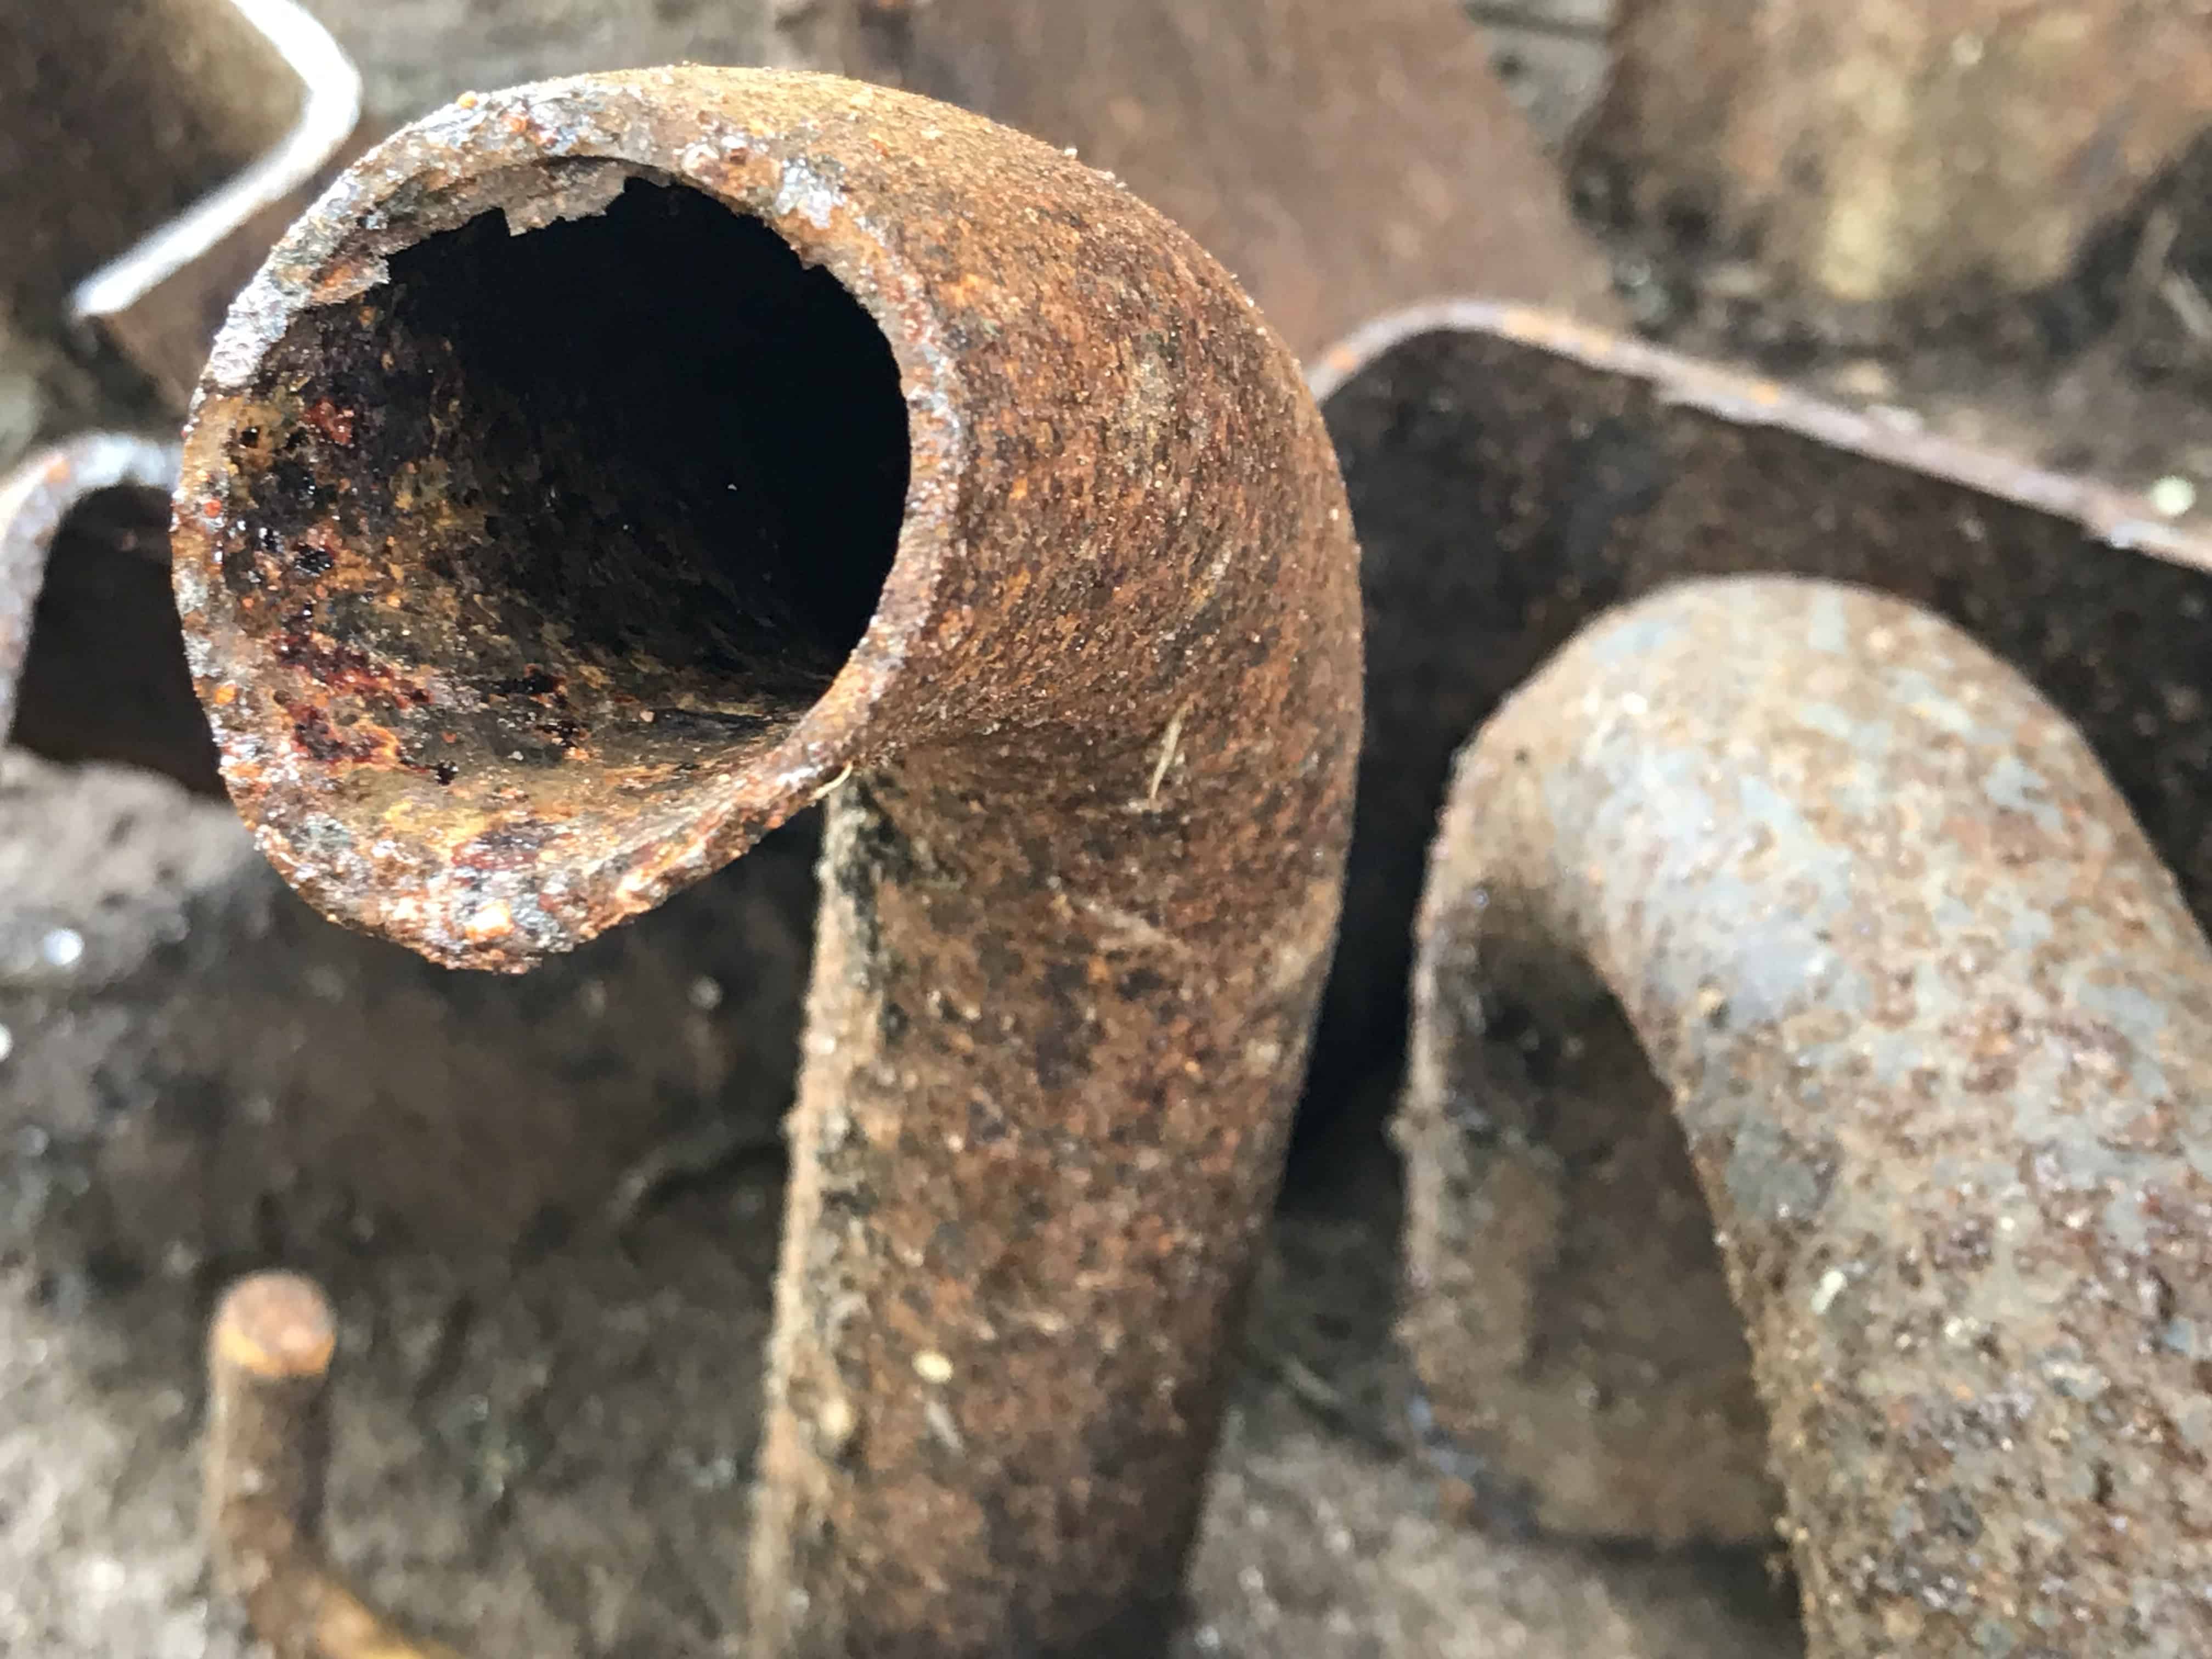
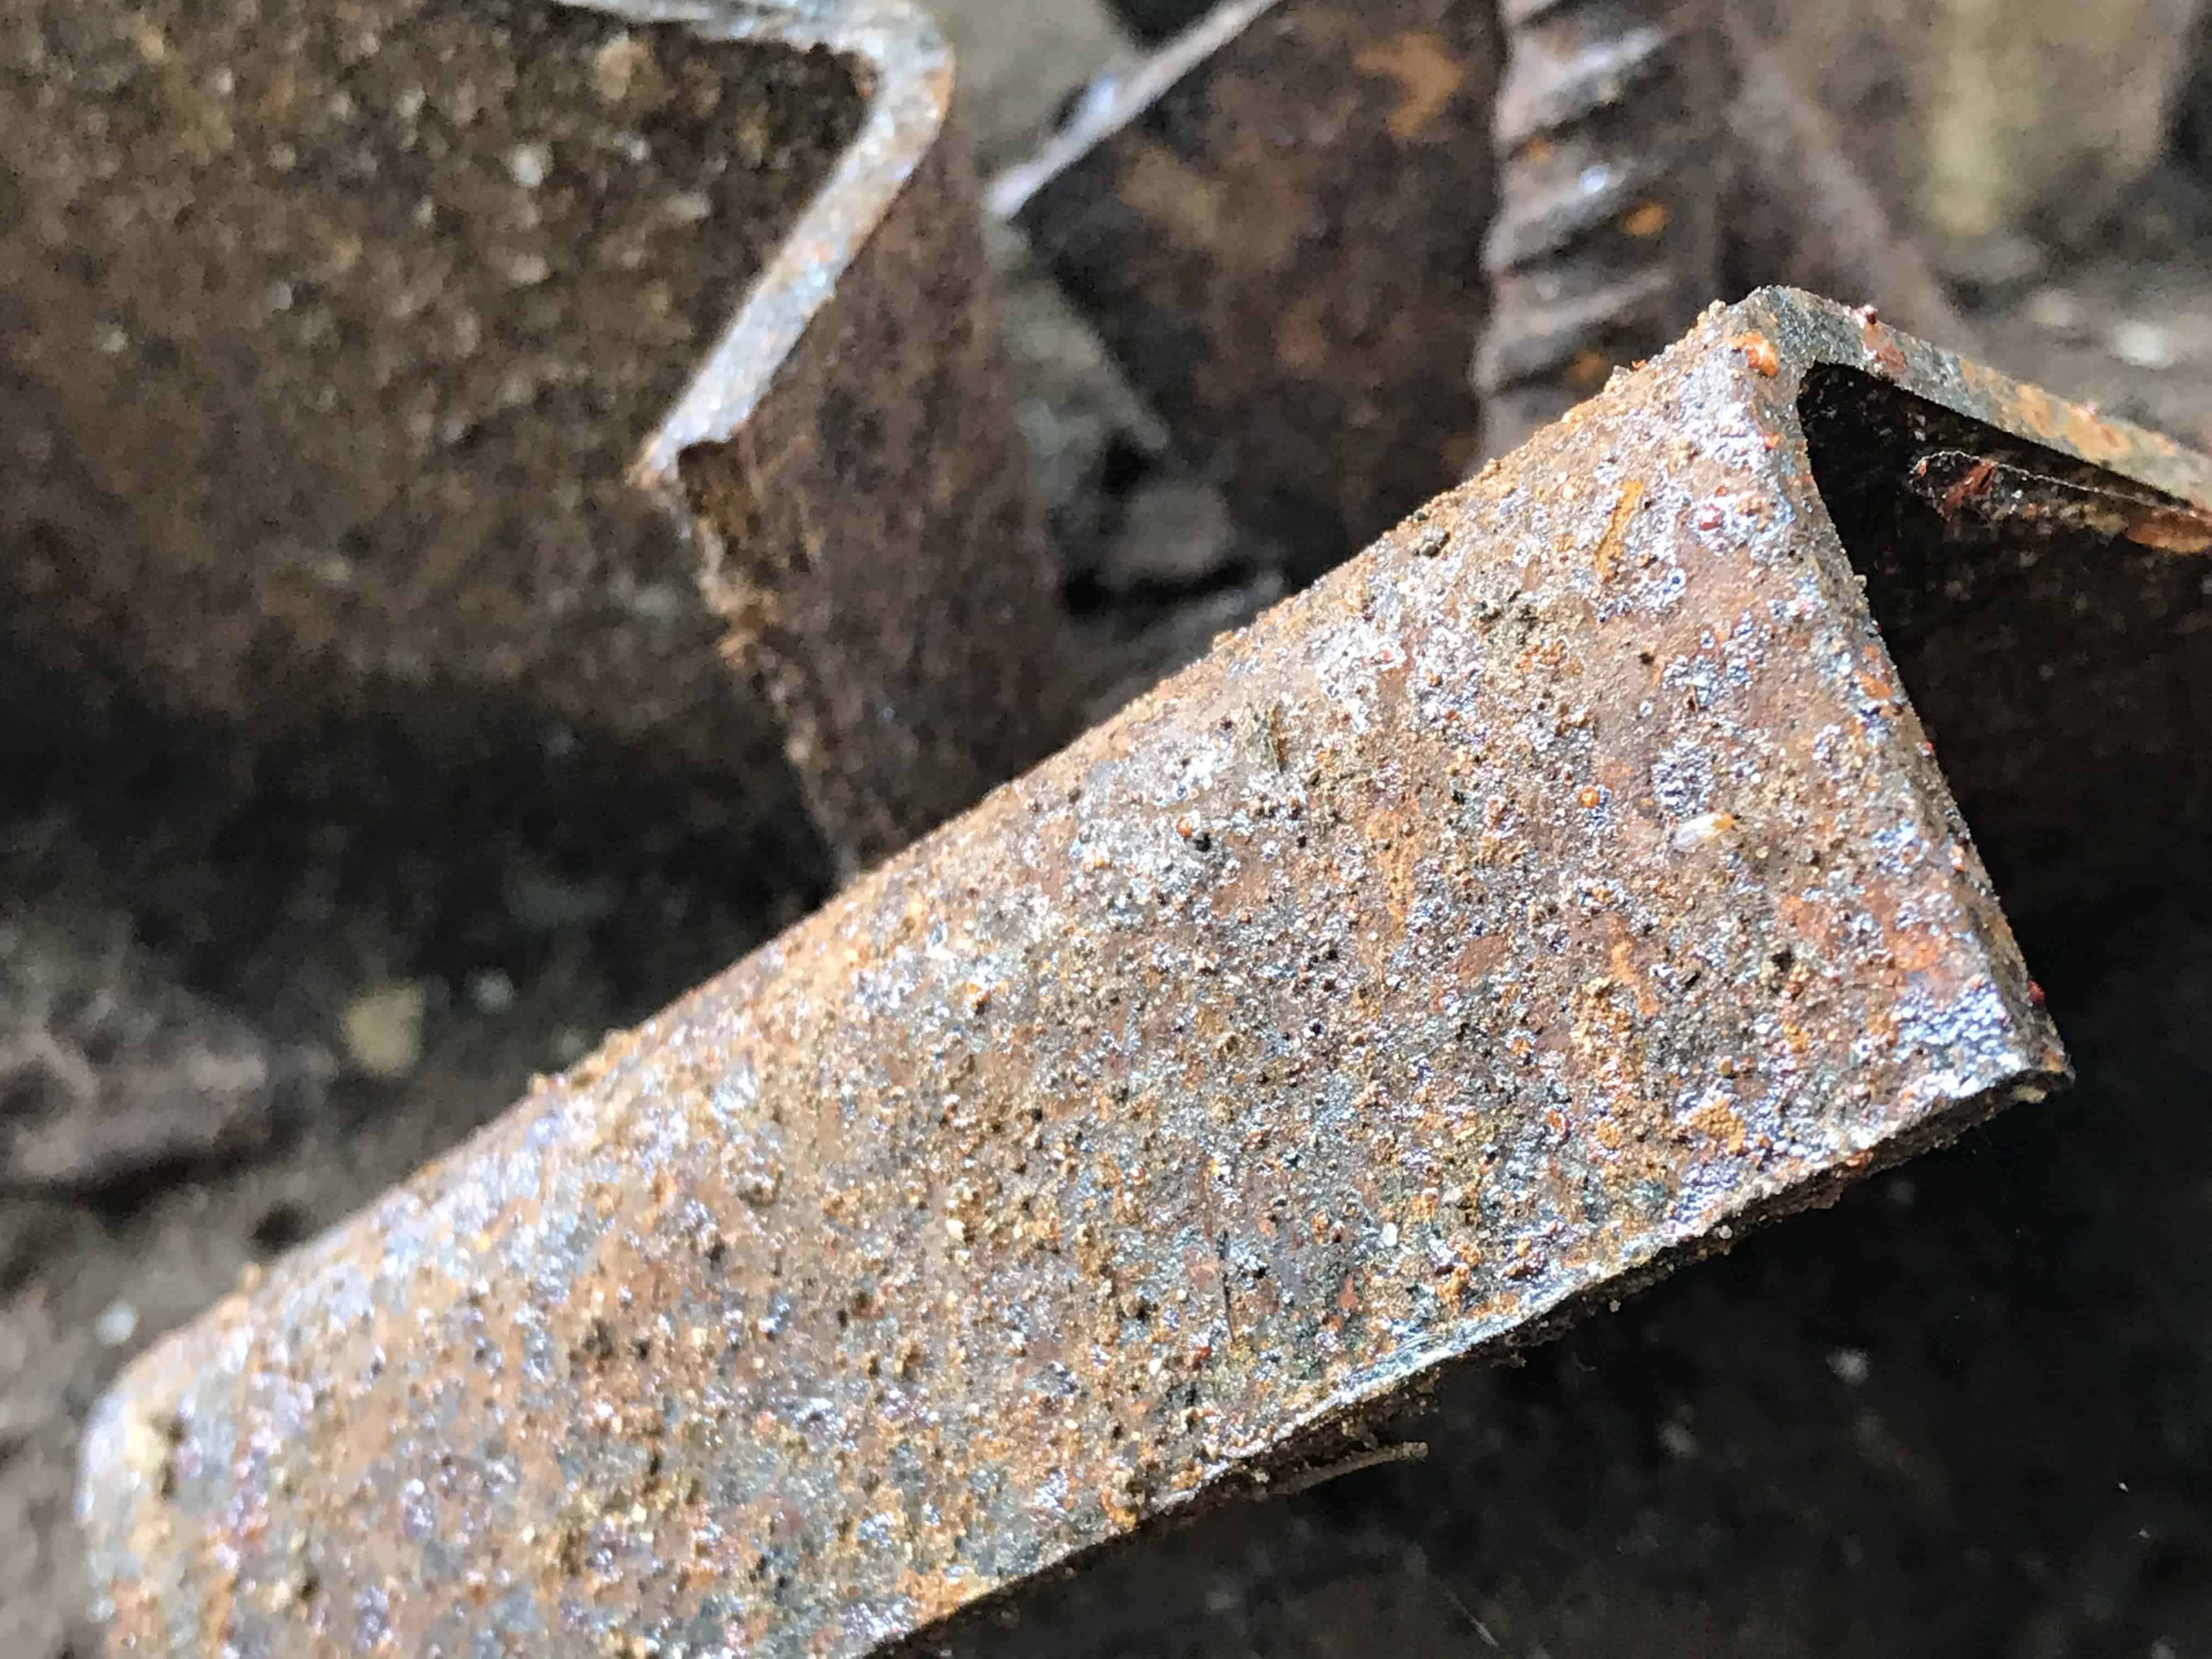
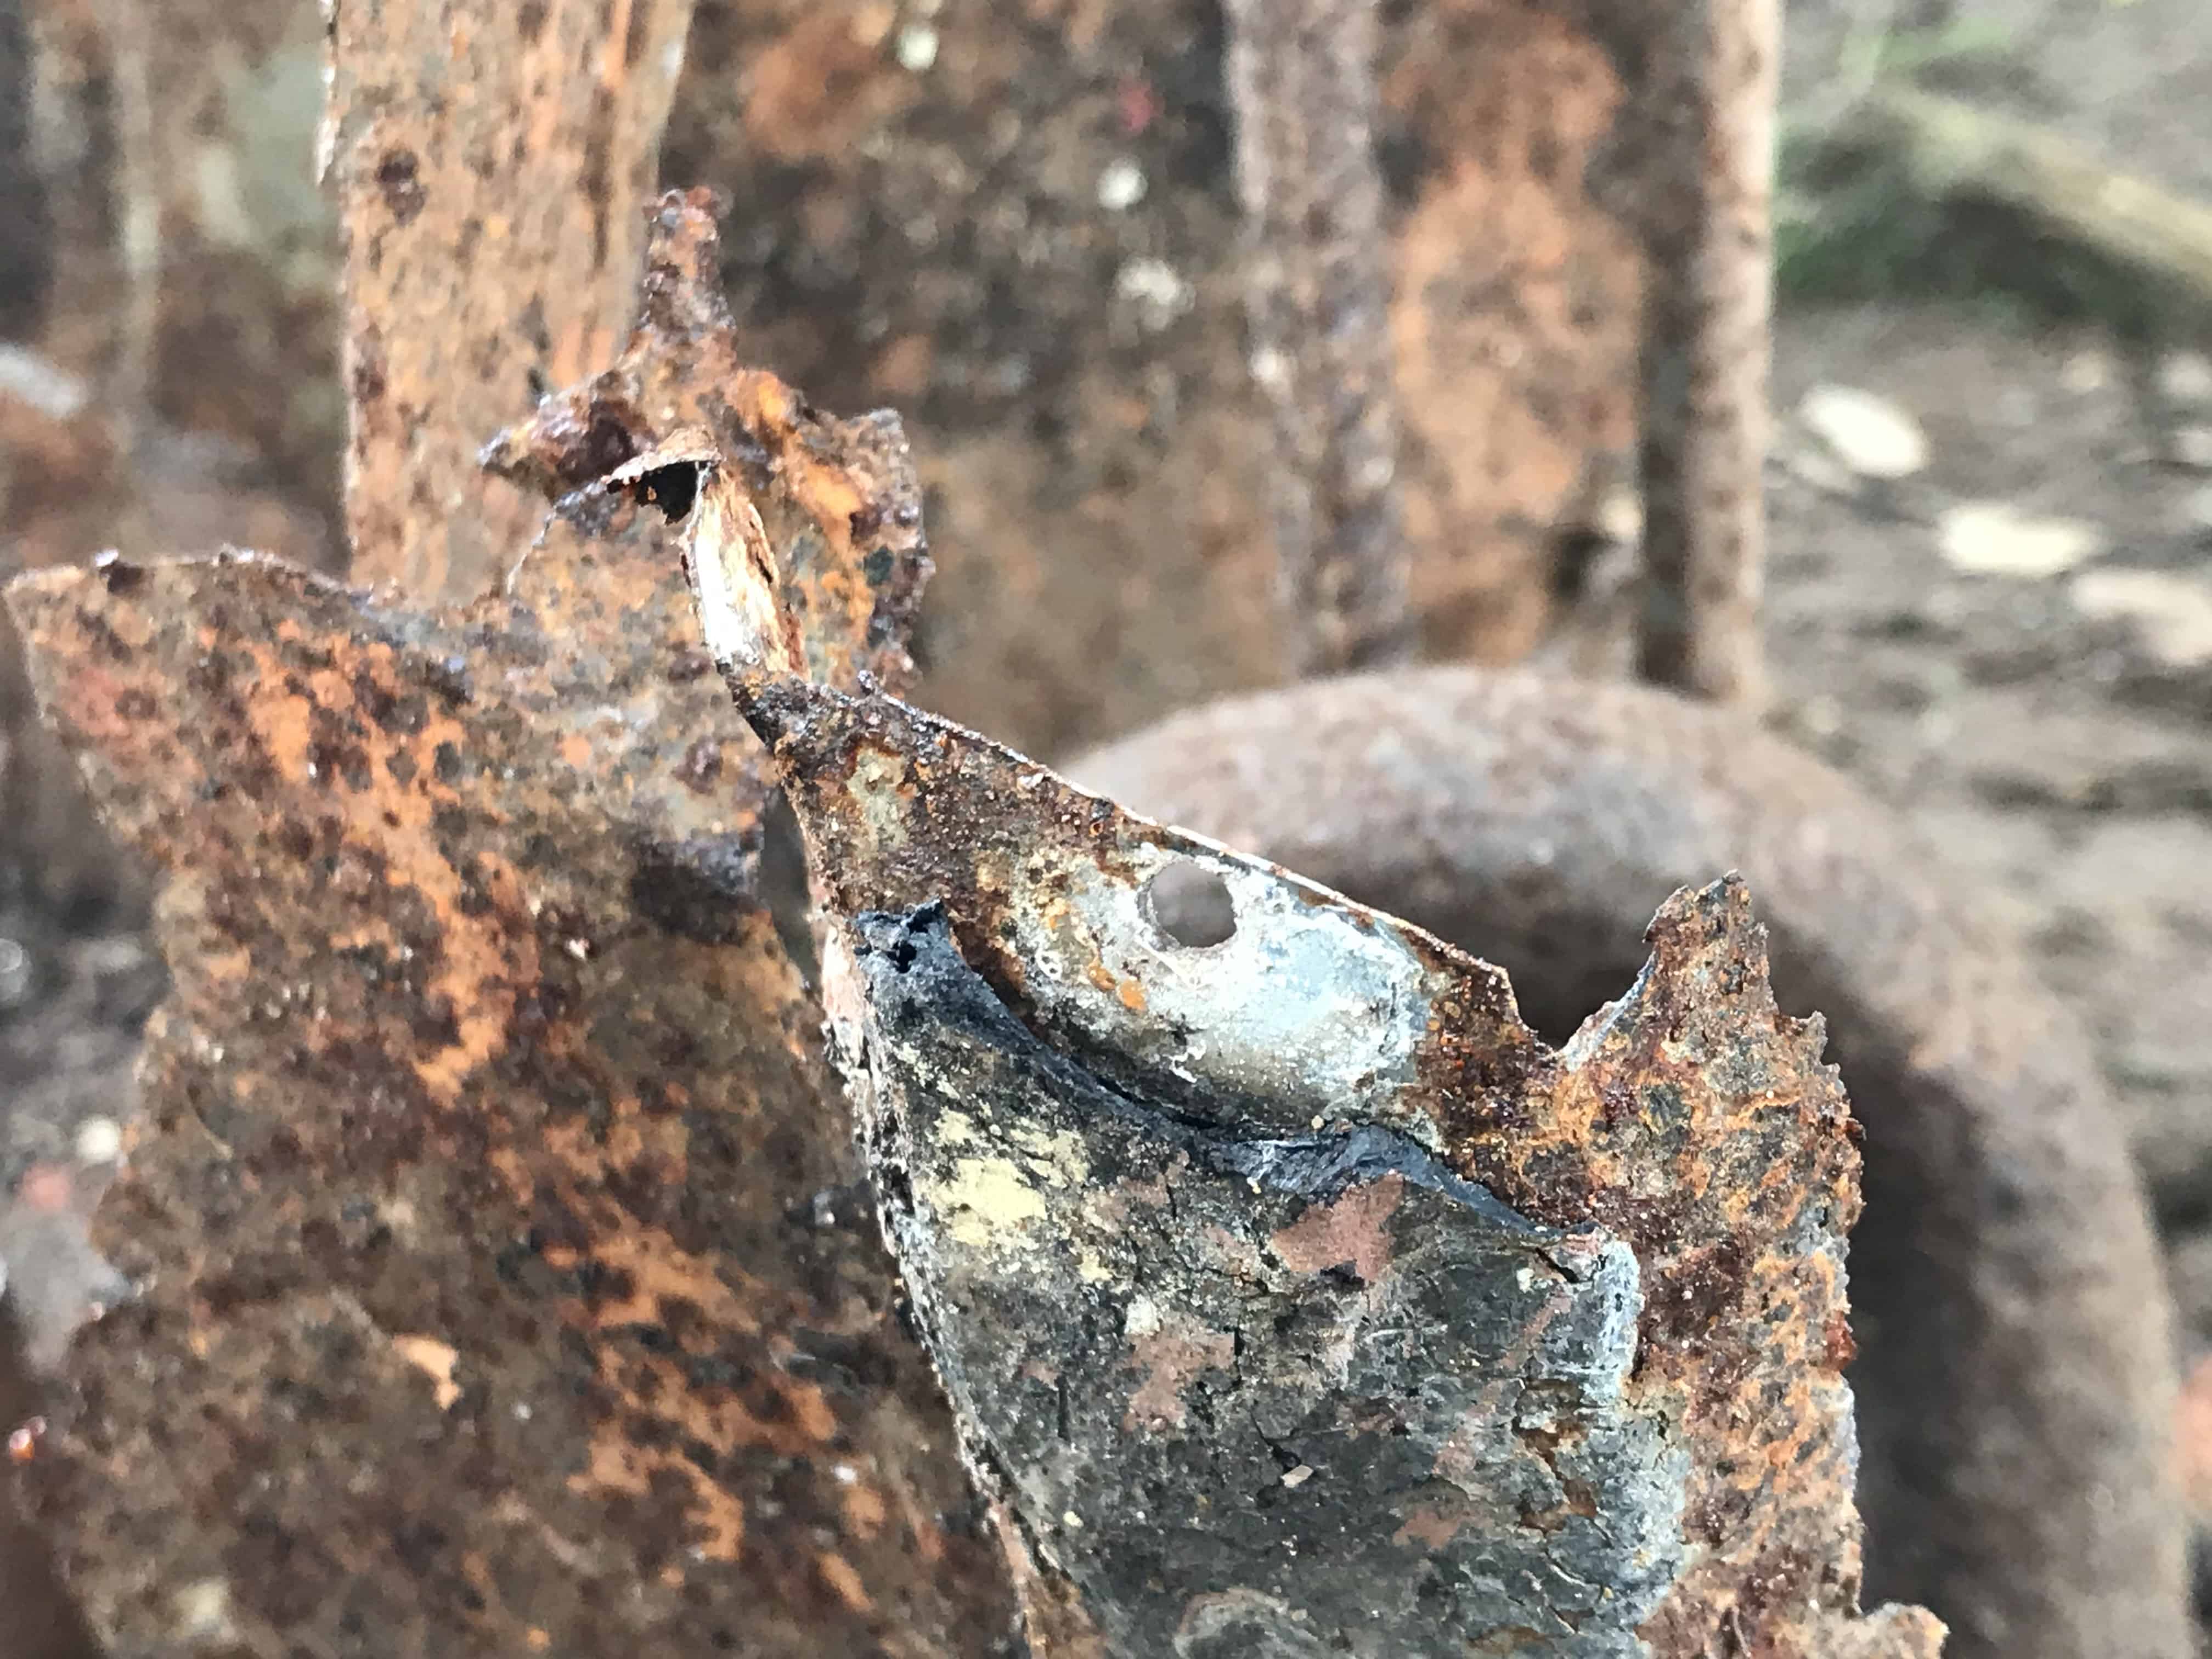
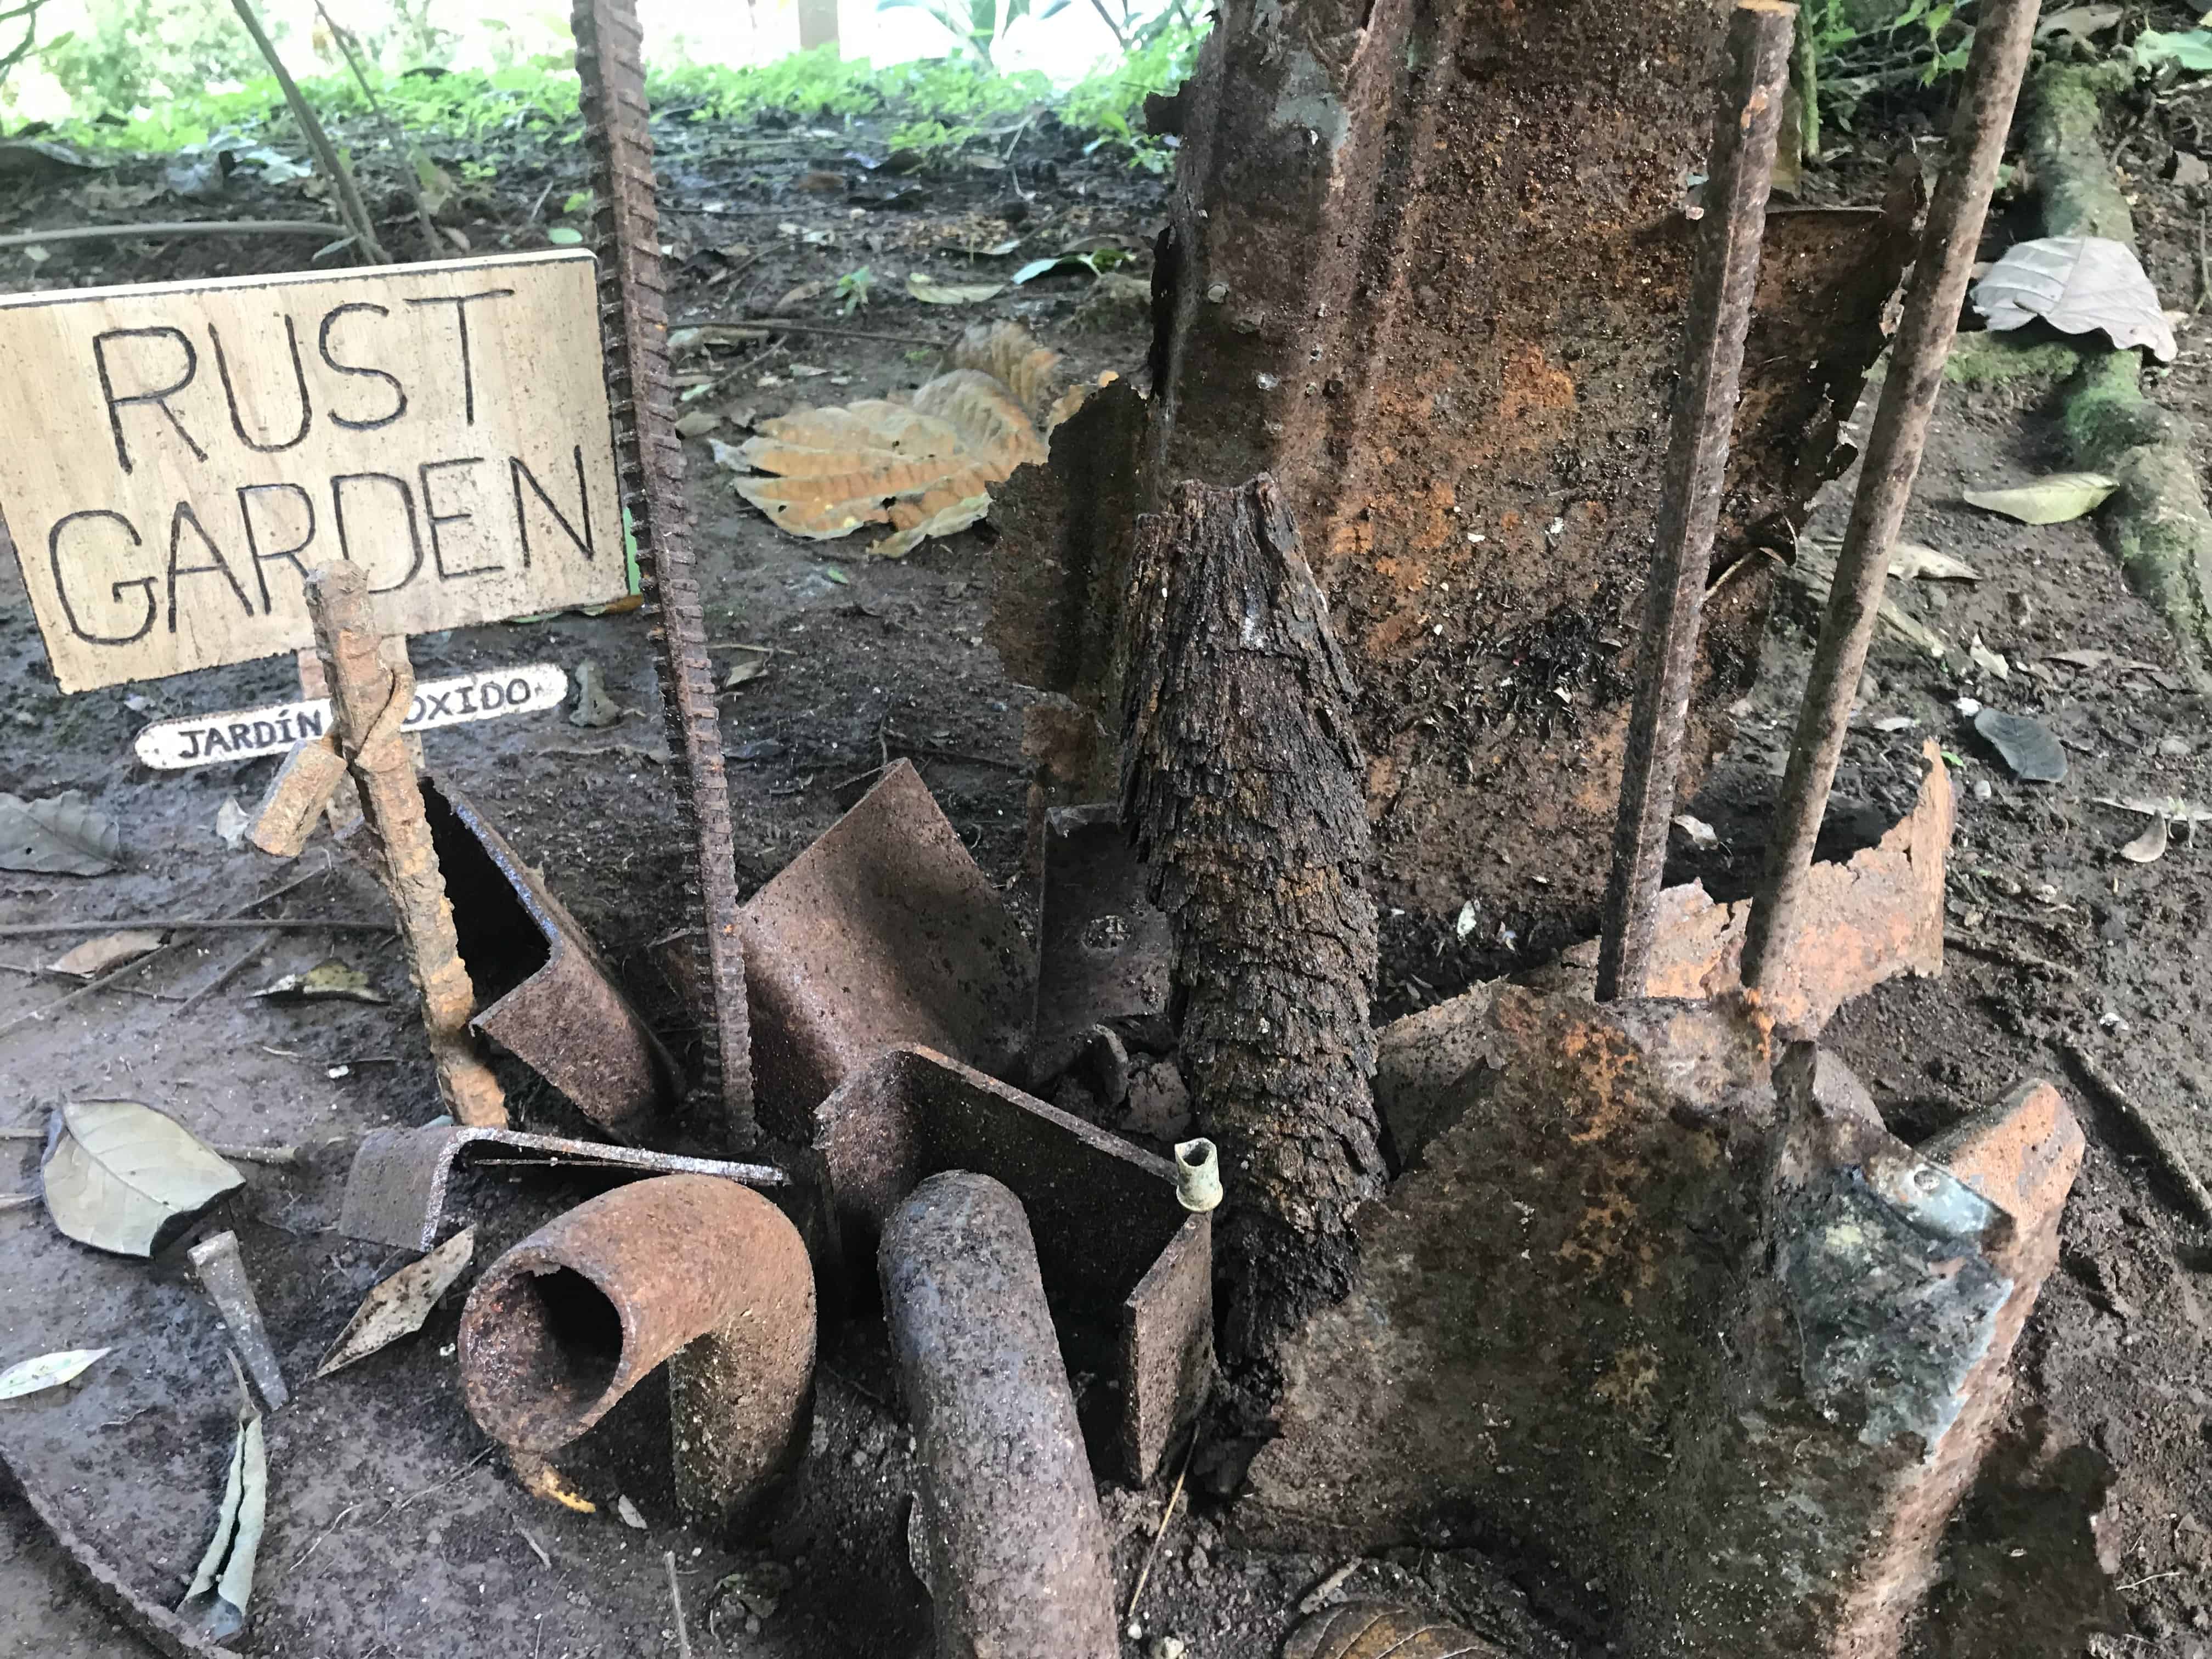
Rust is gorgeous. We marvel at its endless shades of ochre, red, orange and sienna. We appreciate the organic shapes created as right angles collapse and edges decay into jagged landscapes. Rust is poetic, photogenic, artistic and melancholy. It grows on its own and famously, never sleeps.
As an agricultural species, we love to garden. We plant seeds outdoors, water them diligently, watch the miracle of life, trim, weed, and appreciate the lush green plantscape we’ve created. Gardening gets right at our souls. But why limit ourselves to plants?
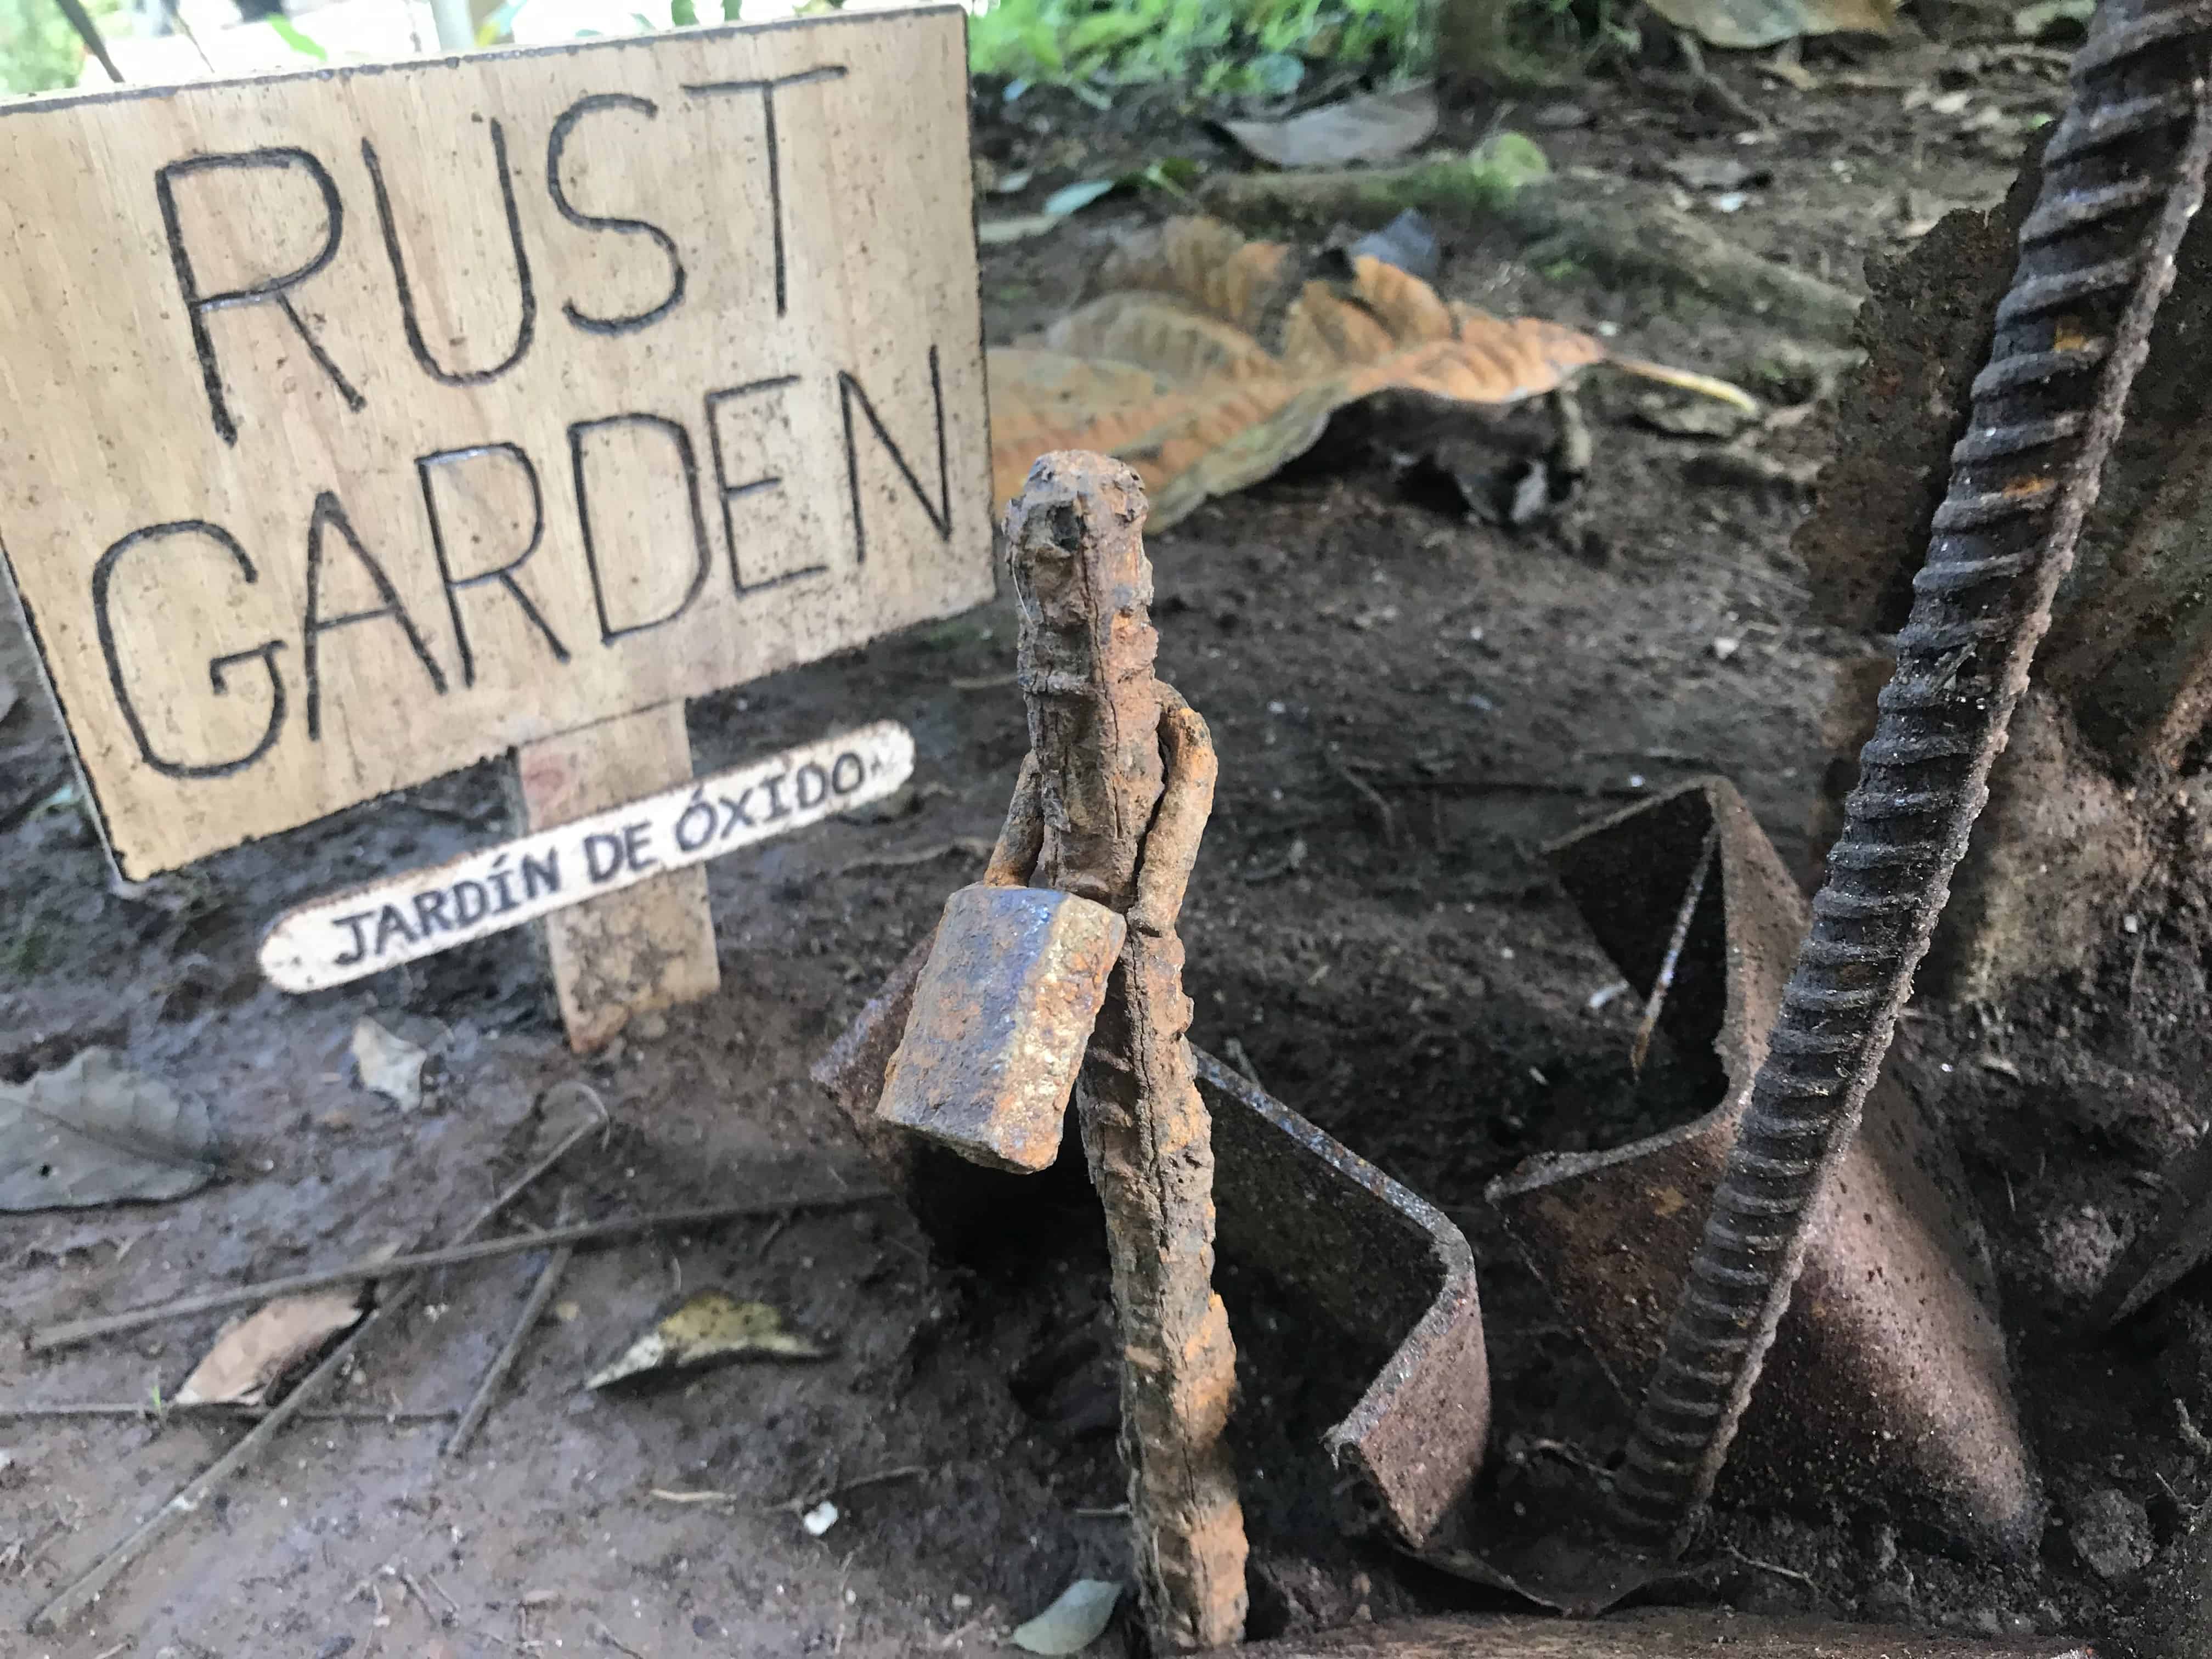
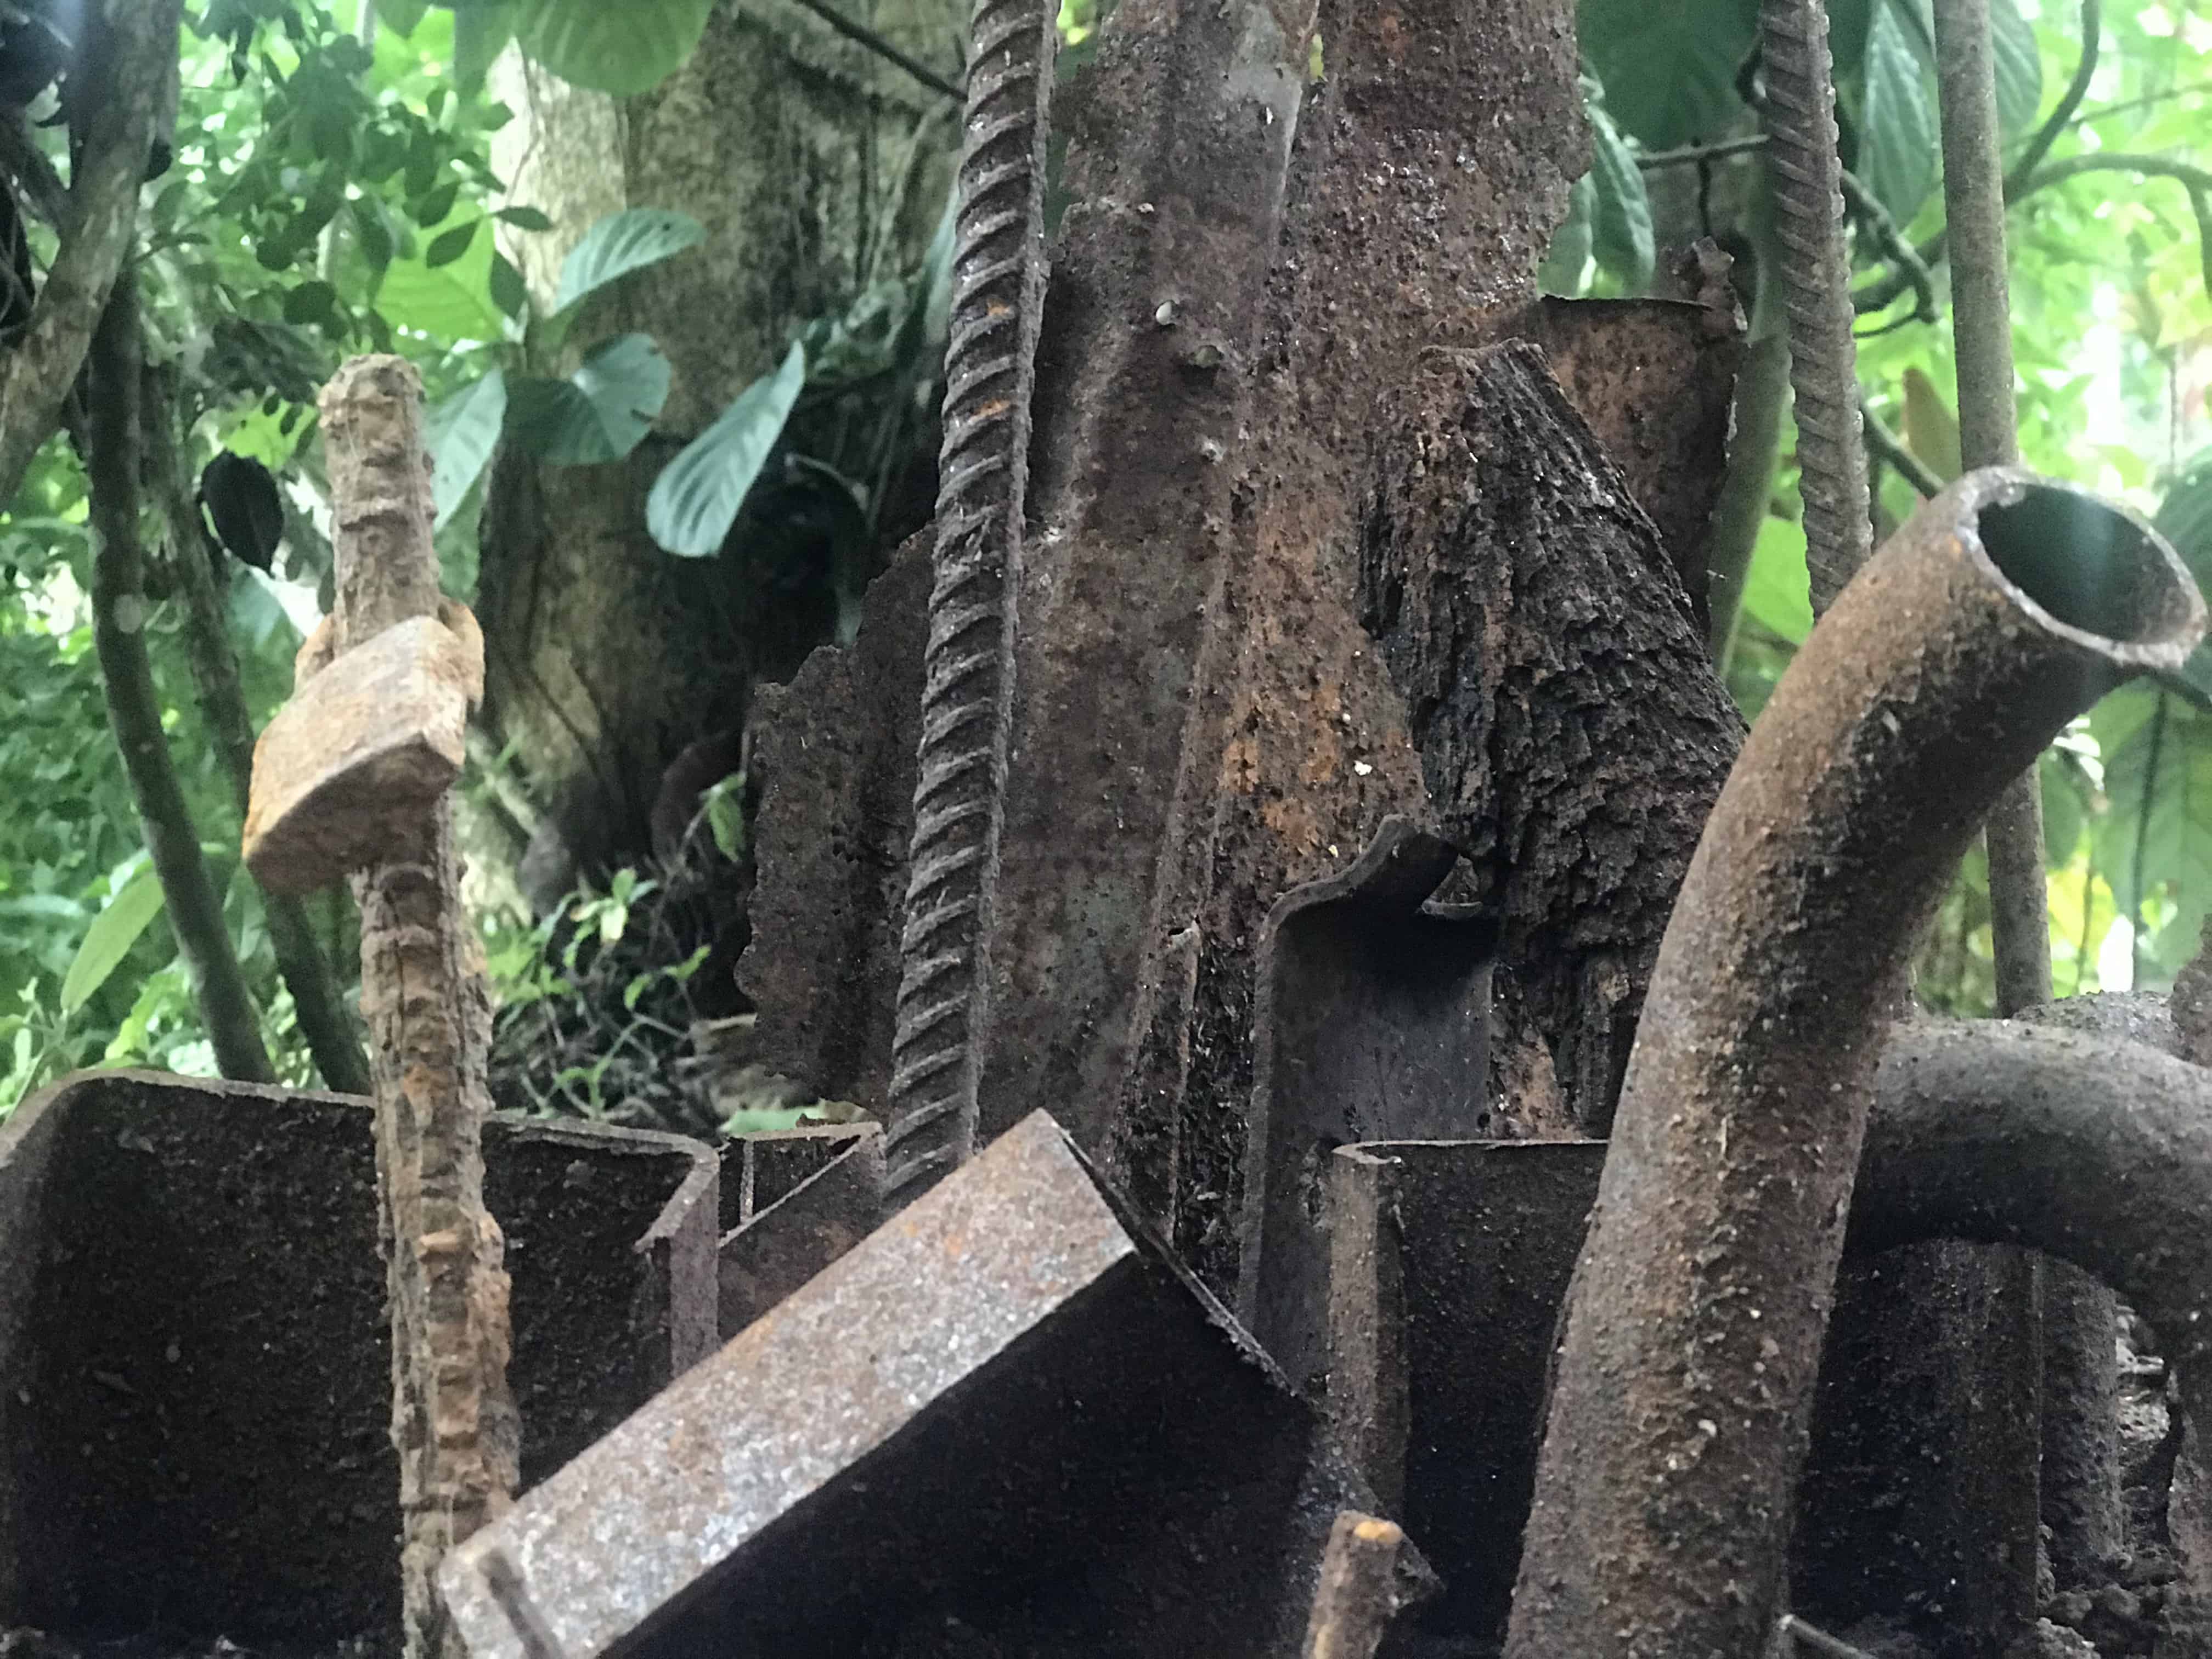
Let’s garden with rust! Rust gardening is easy and the perfect way to exploit a “brown thumb.” In some ways it’s identical to growing a plant garden. In other ways it’s the polar opposite. A rust garden is created by “planting” metal pieces outdoors where they can weather organically. Patience is required, though the process can be sped up with regular watering, plus a few other tricks. You’ll eventually be rewarded with lush decay, in a myriad of sunset colors. Of course, your rusted wonder won’t bear anything edible, but it also won’t attract any pests. You might even extract a centerpiece-worthy “bouquet” from your rust garden, in leiu of a traditional harvest. Of course pesticides are unnecessary, and weeding is entirely optional.
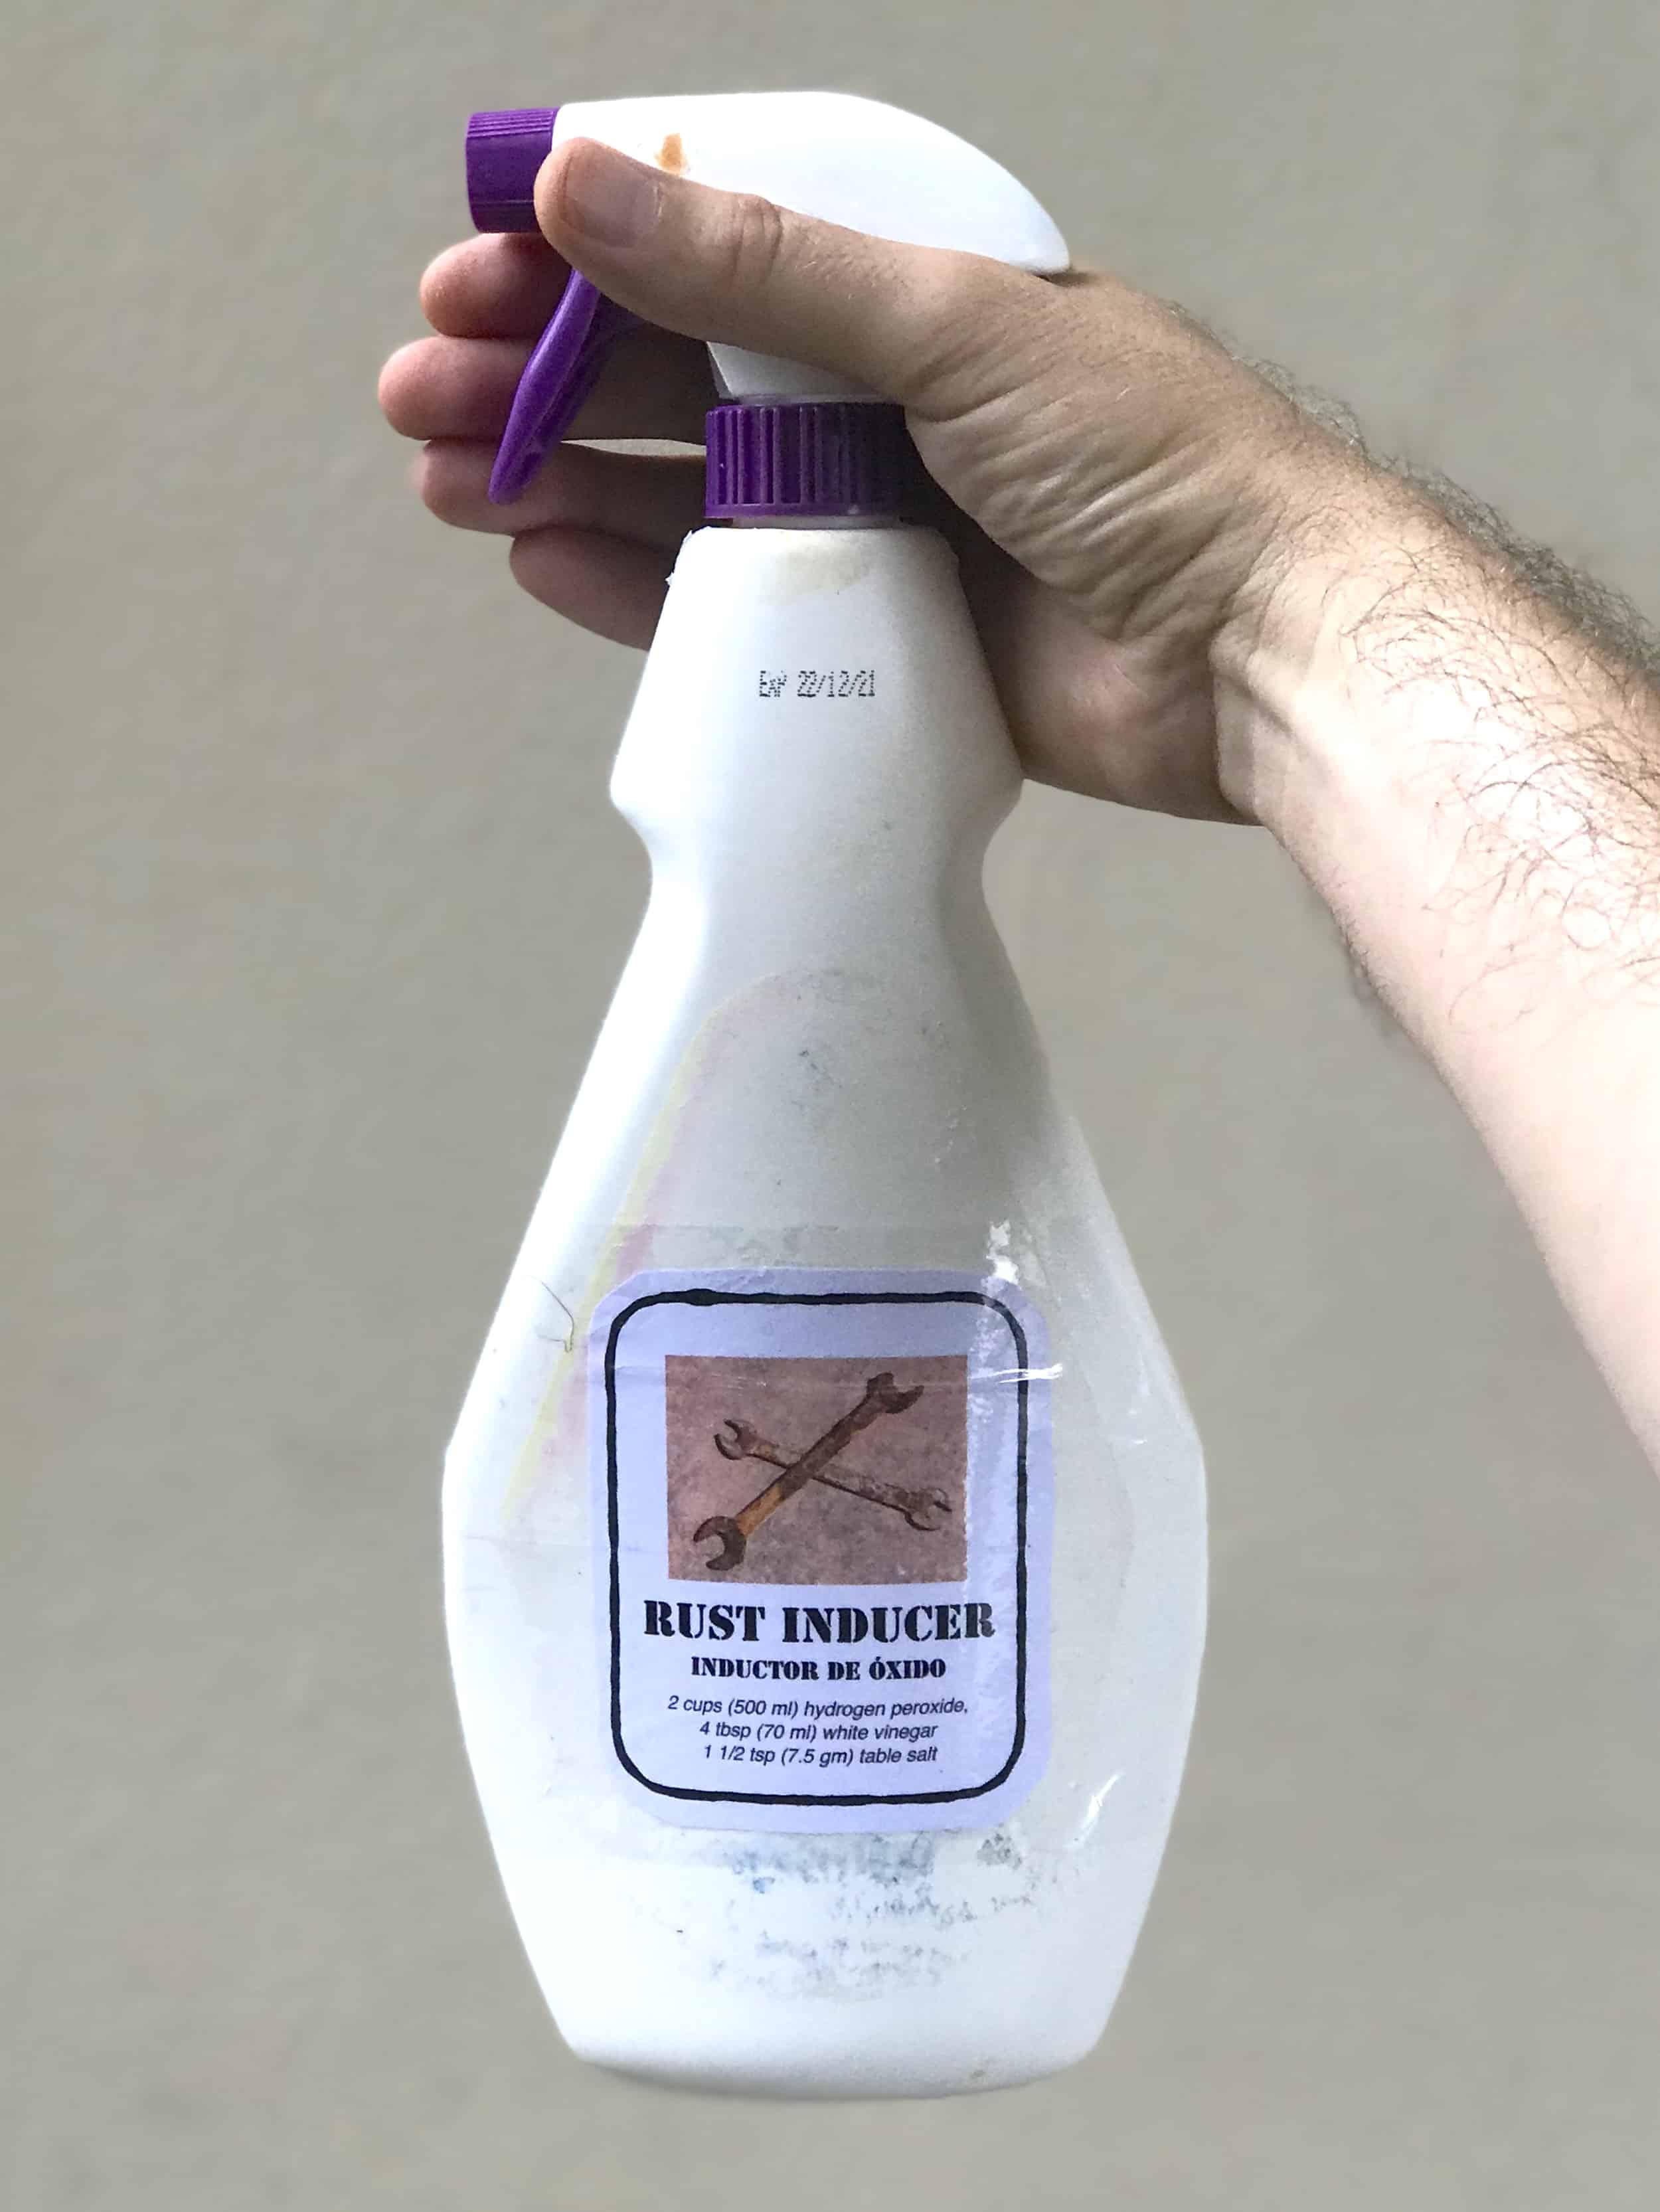
For this year’s Dinacon I’m planting a rust garden outside of a home in Gamboa, Panama. Since I’ll only be there for two weeks, I’ve chosen to accelerate the initial rusting process using a household concoction of white vinegar, peroxide and table salt. The results are instant, but really just a head start on what promises to be a post-industrial patch of sepia-toned disintegration, offsetting the riot of tropical greenery.
Here’s how to make your own rust garden.
Pick a patch of ground outdoors. You can also set up an indoor planter box or humidity-rich terrarium.
Gather some scrap iron or steel. If it’s already rusting, so much the better. Painted or coated metals won’t rust quickly. Strip the paint and sand the metal for best results. If you’re not sure a metal will rust, try it anyway. Experimentation is a terrific way to learn, and the artist’s favored tool.
You can leave the metal to rust on its own outdoors, or water it regularly to accelerate the decay.
If you’re an impatient gardener, it’s easy to get some rust going immediately. Pour some white vinegar into a plastic spray bottle and mist your metal scraps until they are thoroughly moistened. Wait for the vinegar to dry, around 15 minutes. Next, in another spray bottle, mix:
two cups of hydrogen peroxide
four tablespoons of white vinegar
one-and-a-half teaspoons of table salt (why salt?)
Swirl the mixture until the salt has dissolved. Spray it onto your metal scraps and they will turn rusty as you watch. Allow the rusty metal to dry, then repeat as desired.* Careful with this mixture, it will rust anything it contacts instantly!
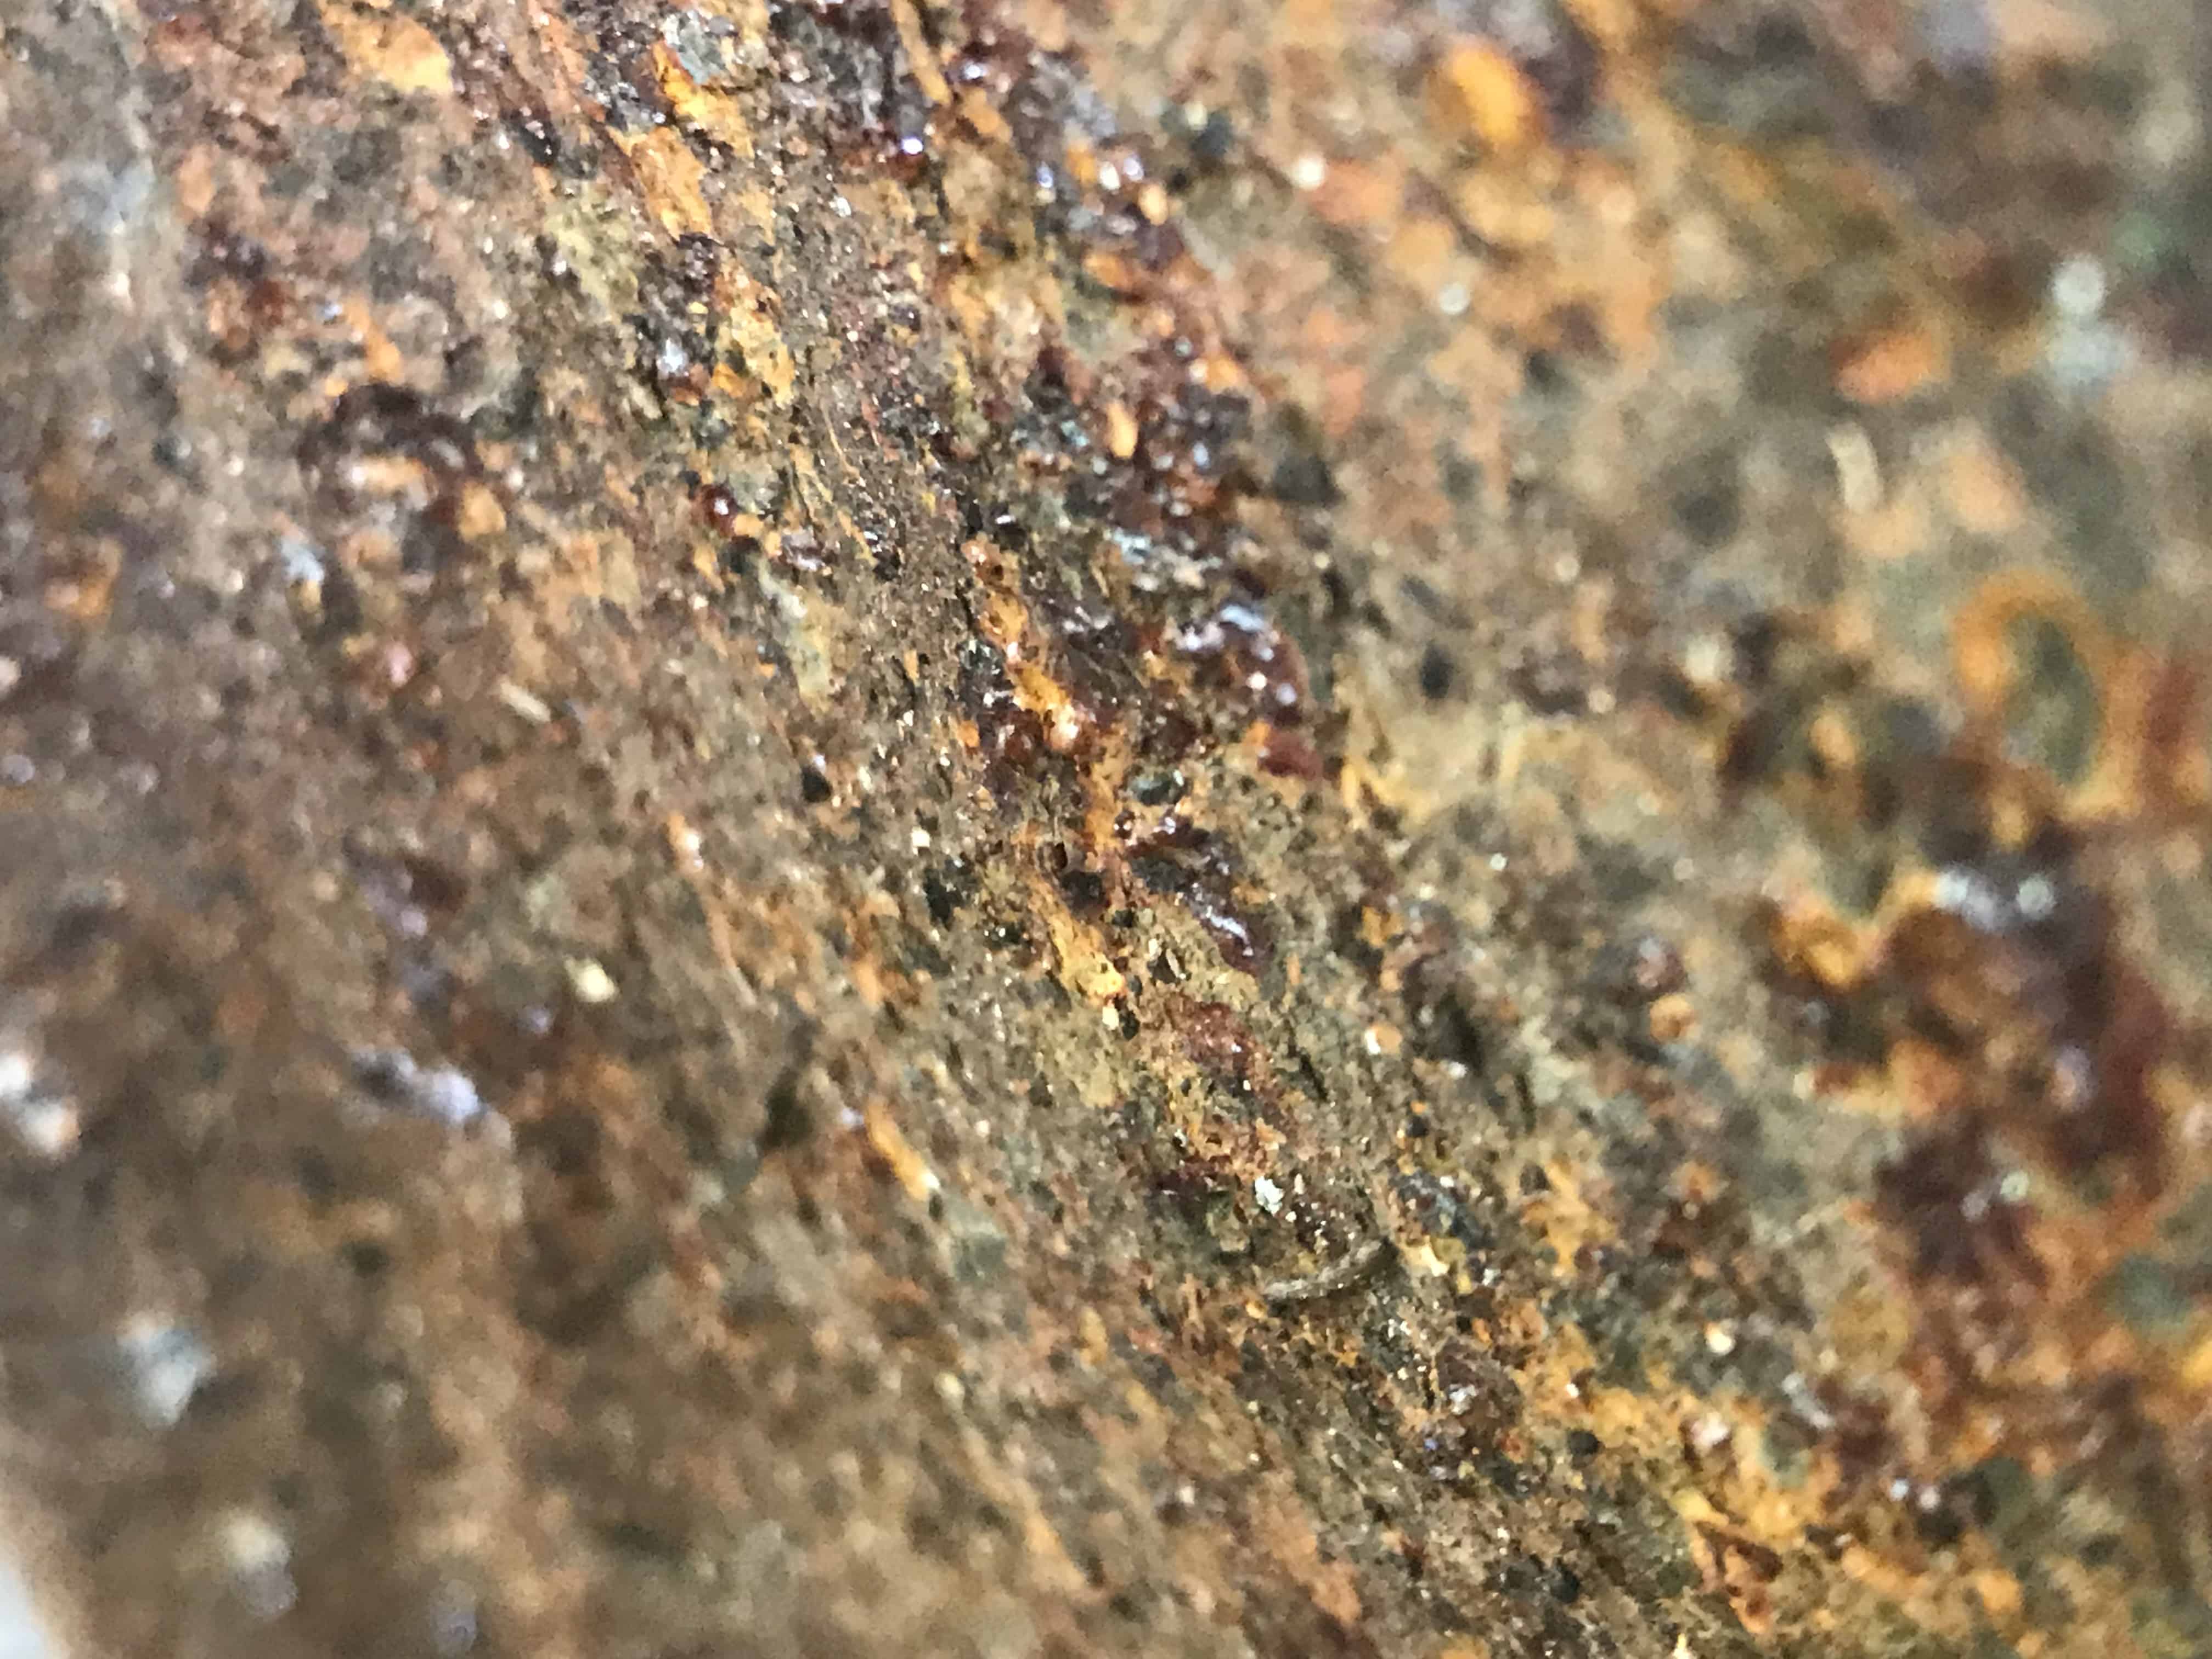
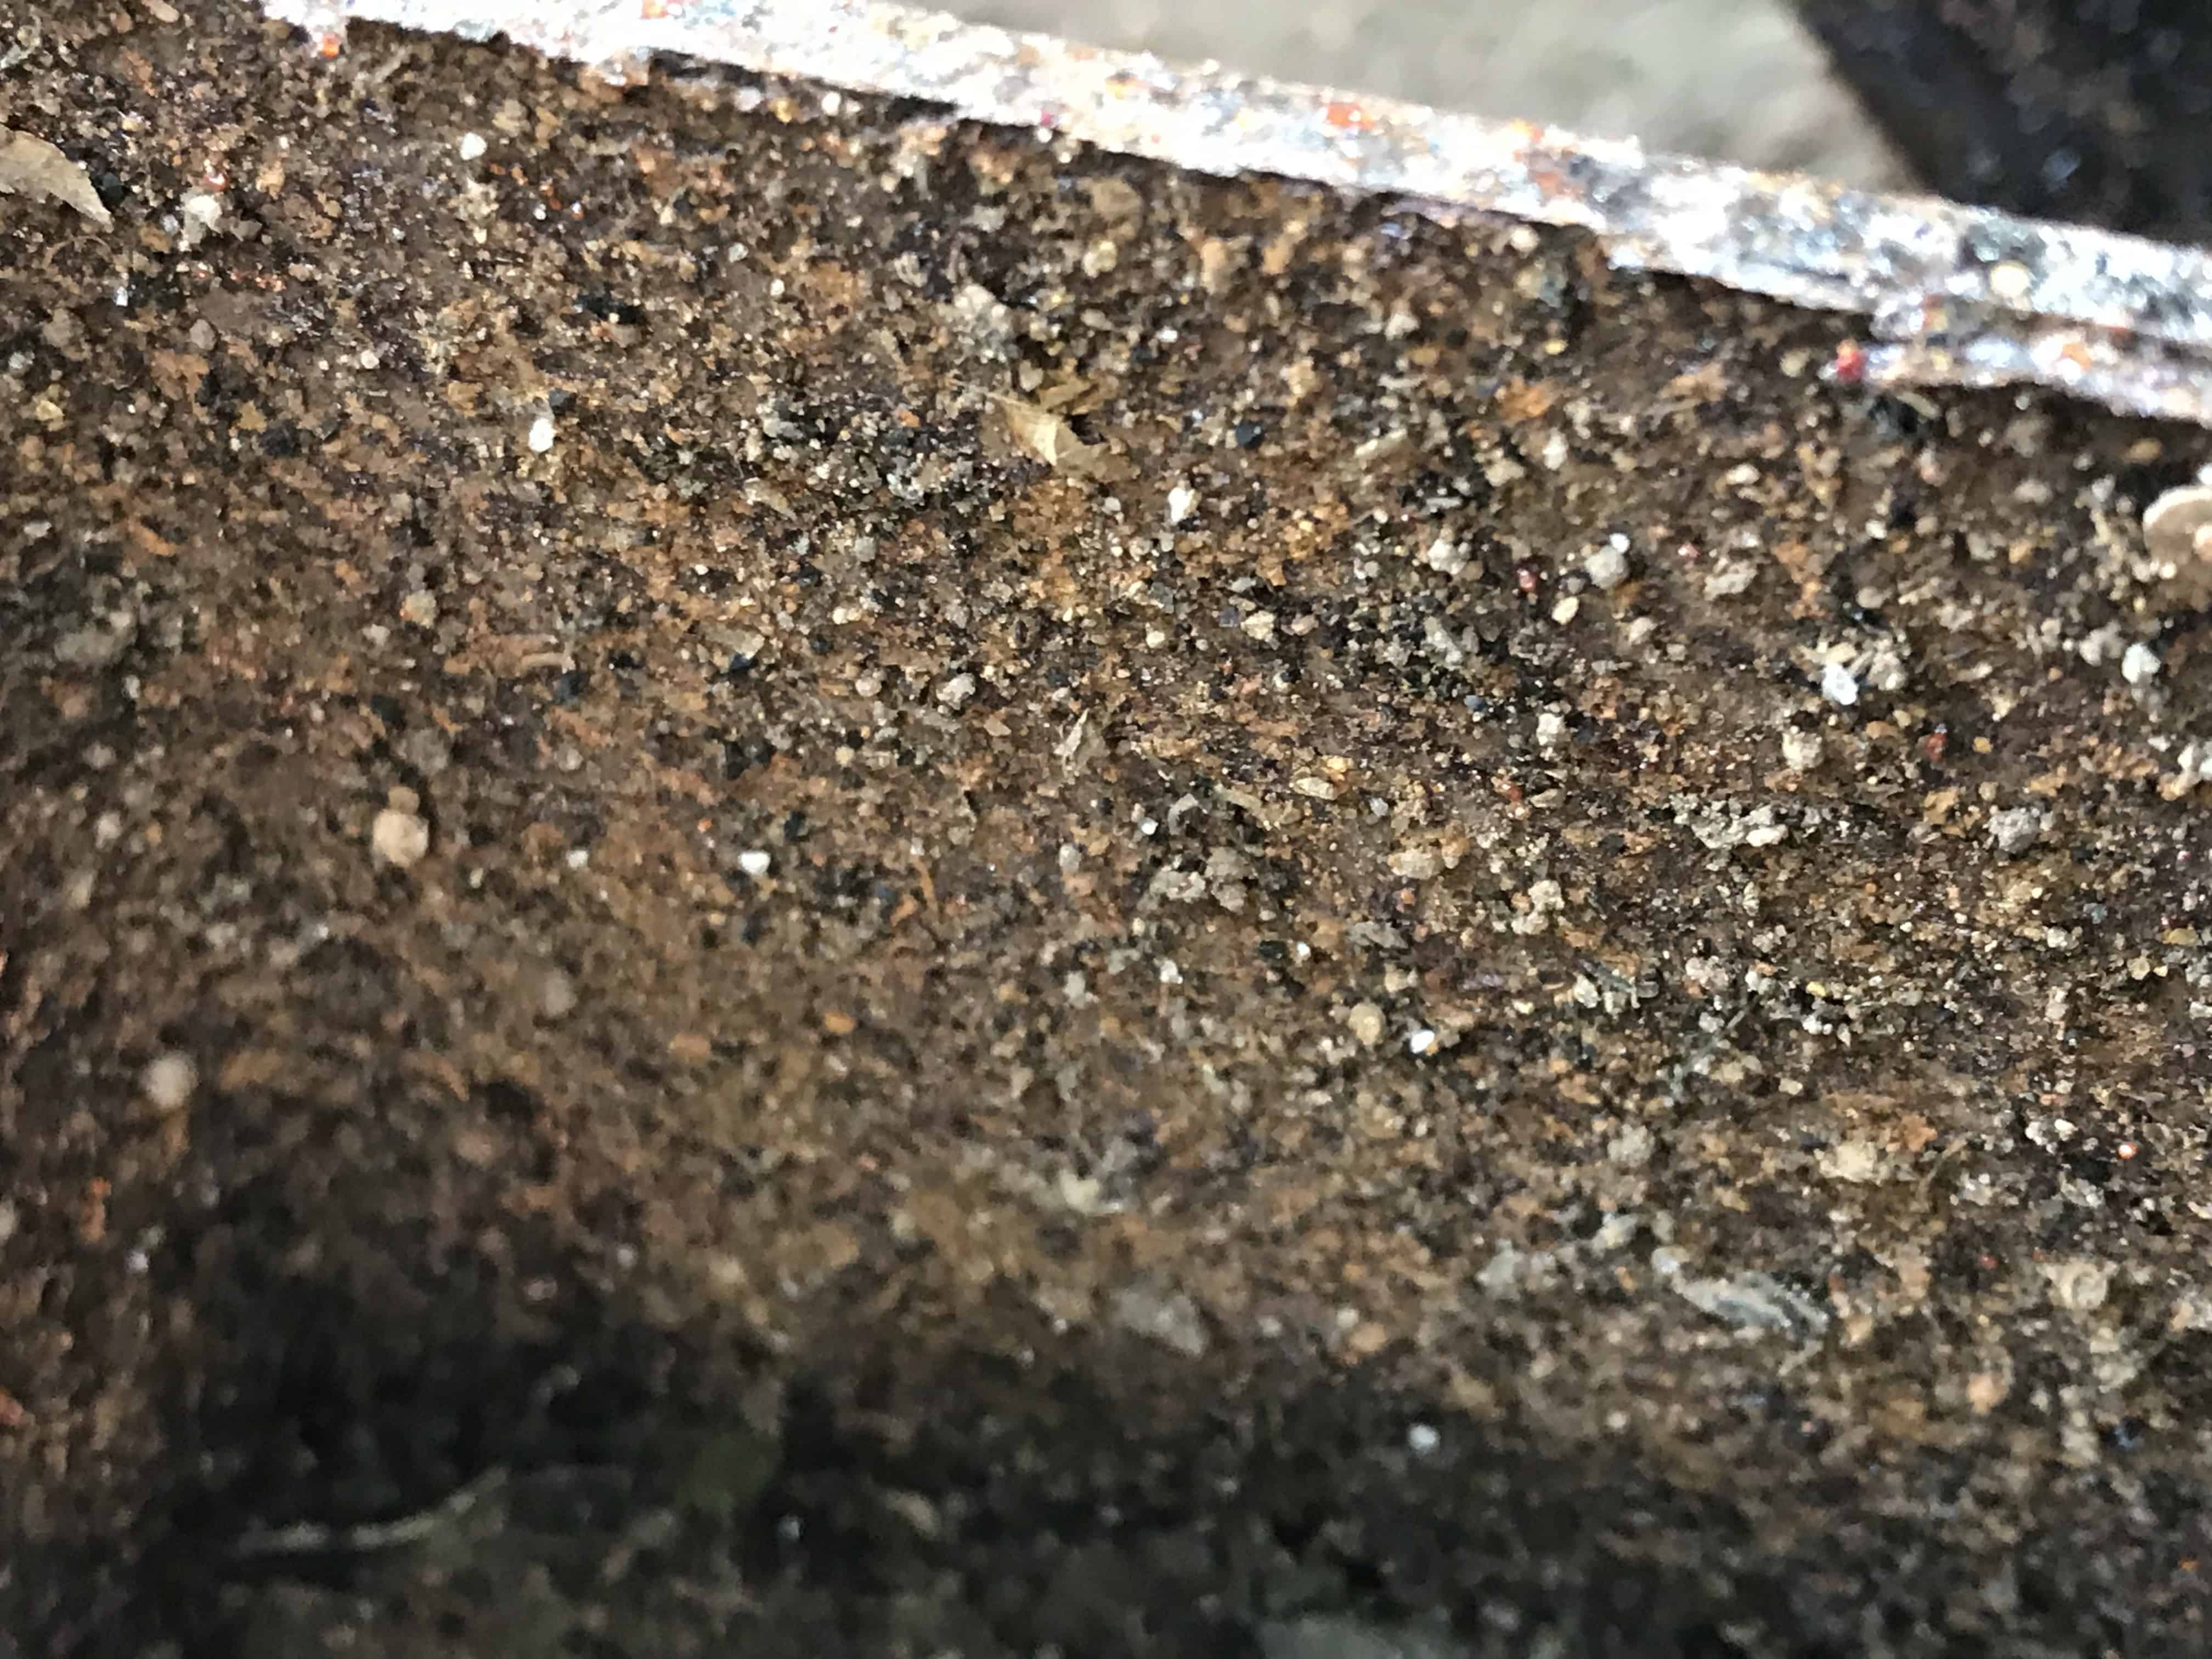
“Plant” other metal scraps as often as desired to create a variety of rusty delights. You can include non-ferrous metals like copper which will grow a green patina for contrast. Rust gardens are perfect for photography, try a macro lens for the most beautiful corrosion close-ups.
I’m learning how to use Procreate, and I thought I’d use it to flesh out an idea that’s been on my mind lately. I’m going to try to make a longer comic about yarncrafting during Dinacon!
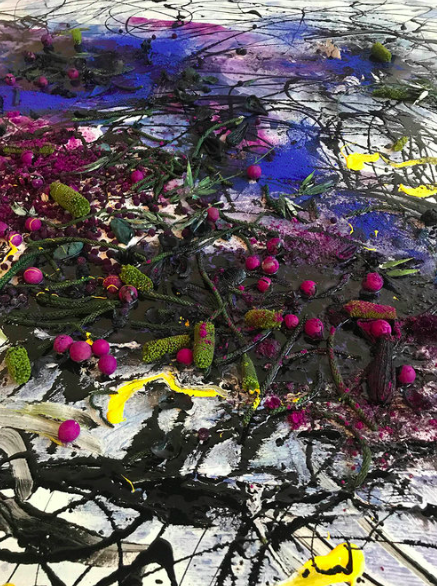
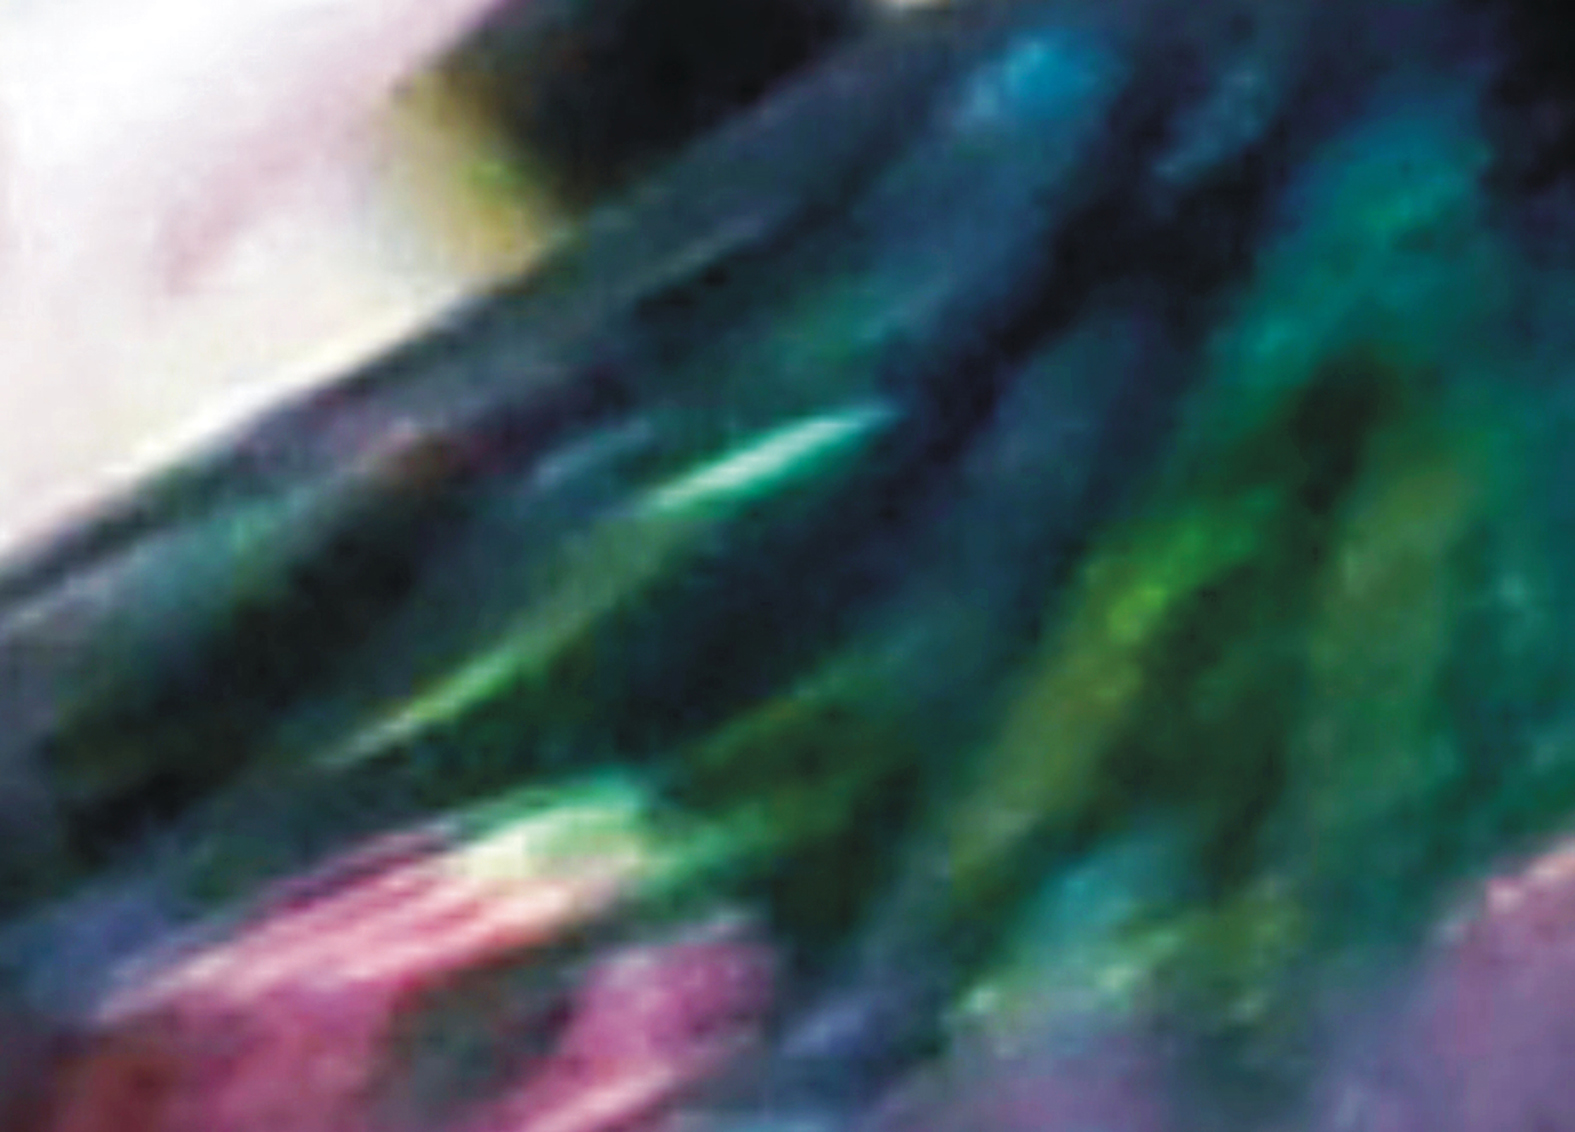
August 12-19th. Kris Casey is a visual artist and creative researcher from Chicago, IL. Her work draws heavily from various fields of philosophical and scientific inquiry, including evolutionary developmental biology, bio-aesthetics, evolutionary aesthetics, and genetics. Her research and practice examines relationships between biology and technology, natural and artificial, material and immaterial, subject and object. Her paintings can be seen as assemblages or accumulations of natural and technological elements whereby the biological concepts of mutation, contamination, decay, generation, emergence and metamorphosis become modes of inquiry into the production of novel forms.
This project has been performed in the premises of Dinacon (KohLon, Thailand), Harakka island and the Maj & Thor Nestling Foundation pop-up work space (Helsinki, Finland)
A biomimetic case discovered by Biomimeticx2 (Päivi Maunu and Marko Nykänen) at DiNaCon, KohLon June 2018
We have revealed flying tropical carpenter’s bee (Xylocopa latipes) expressing the prominent phenotype with shiny metallic bluish green wings. The ultrastructure of the wings provide vital opportunities for the insect to persist successfully within its niche.Its ultrastructure encompasses meshwork of intercalating, longitudinally and horizontally traversing, cytoskeletal fibers. Those provide structurally and efficiently ingenious resolutions for survival in the most challenging climate and environment.
The erudite ultrastructure of the wing counterparts analogously with the ultrastructural cytoarchitecture of the brush border (i.e. terminal web) in the apical part of human airway epithelial cell, where comparable meshwork of intercalating cytoskeletal fibers occur as in the wings of Xylocopa latipes. On the basis of these ultrastructural cytoarchitectural specifics,we were able to comprise a biomimetic resolution where the crucial ultrastructural cytoarchitecture enables efficacious survival both for the tropical carpenter’s bee and human epithelial cell.
However, architectural establishments like the pillar of the Greek temple built by humans, have not been as efficacious persisting in natural extreme circumstances like the pillar cell in the Corti’s organ of human inner ear. The cell is able to endure intense vibrational forces within the cochlea. Also the pillar cell has the homologous and analogousultrastructural cytoarchitecture to the human epithelial brush border and cytoskeletal meshwork in the wings of Xylocopa. See the similar pattern of ultrastructural cytoskeletal elements in the micrographs captivated by transmission electron microscope (the counterpart images).
Human cultural evolution could not be able to cater the refined flexible and durable architecture as the natural evolution has done. Thus, the comprised biomimetic resolution provides an intriguing and encouraging option to tackle more fruitfully with the dramatic challenges associated with the global climate change, e.g. superstorms.
The source image displays tropical carpenter’s bee (Xylocopa latipes)
The dorsal part of insect’s left wing is exhibited in the magnification.
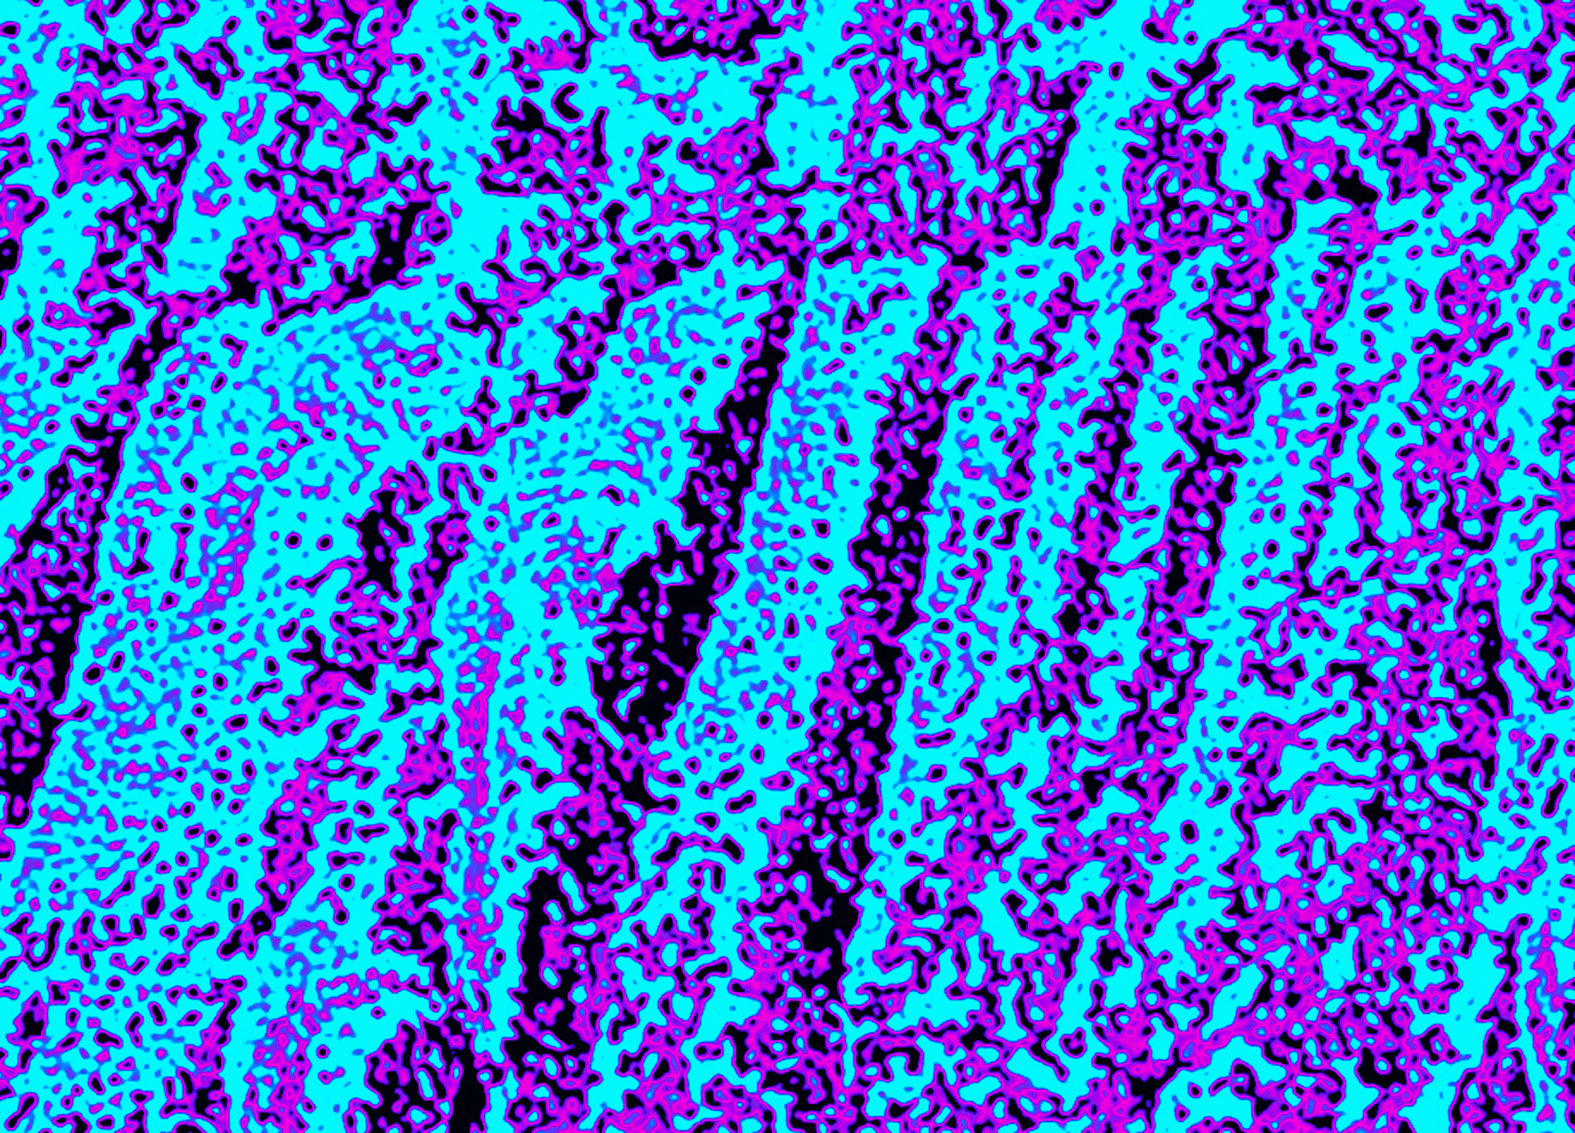
The counterpart figure portrays vertically traversing cytoskeletal microfibers associated with the cytoskeletal meshwork (the terminal web i.e. brush border) in the apical part of human airway epithelial cell (pseudocolored transmission electron micrograph of freeze-fractured replica coated with platinum/carbon, magnification x 120,000).
The source image reveals the pillar at the temple of Olympian Zeus (Athens, Greece) and its counterpart, the pillar cell, discovered in the human inner ear cochlea (in the Corti’s organ). The pillar cell has a giant desmosome analogous to the helix below the architrave of the temple pillar, and the cannelures in the pillar portray visual resemblance to vertically traversing cytoskeletal fibers in the pillar cell. The scale bars show remarkable discrepancy expressed here as kilometers. The pillar cell in Corti’s organ is over 330,000 times shorter and a million times thinner than the temple pillar (transmission electron micrograph, magnification x 90,000).
The Harakka island is displayed in the Winter. The macroworld image pairs (i.e. KohLon in the Summer and Harakka in the opposed season) imitate analogously the extremes in the measures that has also been depicted between the image pairs (the source and counterpart images).
Still during late March, it was possible to walk on the intact ice from mainland to the island….
… However, already in April, the ice was melting away and isolating the island.
Flyer for DiNaCon Extension, Visual Art Exhibition in Harakka island.
Visual Art Exhibition, Dinacon Extension, was arranged June 12-17 immediately after landing of our flight very early morning at Helsinki back from Thailand.